The Flair Magnatilla build.
I fell totally in love with the look of this plane and as much as I don’t like to scratch built planes... I had to do it!

I looked and looked for plans and specifications on the Internet for this plane and could not find them. In the UK they sell the kit for it, but I wanted it now, so I scratched my head and came up with a plan to build it based on the technique that “Ultramicrobe” has used before.
History of the plane
It looks to me that The Flair Magnatilla was inspired from the Fokker Eindecker fighter. The Fokker Eindecker fighter was manufactured from a series of German World War I monoplanes single-seated fighter aircraft by Dutch engineer Anthony Fokker. It was developed in April 1915, the first Eindecker ("Monoplane") was the first purpose-built German fighter aircraft and the first aircraft to be fitted with a synchronization gear, enabling the pilot to fire a machine gun through the arc of the propeller without striking the blades. The Eindecker earned the German Air Service degree of air superiority from July 1915 until early 1916. Not many monoplanes flew in those days.
Since my early days I was very attracted to the Bleriot Monoplane. The one the crossed the English channel for the first time. The Flair Magnatilla caught my attention when I watched Mike’s plane flying in a video on YouTube.
I am going to show you how to build it and how it flies in there movies. In the first you will see the steps and instruction to build it, in the second movie you will see the Flair Magnatilla in its maiden flight in high winds 15mph and gusting 26mph. Not the ideal test flight conditions, however she handled the wind phenomenally. On the third video you will see the second day flying with perfect conditions she flew with grace and ease until the elevator servo jammed and the plane went down nose first into the grass. There was no major damage. Pretty good build.
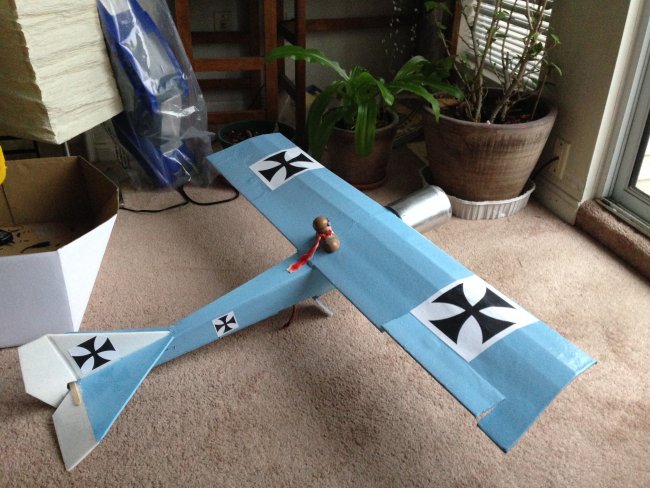
I really like the shape of the wings of this plane, it is quite different and attractive. The color is something else, light blue! With the big Malta Crosses on top on a white background. The location of the wing is also interesting, they called them shoulder wings and the pilot reminds me of an old milkman. The long narrow body, the rudder and the horizontal stabilizer are well put together. Gothic? The design was so intriguing to me that I had to build it.
I had a motor from the Park Zone Stinson kicking around and took the propeller from the Park Zone Albatross since it looks like wood. I couldn’t find the ESC from the Stinson so I am using one from the Radjet. Looking at the Albatross I thought that the motor and propeller should be adequate for this plane.
I am not normally a plane builder in fact I refuse to build planes... until I have to!
I studied on the Flitetest website with the FT Spitfire build video. By the way this building video is awesome if you want to build planes and get the fundamental ideas for building out of Adams foam board. As lazy as I am I didn’t want to build the motor pod to make it swappable. Most likely my friend “Ultramicrobe” will end up doing a better version of mine. “Ultramicrobe” is my inspiration and he is really really good at building and thinking of stuff! Every time I had a challenge I would think “How would he solve this?!”
The Flair Magnatilla is a very simple plane. It has a straight lines square kind of fuselage with square wings and triangular horizontal stabilizer and rudder. The most challenging was the landing gear, not because is difficult but because I didn’t have the proper tools to make it.
Here is a video on how to build it:
Before you start building you might want to consider covering the foam board with Vinyl.
I didnt know how to do it when I uploaded this post, that's why is coming just now. My friend Terry O'Brien came out with this technique and he agreed to make it avalible to all of you.
Here is a video that shows how to.
Notice that in my instructions I use brown paper and Polycrilic to cover the wings in this model since I didnt know how to make it with Vinyl. In a post that is pending for approval for the build of the Fokker D.VII I made the wings with this covering and the surface came out to be great, smooth and the paint looks even better. Have in mind that the strength provided from the brown paper and the Polycrilic is much higher than the wings covered with Vinyl. Another consideration is the weight. I personaly like the planes a bit heavier as they penetrate better in the wind. Brown paper and Polycrilic is heavier than the Vinyl.
Building instructions
Fuselage and tail
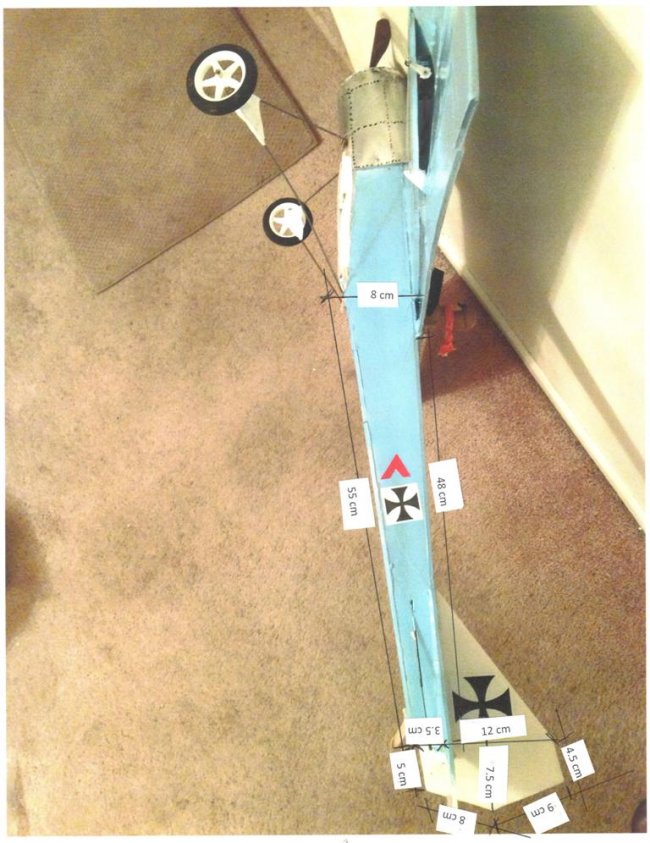
Assemble the box like the FT spitfire following the dimensions on the picture.
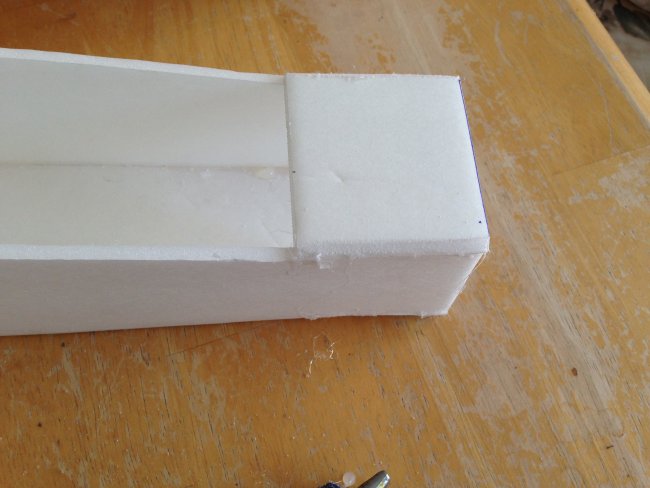
Make the box for the firewall. This piece is square 7cm by 7 cm.
Cut the plywood for the firewall

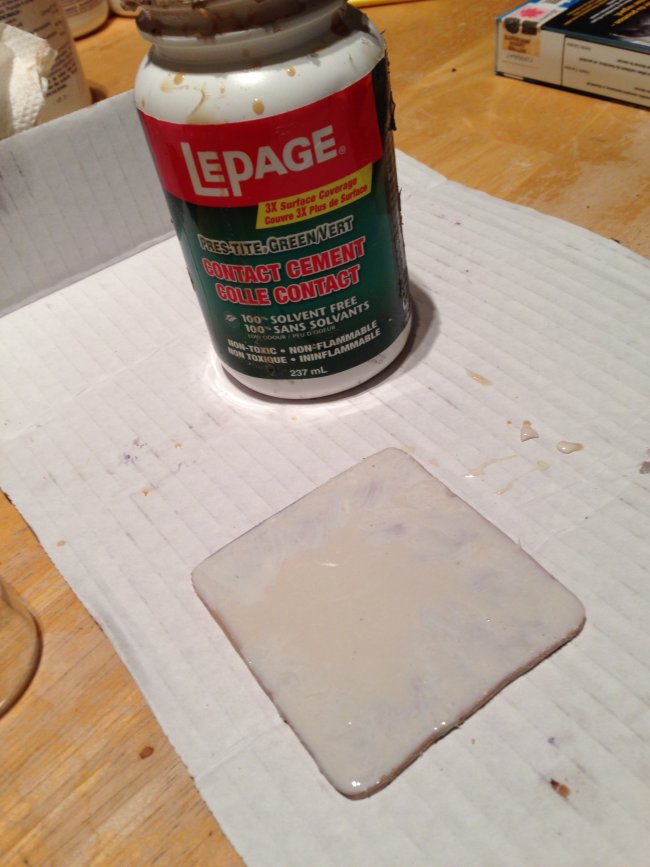
And glue it to the front of the plane with contact cement.
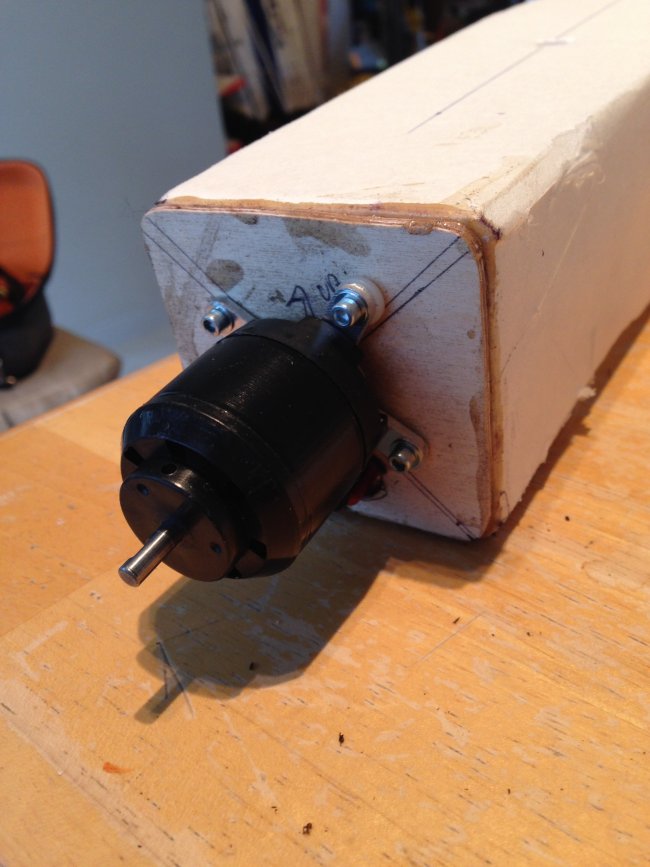
Mount the motor with 3 degrees down and 3 degrees to the right. This is important to have a smooth flight. I put a plastic washer behind the motor mount. You can see in the picture below.
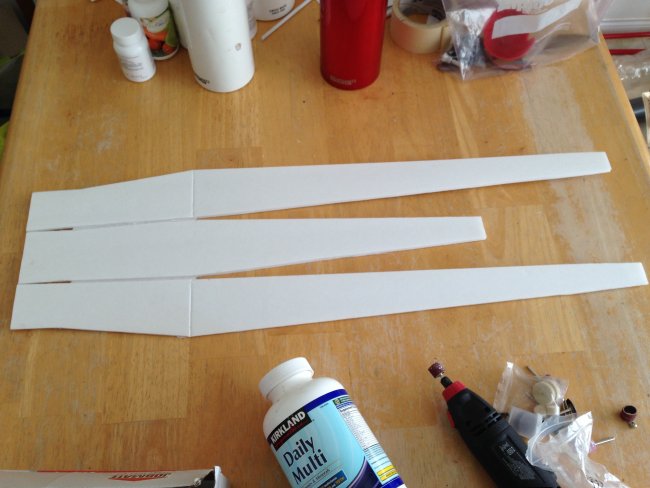
Cut out the tail pieces, cutting bevels for the elevator and rudder. Glue a popsicle stick to the top of the elevator to connect both sides of the elevator strongly.
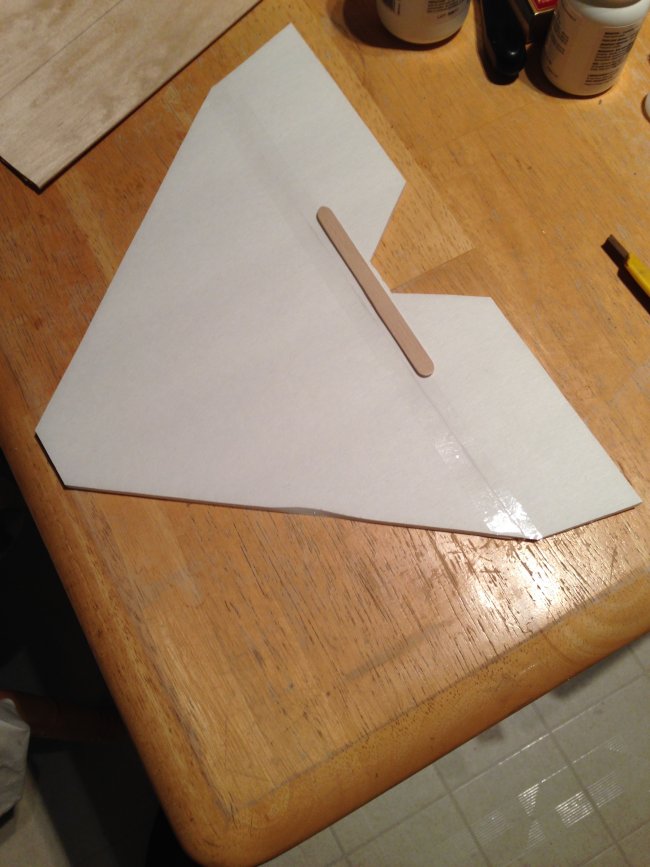
Glue the horizontal stabilizer to the fuselage, making sure it is square.

Glue the vertical stabilizer
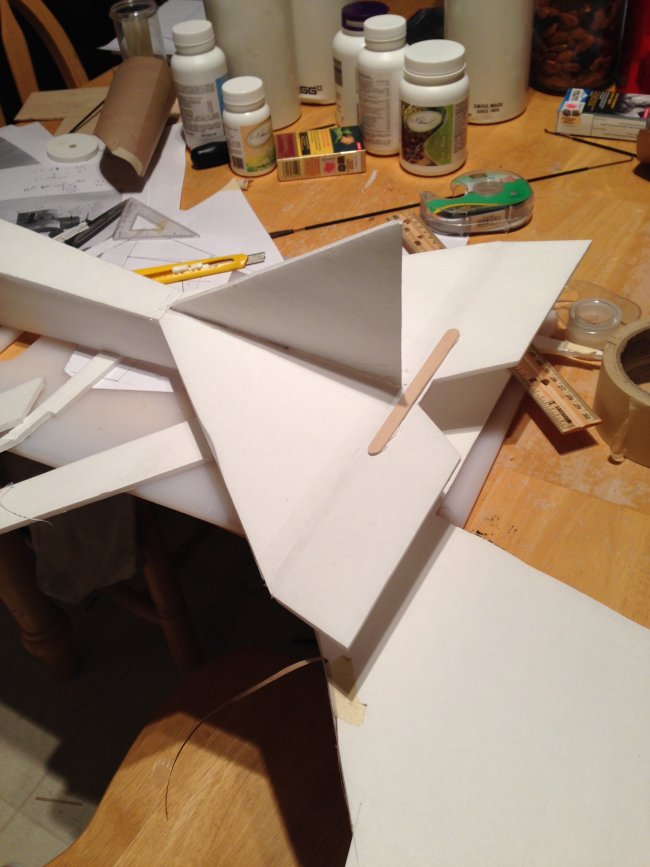
And tape the rudder to it.
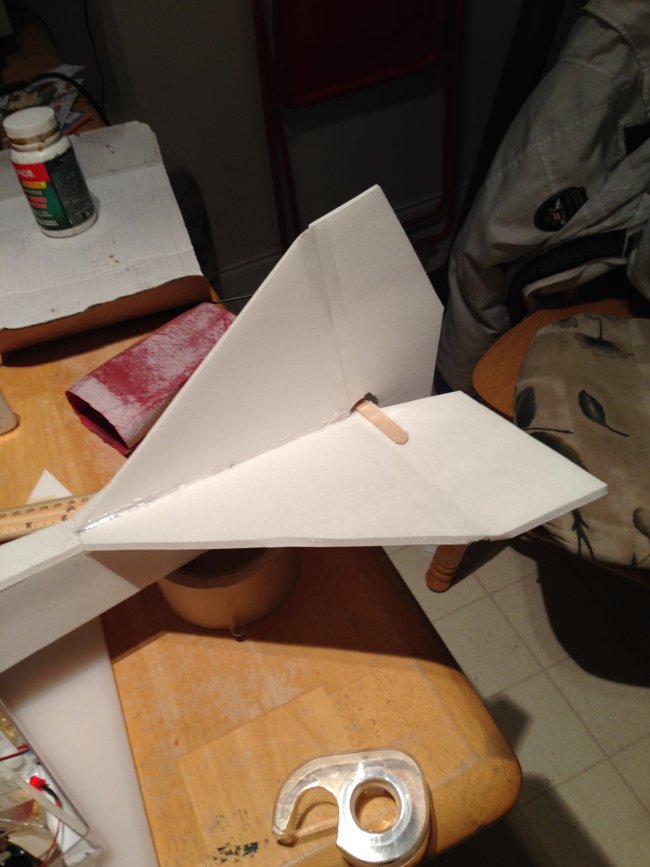
Elevator and rudder servos are installed anywhere in the fuselage.
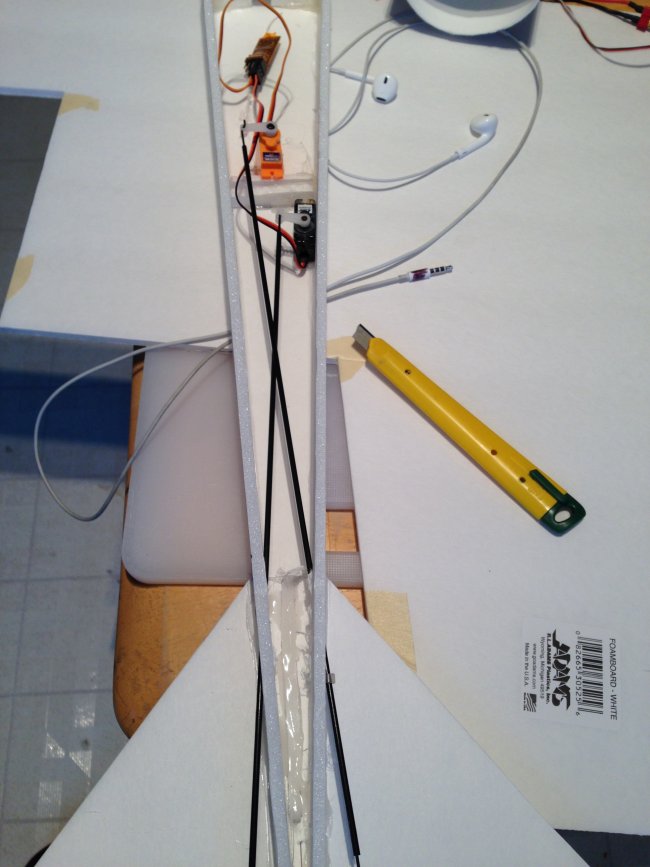
Put a square piece of 7cm by 7cm in the middle of the fuselage for strength. Make a hole to get the servo leads into the fuselage.
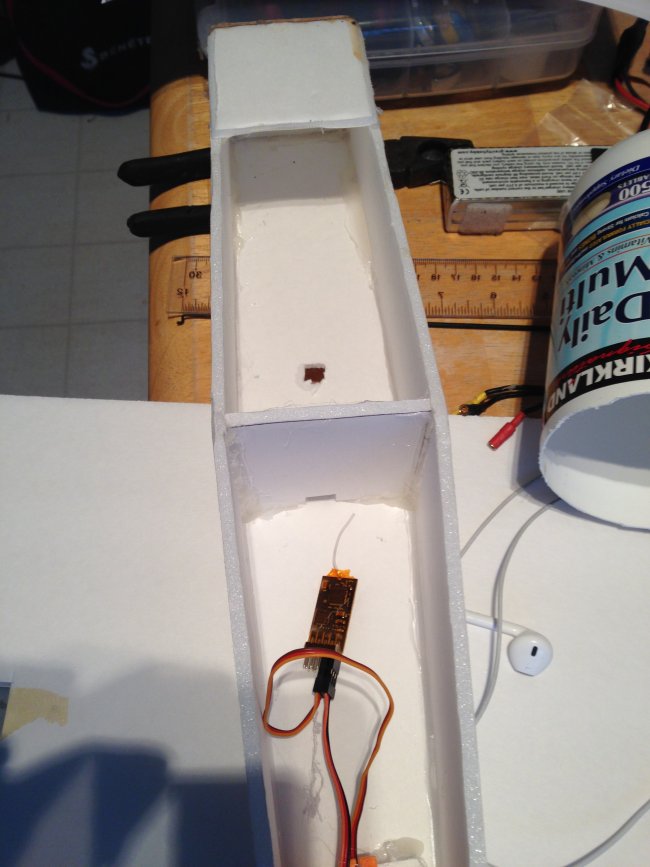
Cowling.
The cowling is made from a bottle of multi vitamins from Costco. Make the hole and cuts with a dremill.
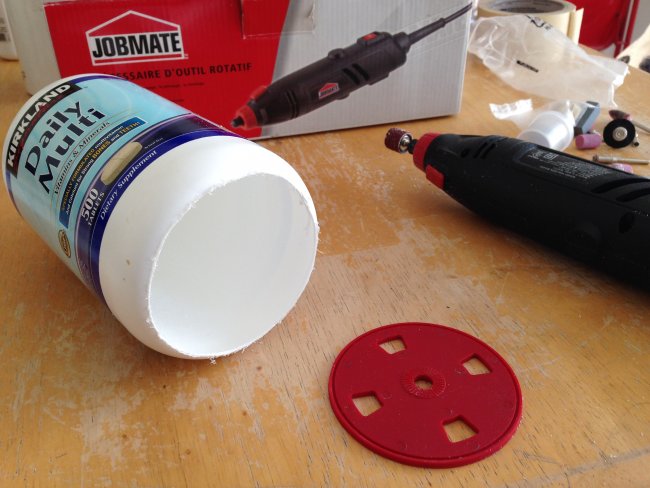
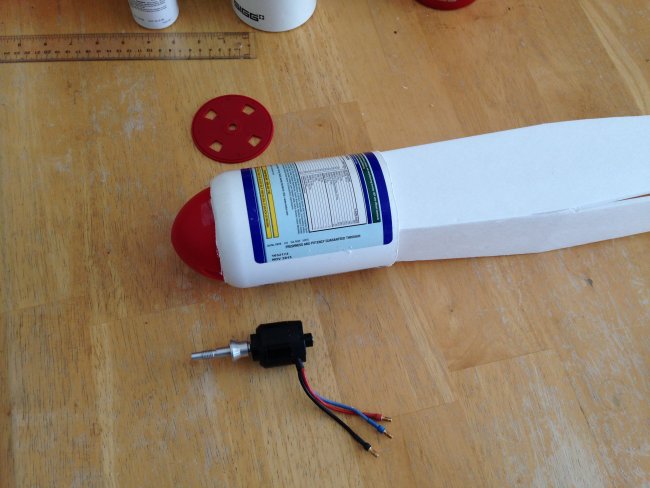
To determine the length of the cowling present the motor on the fusselage and cut the bottle accordingly.
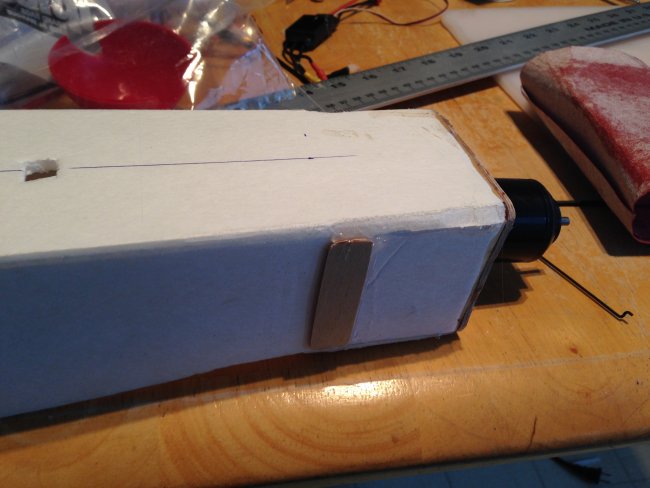
Glue a piece of Popsicle stick on both sides at the end of the cowling to fasten with 4 small wood screws.
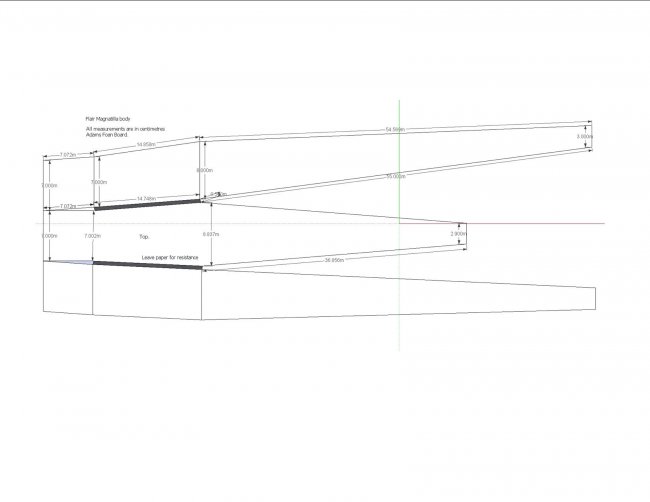
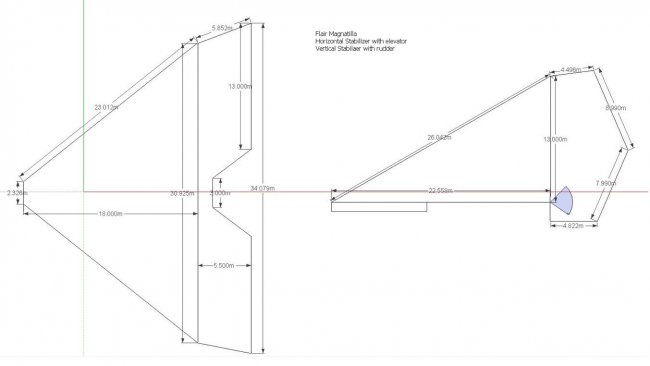
Here are the plans for you to upload in your Sketchup
Main Wing
The wing is similar to build like that of the FT Spitfire.
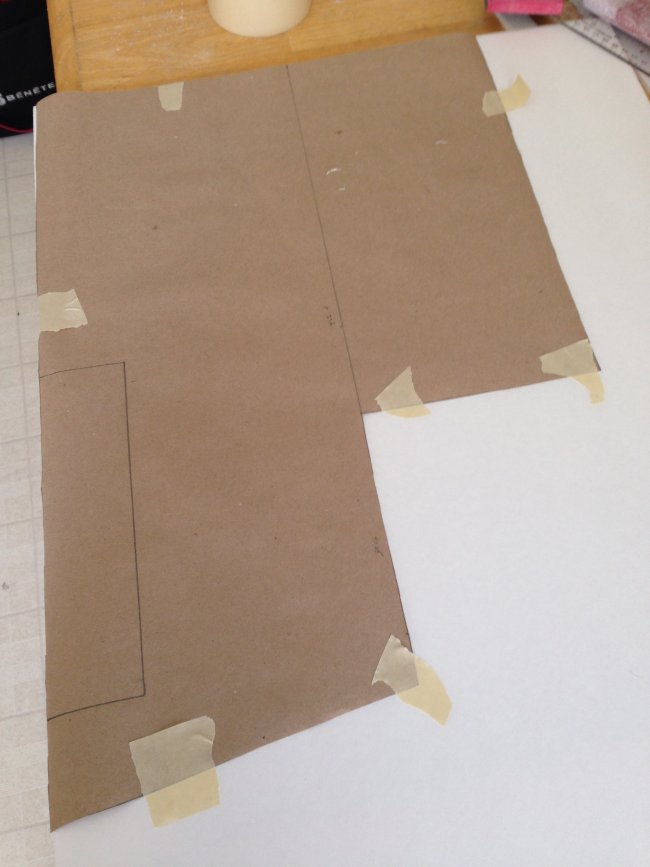
Make the spars and cut out the two main wing pieces. Bevel the leading edge, and bend the airfoil as normal
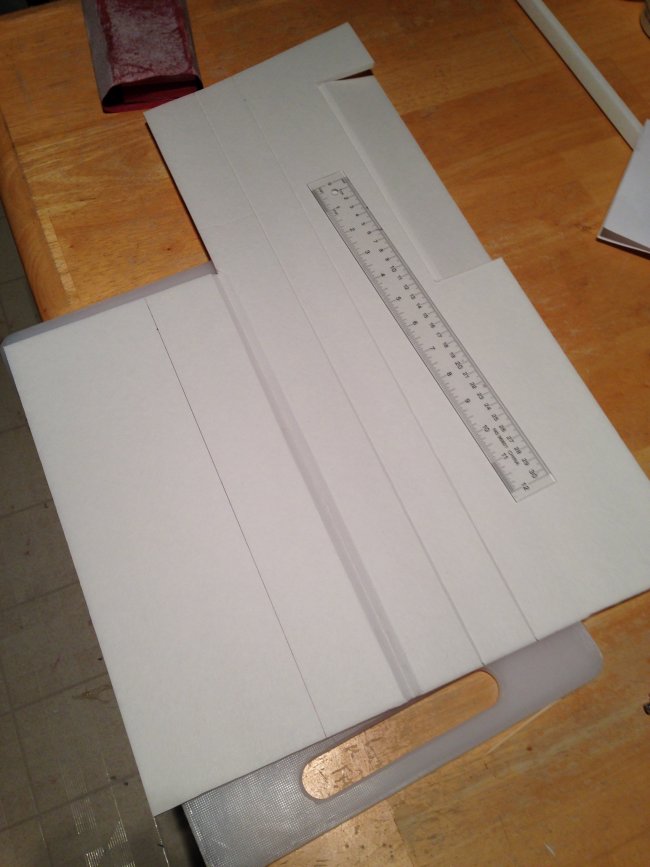
The wing will be assembled and bent at the same time, in three steps. Test bend the wing around this spar to make sure everything fits, that you get a nice airfoilmaking sure that the trailing edge is at the same level as the bottom of the wing. The top is large enough to allow the wing to bend fully. This is a lot of folding, so make sure you check it carefully and know what you are doing before putting the glue on it. Now hot glue the aileron servos at the end of the spar. Once you are happy with the fit, glue the leading edge and the remaining surfaces of the spar, and quickly bend the whole wing into place around the spar. Hold it in place securely for a while until the glue sets, making sure the spar emerges from the wing at the correct position in the airfoil. Once this is set, glue the entire trailing edge, and hold it until set.
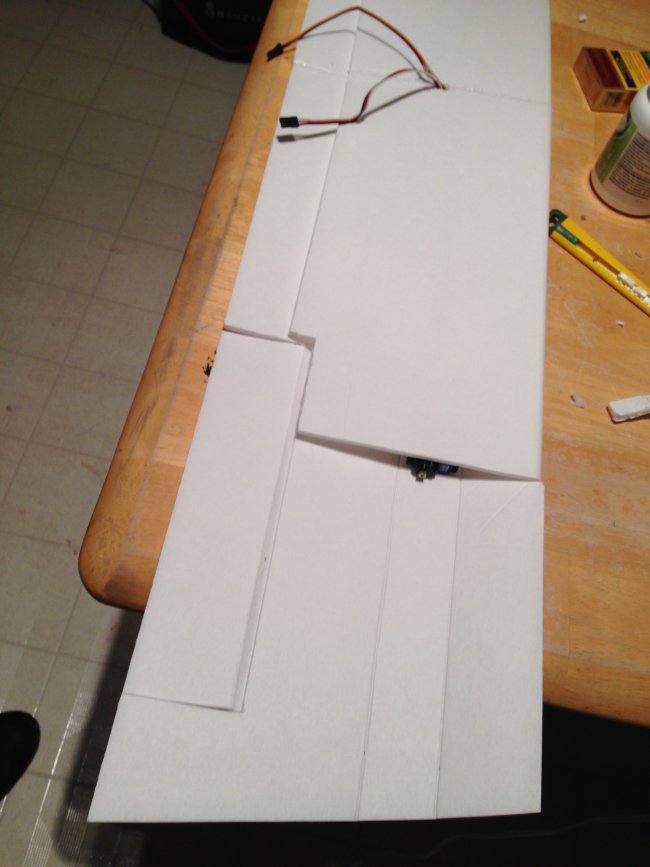
Repeat all this with the other wing. When complete, trim the parts of the spar that are extending from the wing and test fit the joiner-spar. Trim the wings at the joint if they don’t join up fairly cleanly it’s OK. Make a small hole in the bottom of the wings, pull the servo leads out of the hole and tape them out of the way, then glue both wings with generous hot glue. Using a business card take the excess of glue before it gets hard.

Fit everything together for testing and hot glue the wing to the fuselage.
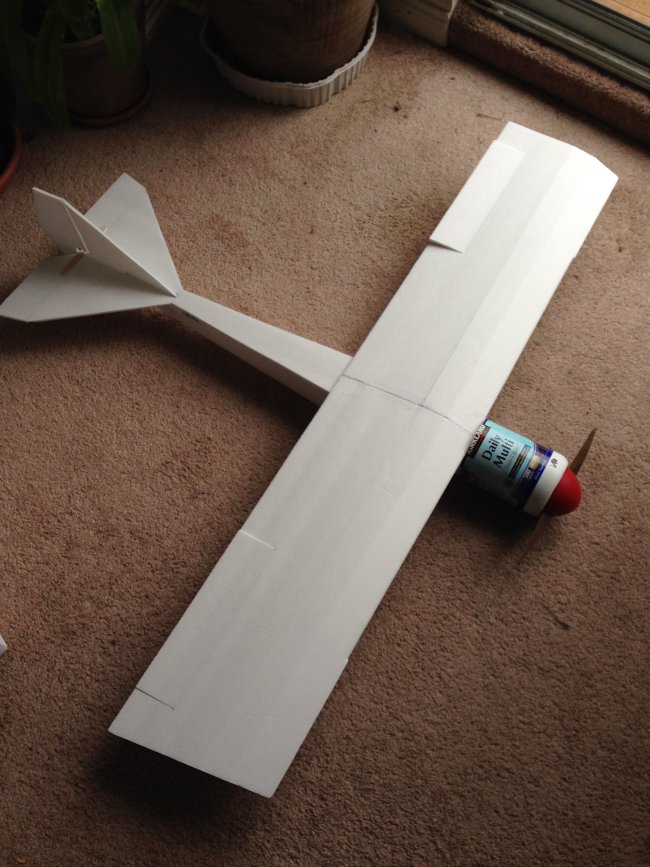
Ultramicrobe likes to glue skewers into the airfoil bends if you want extra strength, I didn’t. instead I used packing paper with Polycrilic transparent paint for resistance. Apply Polycrilic on both sides of the paper.
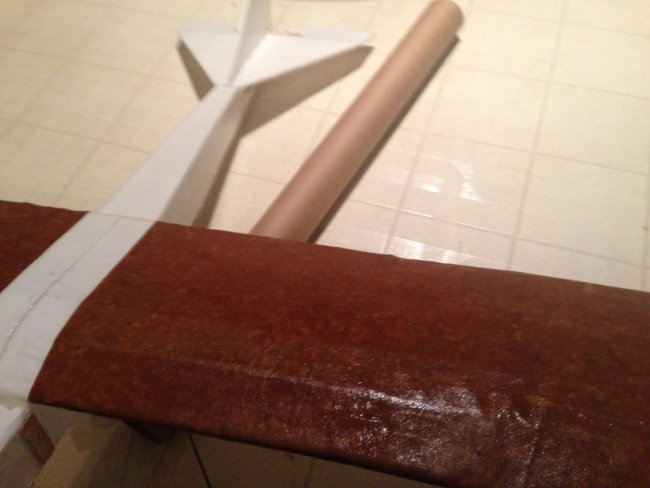
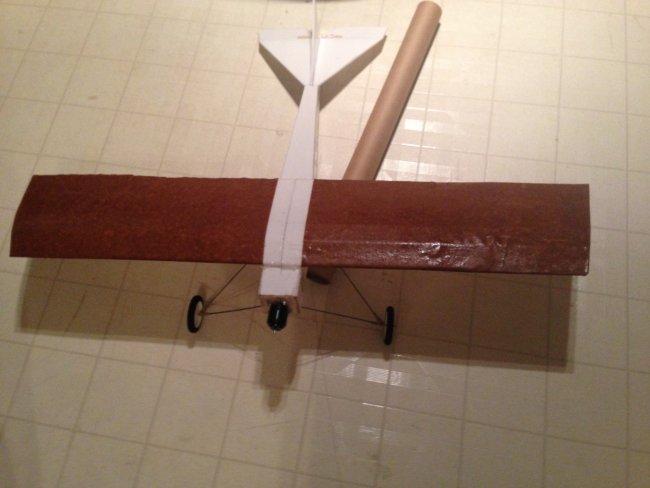
Give two generous coats of Polycrilic to the whole plane.
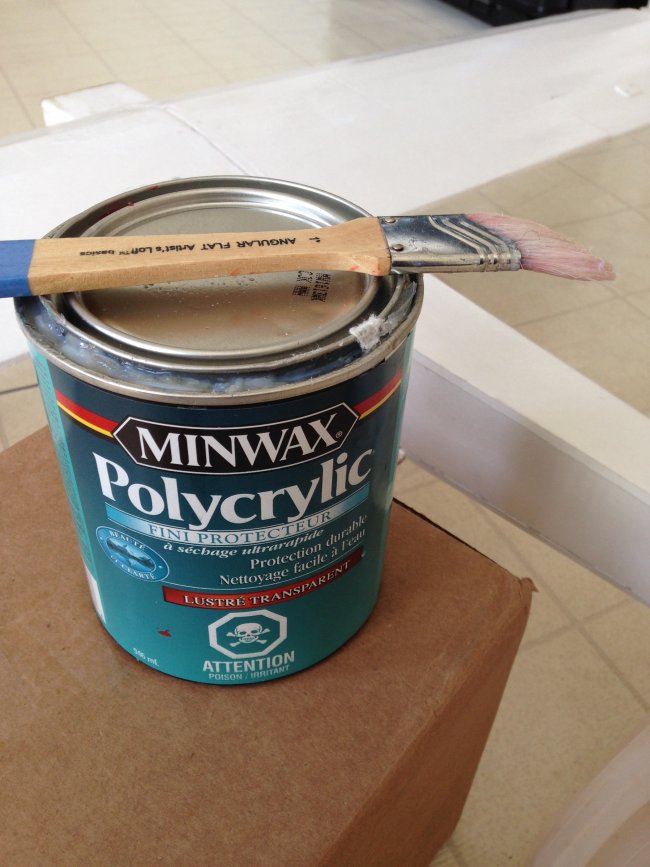
Landing gear
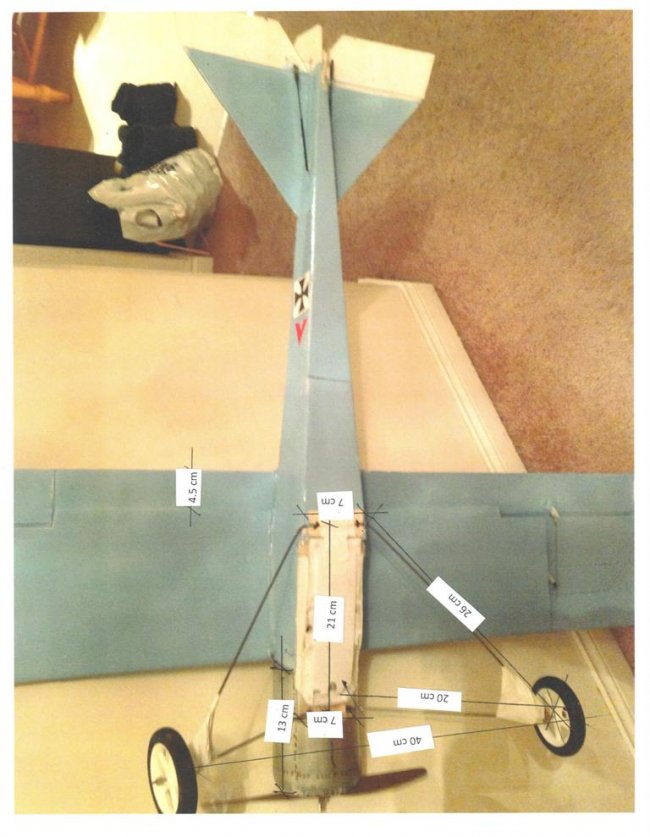
Bend 2 pieces of 3/32” piano wire, and sit them on top of the popsicle platform that is glued to the bottom of the fuselage.
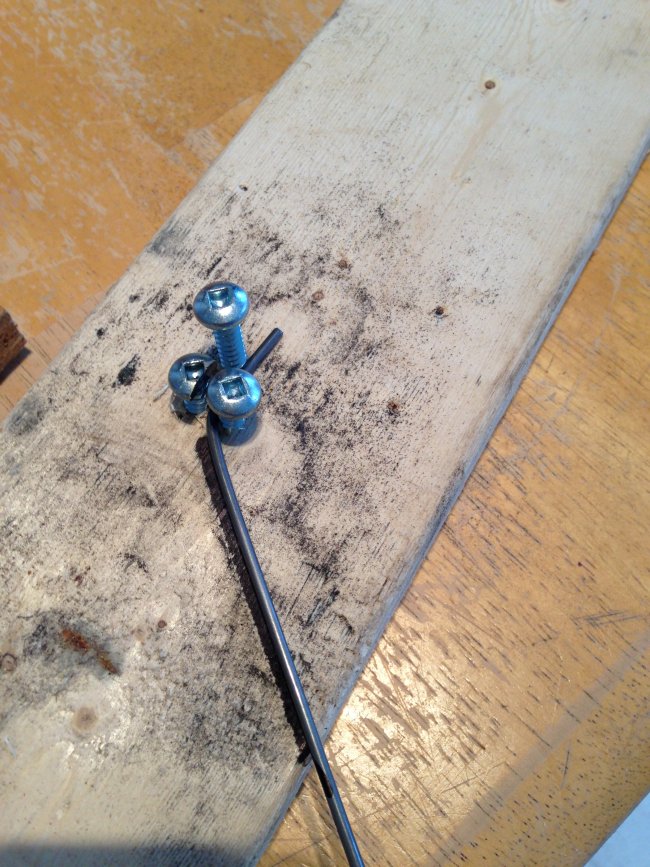
Then fit the scale sized Dubro 3” wheels.
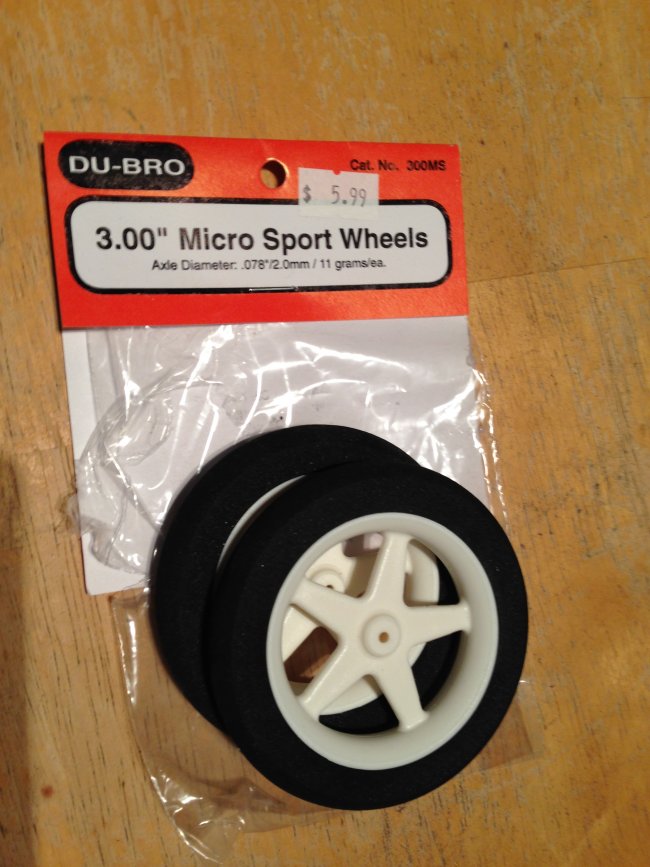
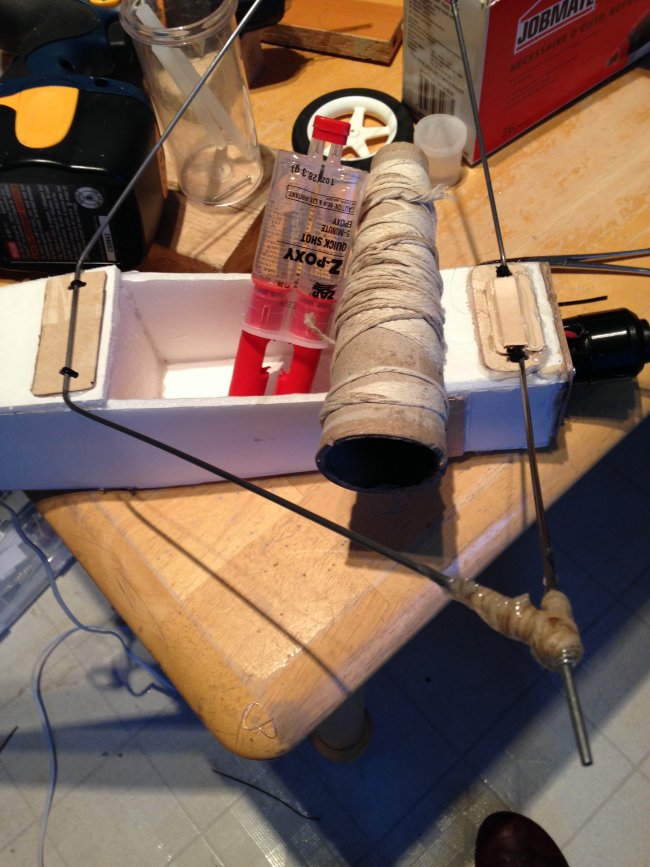
I used a cotton rope with epoxy to attach both wires together by the wheel. I learned that this joint can be made by using copper wire and soldering it. It was rather late for me... next time!
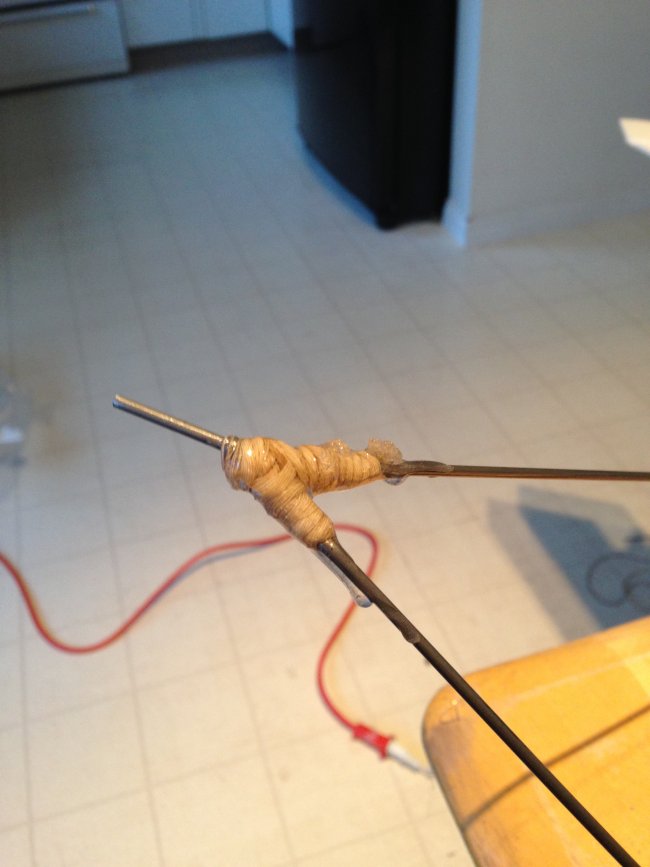
Cut pieces of plywood to reinforce the landing gear meet with the foam and using 3/32” sap straps fasten the wires to the fuselage. I put extra popsicle on the front landing gear, see picture below.
Paint the color of your choice, print the Malta Crosses from Google images and glue them on top.

Flying
I am amazed how well this plane flies. On Maiden, with strong winds the plane just flew happy! I believe this plane is meant to be flying! Naturally and with grace. No bad tendencies at all. I have not flown this plane lots, but so far, very nice. Aerobatic capable I did some rolls until it crashed due to a servo malfunction. The plane withstood the crash no problems. Just broke my pride! Minor adjustments to the cowling and the landing gear, new servo and voila, ready to fly again. This plane has already caught many eyes. It’s a very unique plane that you don’t see in kits that often.
How it flies
Second flight and crash!
What else can I say about it...? I love it! She is just beautiful.
The power set I used is as follows:
- 960 kV motor from the ParkZone Stinson.
- 2200mAh 3S
- 25amp ESC
- 10 X 9 from the ParkZone Albatross because of it looks.
- The battery hatch is also from my old Stinson
- CG right on the wing spar.
- As for the pilot, I found it kicking around. I don’t know where it came from but is perfect for the plane.
Plans
If I could build and fly this plane without plans... and you have read this post to this point I’m sure you will do a betterjob than me.
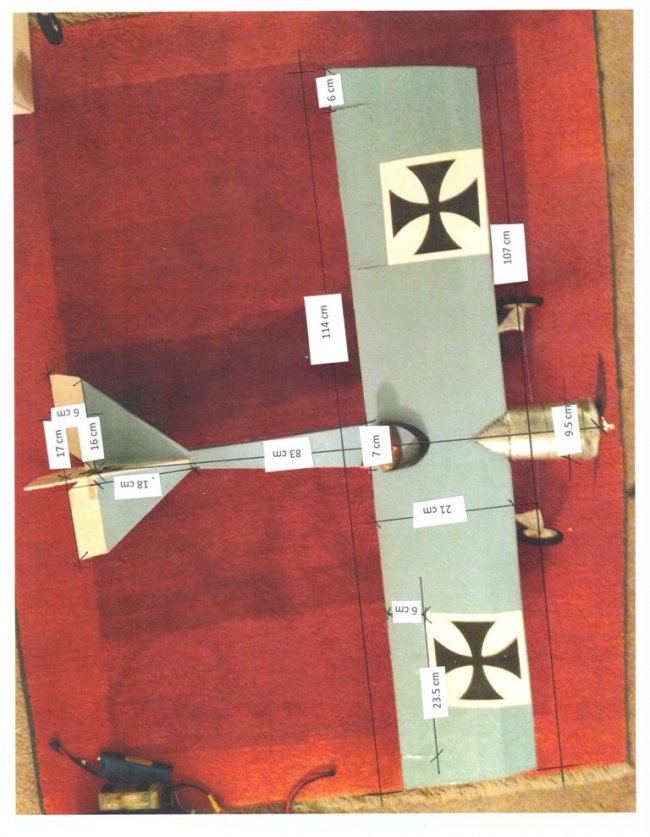
I included pictures of the plans below each category, They have better resolution.
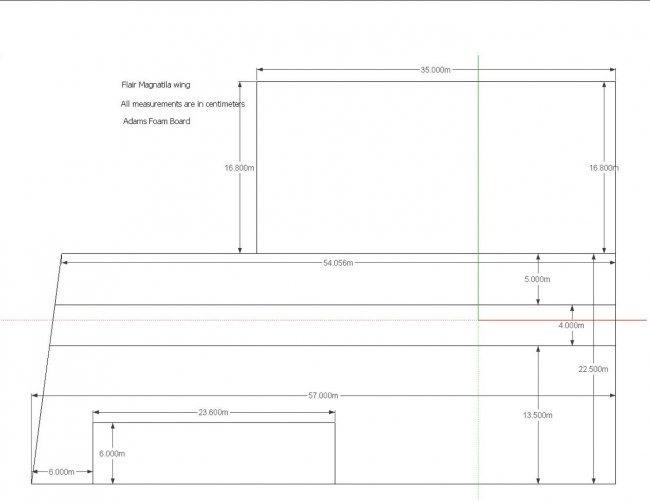
Plans for the wing note that the wing plans are more accurate than the picture measurements.
I also have included nice pictures with measurements. Pick up brown packing paper and draw the straight lines and cut.
Have fun building this plane and send me pictures of your build. Should you have any questions, just let me know at eduardofritis@gmail.com
Thanks for reading and happy building and flying the Flair Magnatilla.


I think you've given me the very plane I'm looking to build next.
Btw... it looked awesome and flew awesome on the first flight. Can't do better than that.
Frank
Log In to reply
I am glad that you like it! Should you need any assistance with the build please let me know. and of course I would like to see the finished plane!
All the best,
Eduardo
Log In to reply
Have a great one and thanks again for sharing.
Frank
Log In to reply
Log In to reply
Thanks again,
Frank
Log In to reply
Log In to reply
Log In to reply
Log In to reply
Log In to reply
Log In to reply
Log In to reply
Log In to reply
Log In to reply
Log In to reply
Log In to reply
Log In to reply
Log In to reply
Log In to reply
Log In to reply
Log In to reply
Log In to reply
Log In to reply
Log In to reply
Log In to reply
Log In to reply
Log In to reply
Log In to reply
Log In to reply
Log In to reply
Log In to reply
Log In to reply
Log In to reply
Log In to reply
Log In to reply
Log In to reply
Log In to reply
Great design! I note that you fly at Trafalgar Park; that wouldn't be in Hazel's neck of the wood's would it? If it is, I would love to come down some day and visit.
I really like what you did. I have no skills with "Sketch Up", so somebody that can put his idea's on paper, cut, fold and glue is amazing! Great job, WJ.
Log In to reply
Log In to reply
Oh dear, here I thought you were an hours drive away but your on the other side of the country! I"m in southern Ontario and we are still snowbound. I guess I should have noticed that there was no snow in your video, lucky guy. Keep the video's coming, love to see Canadian content on this site as well as that from other parts of the world. Thanks again, WJ.
Log In to reply
Log In to reply
For a non builder you did a great job
Log In to reply
Log In to reply
I downloaded the drawings and there might be a problem with dimensions. Could you please check? WJ.
Log In to reply
Log In to reply
Log In to reply
Log In to reply
The units on the plans are shown as, for example, the width of the horizontal stab as "34.079m"; the notch in the elevator "3.000m". So I am thinking that the width of the stab is 340mm (34cm) and the notch 30mm (3cm). Sorry for being such a pain but I want to sure before I start cutting foam. WJ.
Log In to reply
Log In to reply
Log In to reply
Log In to reply
Log In to reply
Log In to reply
In the mean time, I was looking for the vinyl that you are putting on your foamboard. I checked the dollar tree but couldn't find it. I found some at Staples but it's much smaller than the one you guys found. If you could point me in the right direction, that would be great.
Cheers, Chris.
Log In to reply
Log In to reply