Tiny Whoop Build Steps

Lay out your part as seen. Be sure the point of the frame is the front of the frame (green arrow). The red lead motors will be your front right and rear left. Black lead motors will be front left and rear right.

Press camera into 3d printed mount, until it is fully seated. (Make sure wire leads of the camera are on the top of the mount.)

Connect the camera to the connector on the bottom of the Flight Control board (blue arrow).
Install grommets to the control board (green arrows).

Install control board with battery lead up and pointing to the rear left. (Connectors will be pointing down.) Secure board and camera mount with screws included.

Flip whoop over on its back and secure the motors to the frame using included screws.
Twist the leads of each motor gently and plug them into the sockets as shown (red arrows). Pay careful attention to the orientation of the motor leads to the frame.

Install propellers as seen in the picture (red arrows). The front right and rear left motors will both use Clockwise rotating props. The other motors with black leads will use Counter-Clockwise.

Binding: Plug in your Tiny Whoop to a charged battery. Look for lights on the control board to illuminate. You will see a bright red LED flashing slowly. Press the bind button and hold until a red flashing LED glows solid.

Power on your T8 Lite transmitter and press the bind button in the back until you hear a single beep and release. If you hear a double beep, press the bind button one more time to get the single beep.

You should see the solid red LED light flash again after a short amount of time. Cycle the power, install your charged battery, and confirm your FPV signal and functioning of your transmitter

To arm and fly, turn your transmitter on, plug in battery and place right side up on flat stationary surface. Toggle arm switch to activate motors. (It is important to disarm your motors immediately when the whoop has crashed to avoid damage to the motors.)

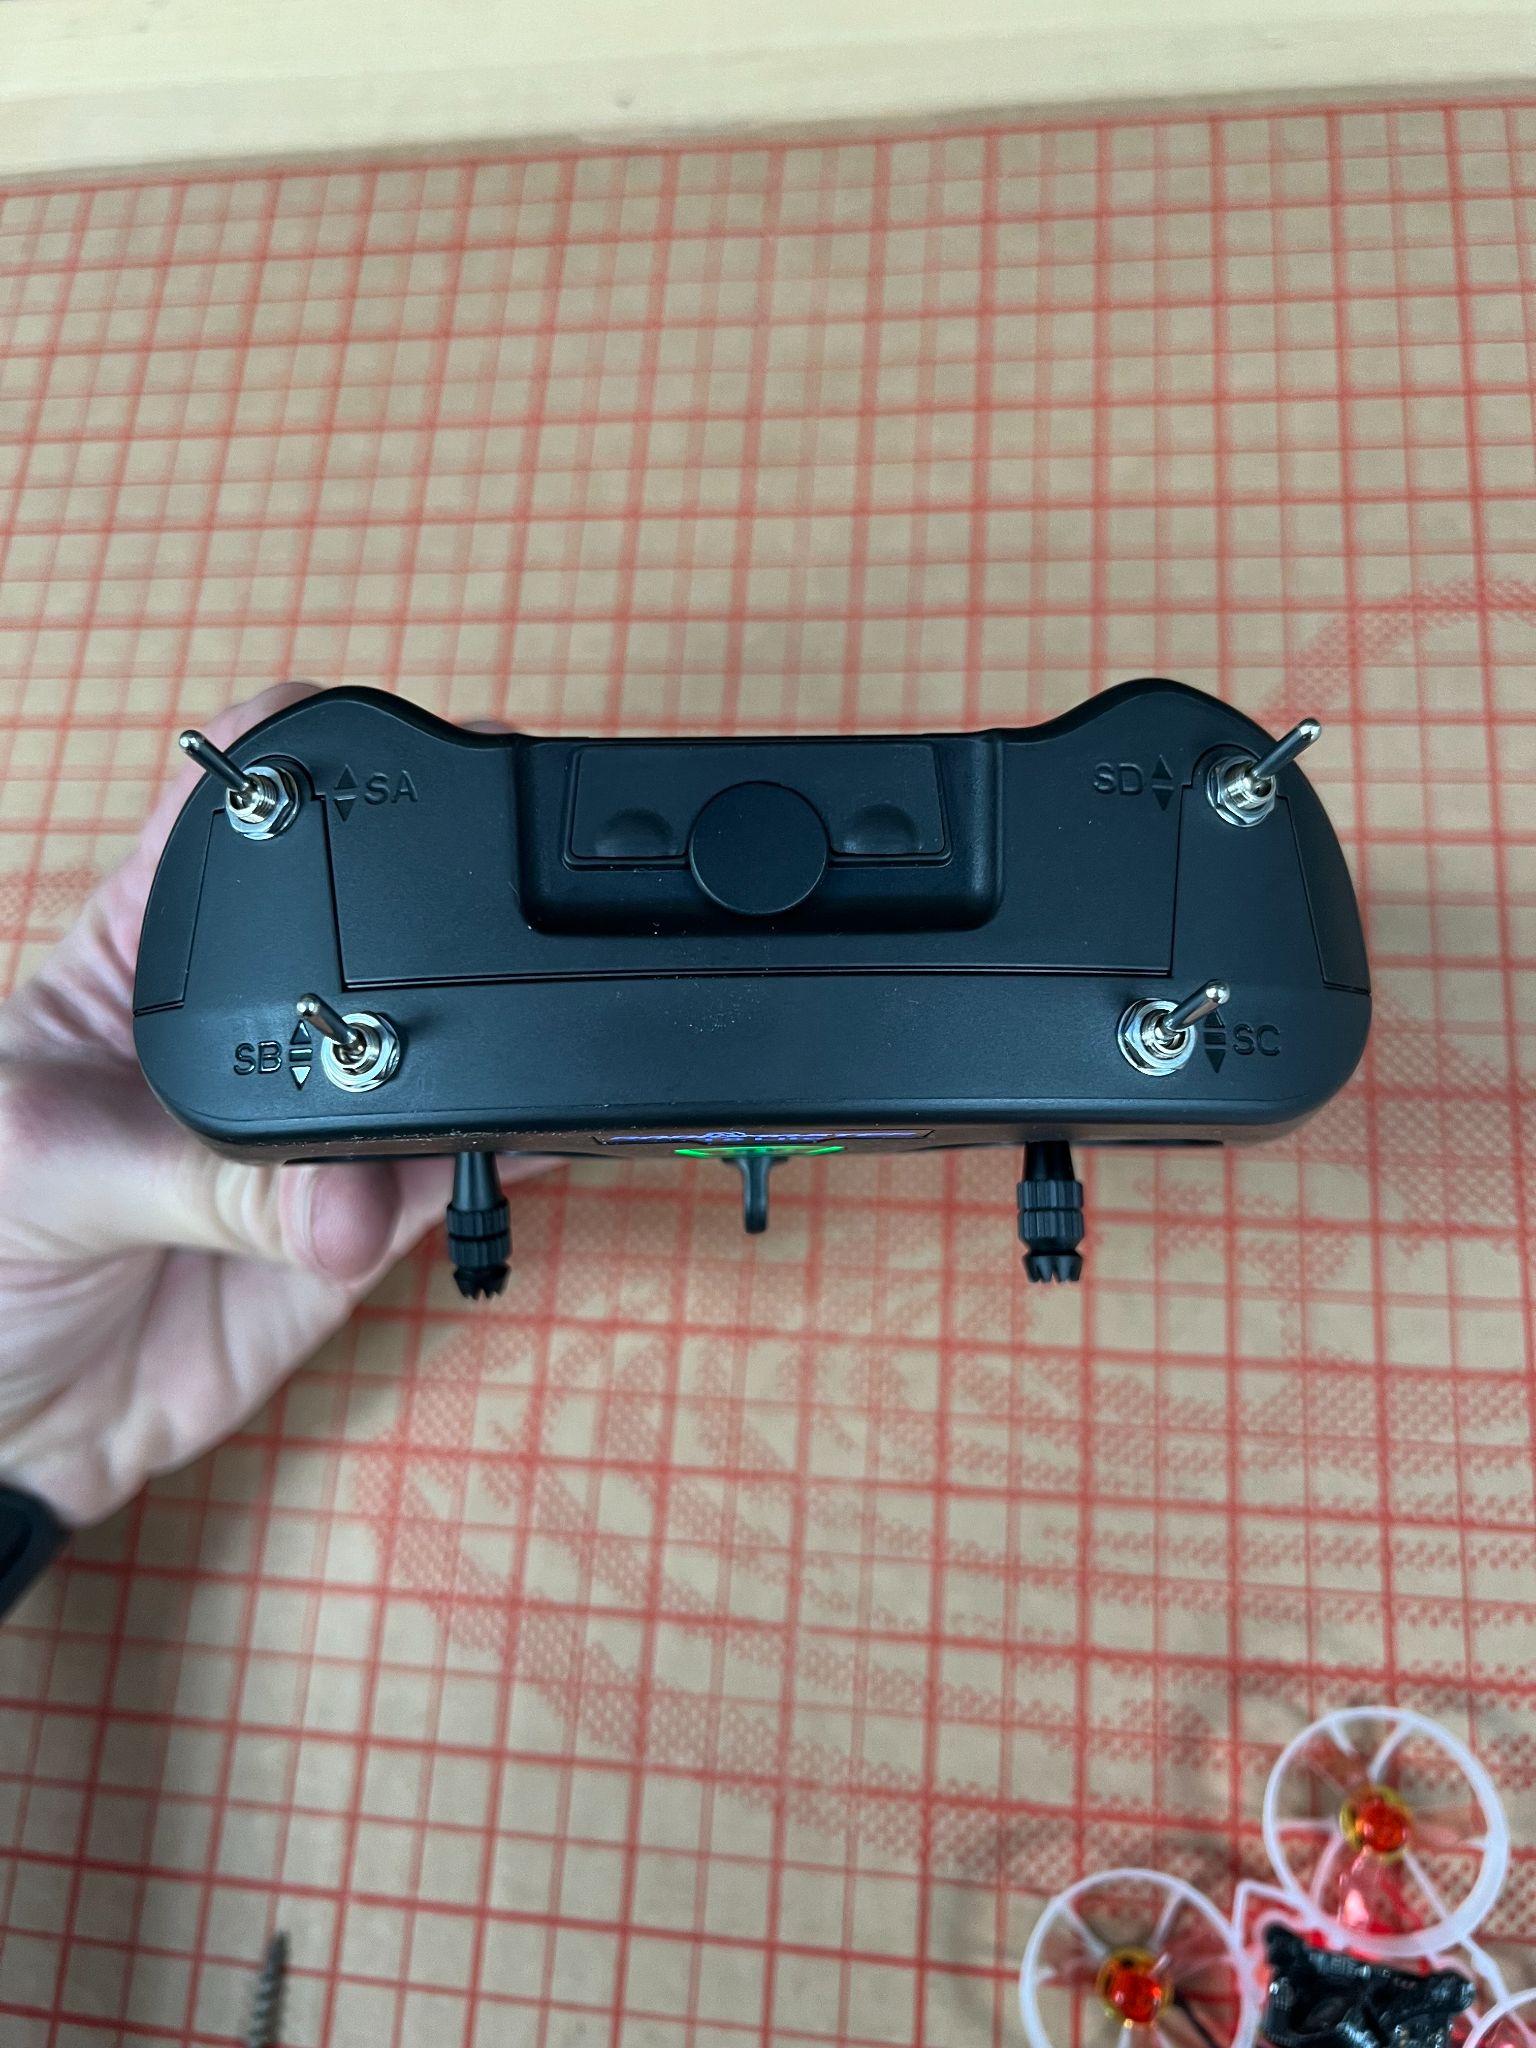
Switch functions of T8 lite transmitter:
- SA is ARM
- SB is Mode switch
- SD is Beeper
- SC is Flip-over or Turtle mode


https://slopeio2.com
Log In to reply
Log In to reply
Log In to reply
Log In to reply
Log In to reply
Log In to reply