It's been a while since I contributed to this website. An old neck injury made flying near impossible so I dropped out of the hobby for a while. Fortunately that's resolved now! So it was back to all those planes hanging from my walls that had been doing nothing for a few years.
I went through the 'stable' replacing rubber bands, straightening warped surfaces (an article in itself?) and rationalising builds to make them easier to use and, hopefully, fly better. I also set myself a goal of 'rounding out' my fleet to include plane types I hadn't modelled. I also signed up to the UK's plane registration scheme and passed my 'pilot safety test'. We don't have a requirement for transponders yet in the UK, so I'm still good to fly my heavier planes responsibly in public spaces.
My Velie Monocoupe, which had morphed into a not so great STOL type aircraft was scrapped, and all the internal and external structures recovered. This gave me a set of parts that demanded a new Monocoupe build. And I had a gap in the fleet - a STOL or bush plane.
About the time I was contemplating these tasks I was lucky to find some Flite Test kits and an almost complete box of 'correct' Flite Test foam on offer on Ebay UK. This gave my a pile of material to work with, especially a chance to work with the much lighter foamboard used for Flite Test builds. There were two complete Explorer kits and a Guinea Pig twin engine plane. But I'm getting ahead of myself.
The first plane on the surgeon's table was my GeeBee 'style' plane.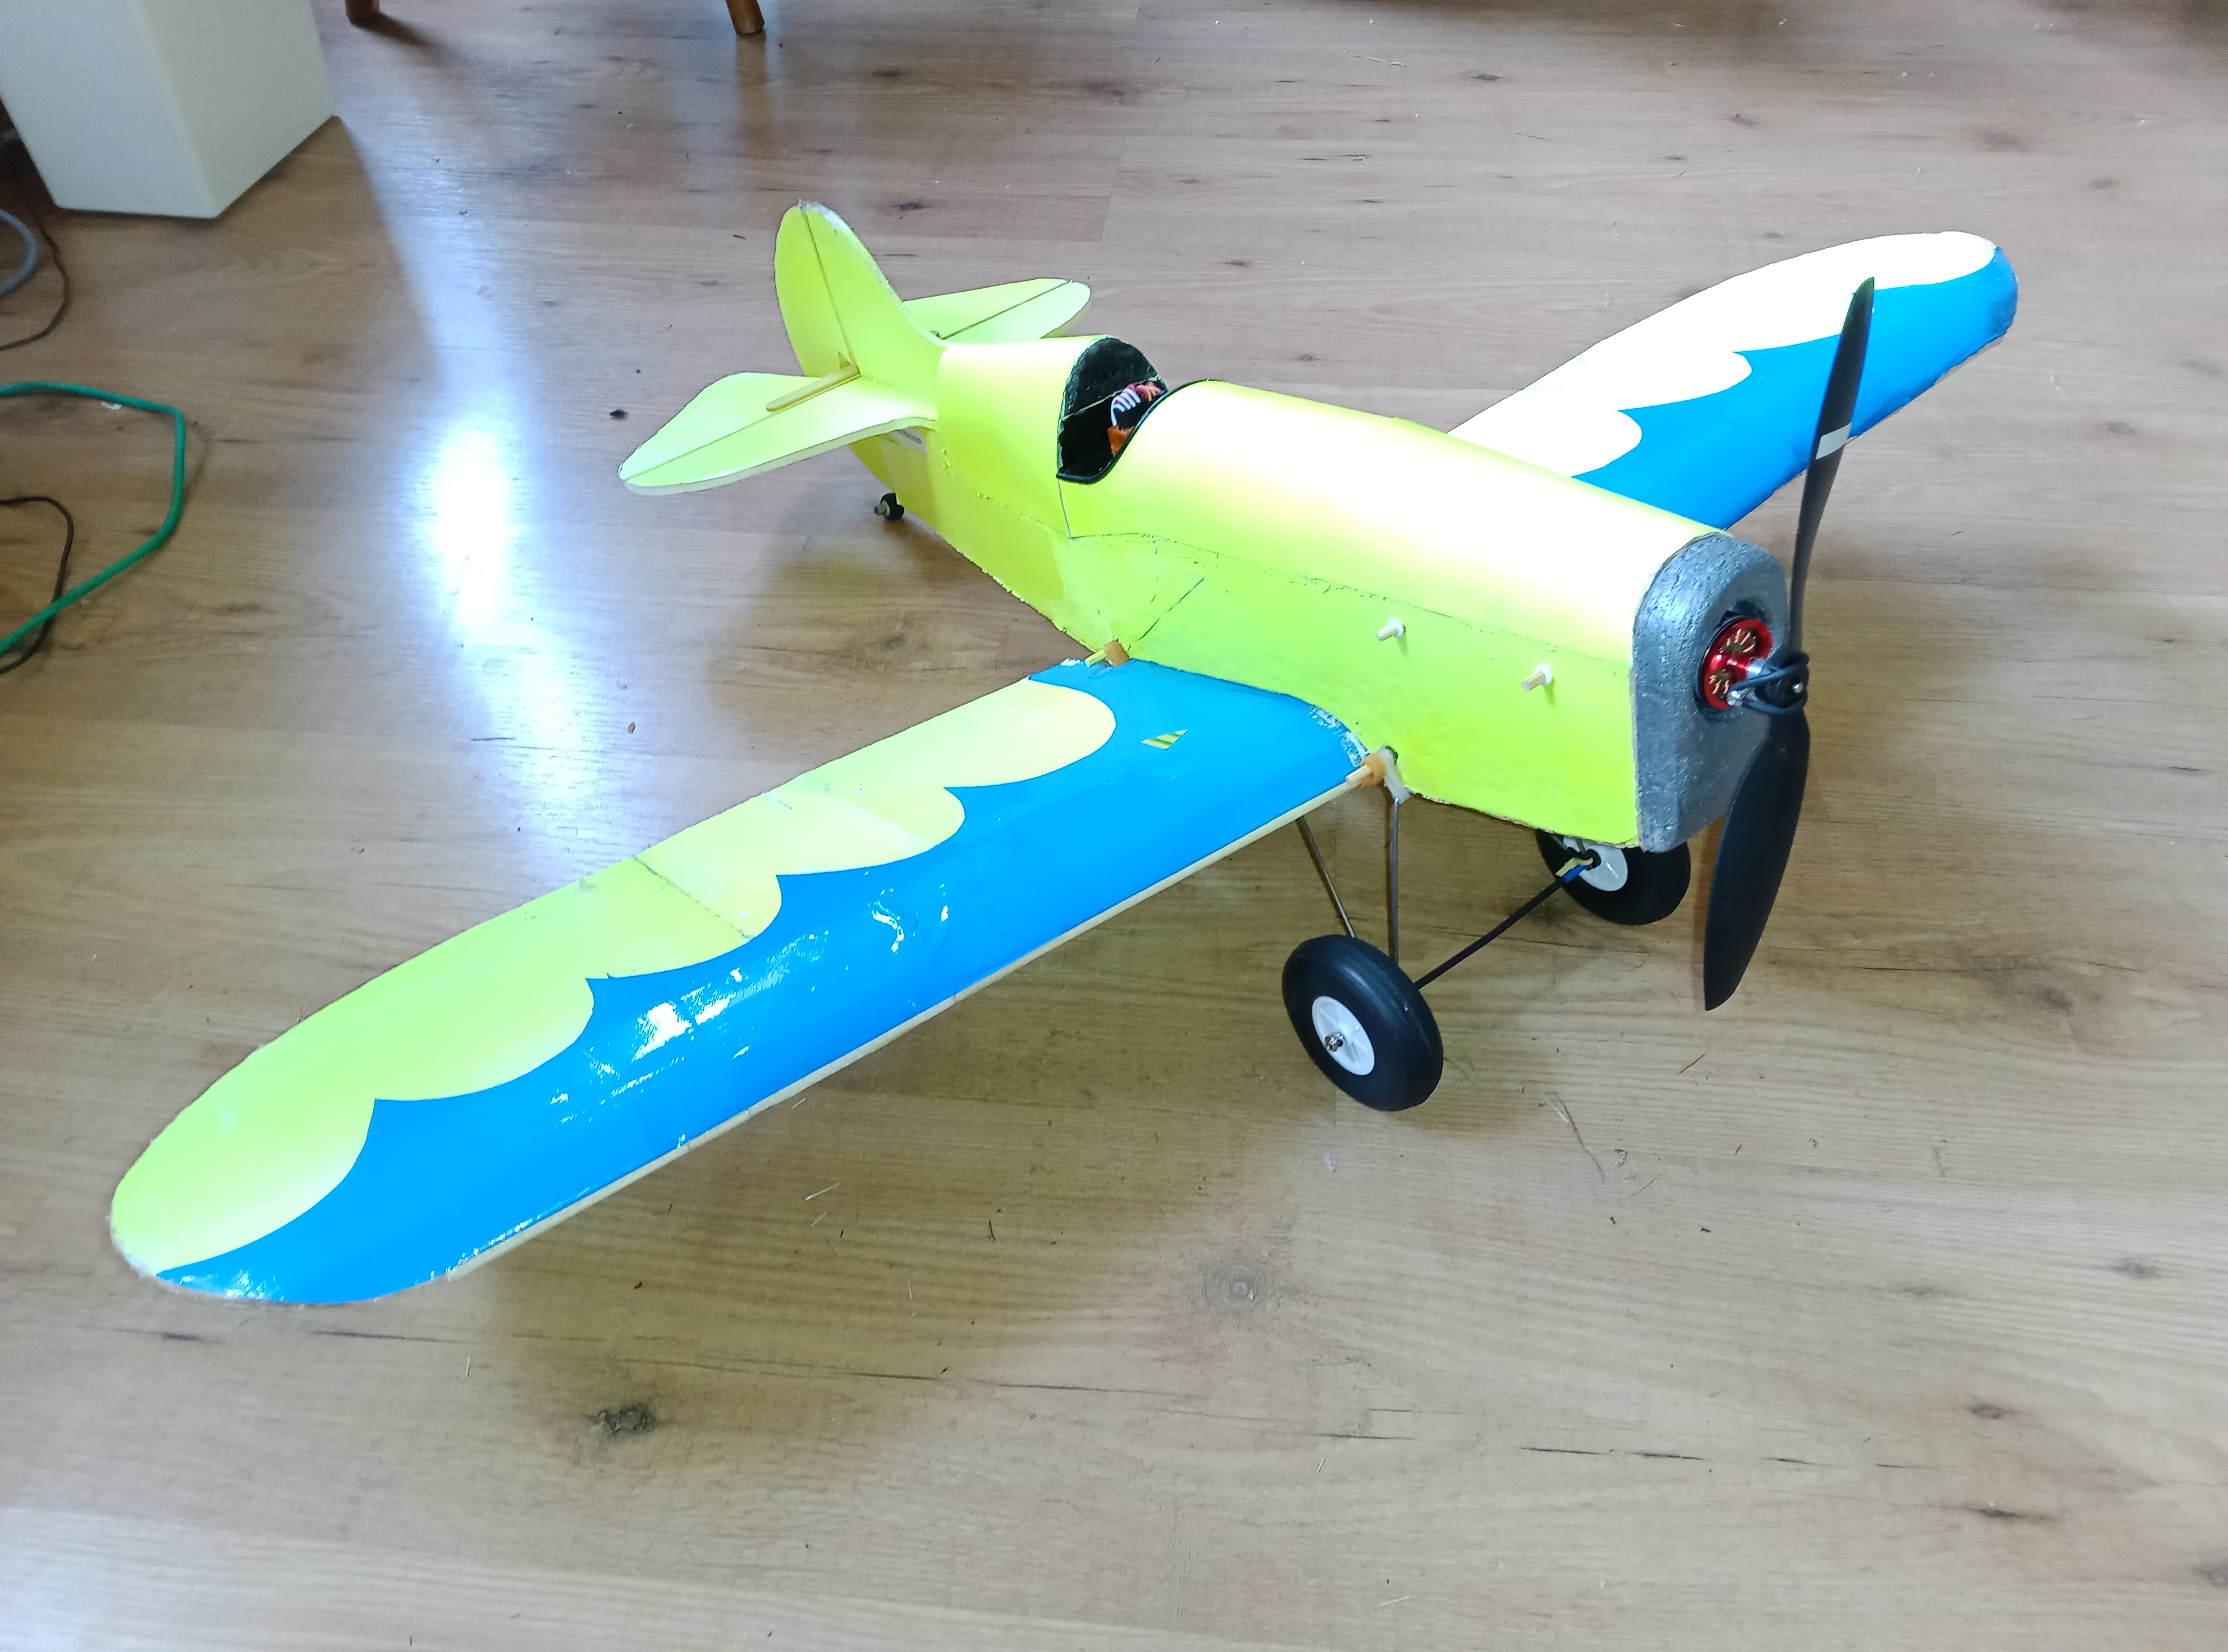
The wings were never big enough, and though they did work, the flaperons weren't that great. Landing speeds were too high. The mission? Add more wing! Add flaps! Redesign the bad-landing-battered nose using a chopped swappable pod!
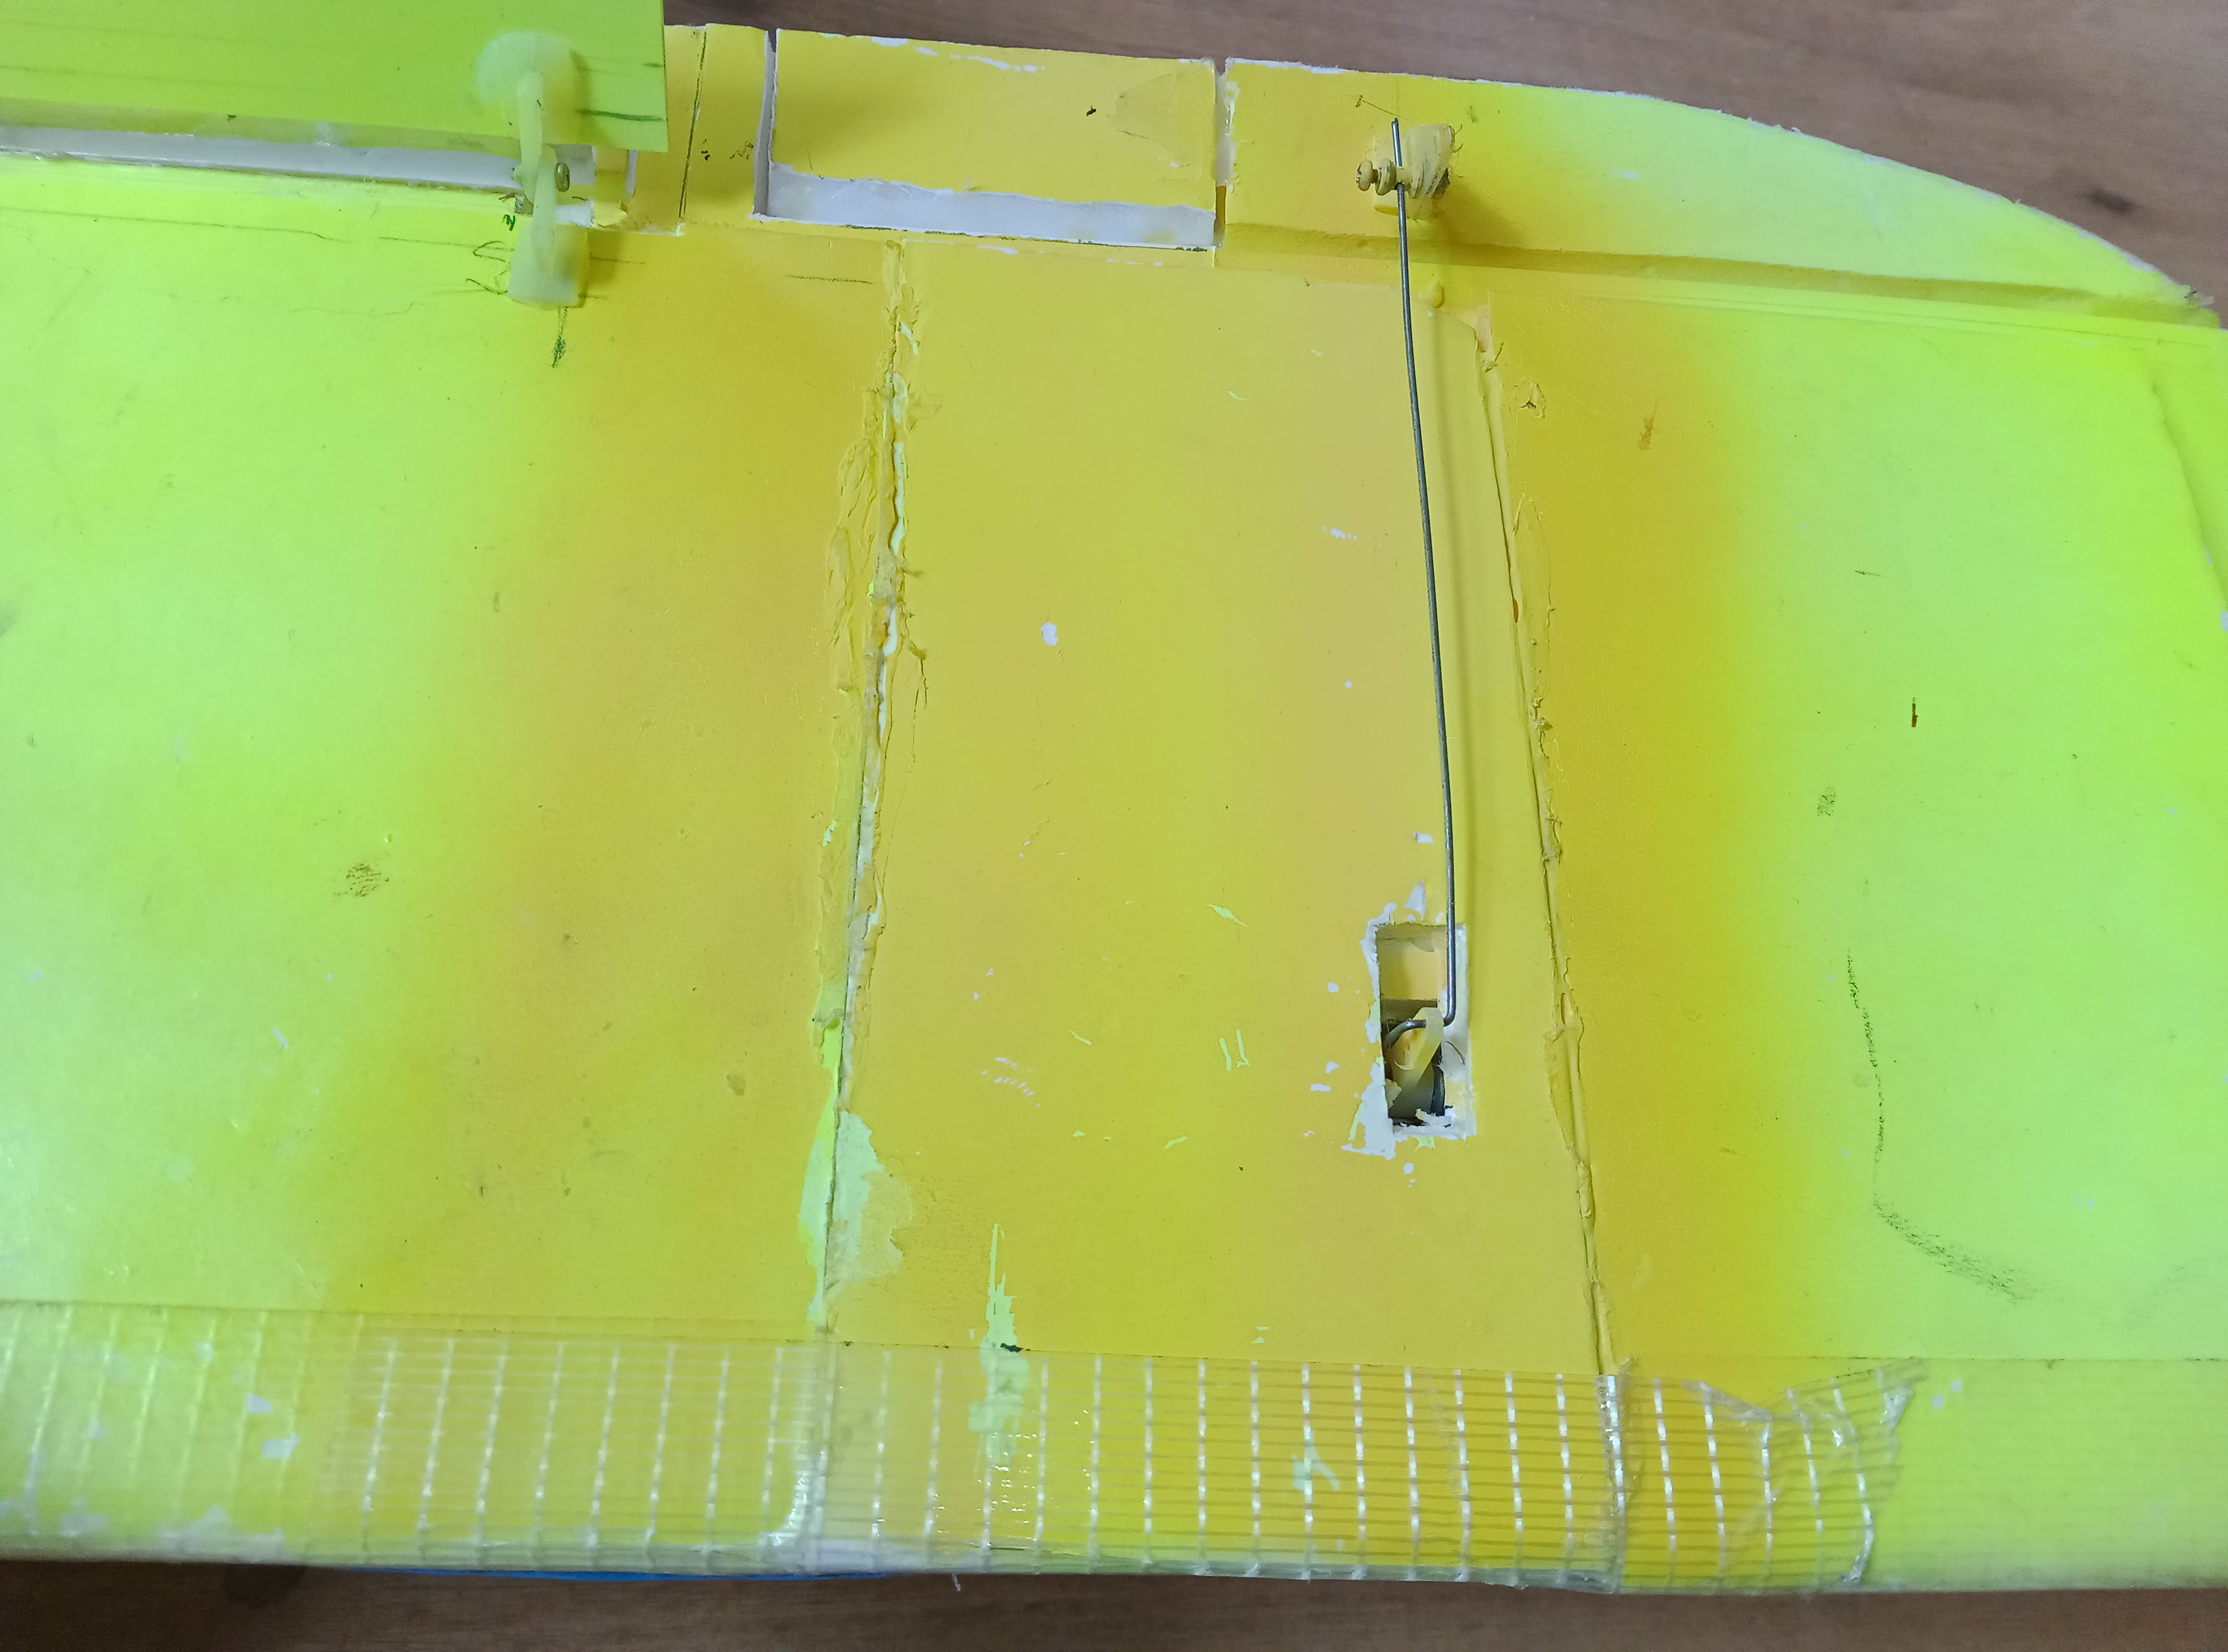
More wings involved grafting an additional wing element into the existing wing. I did this mid-span staggering the join above and below. You can see the stagger between the underside closest to you, and the top surface foamboard projecting from the back of the wing.
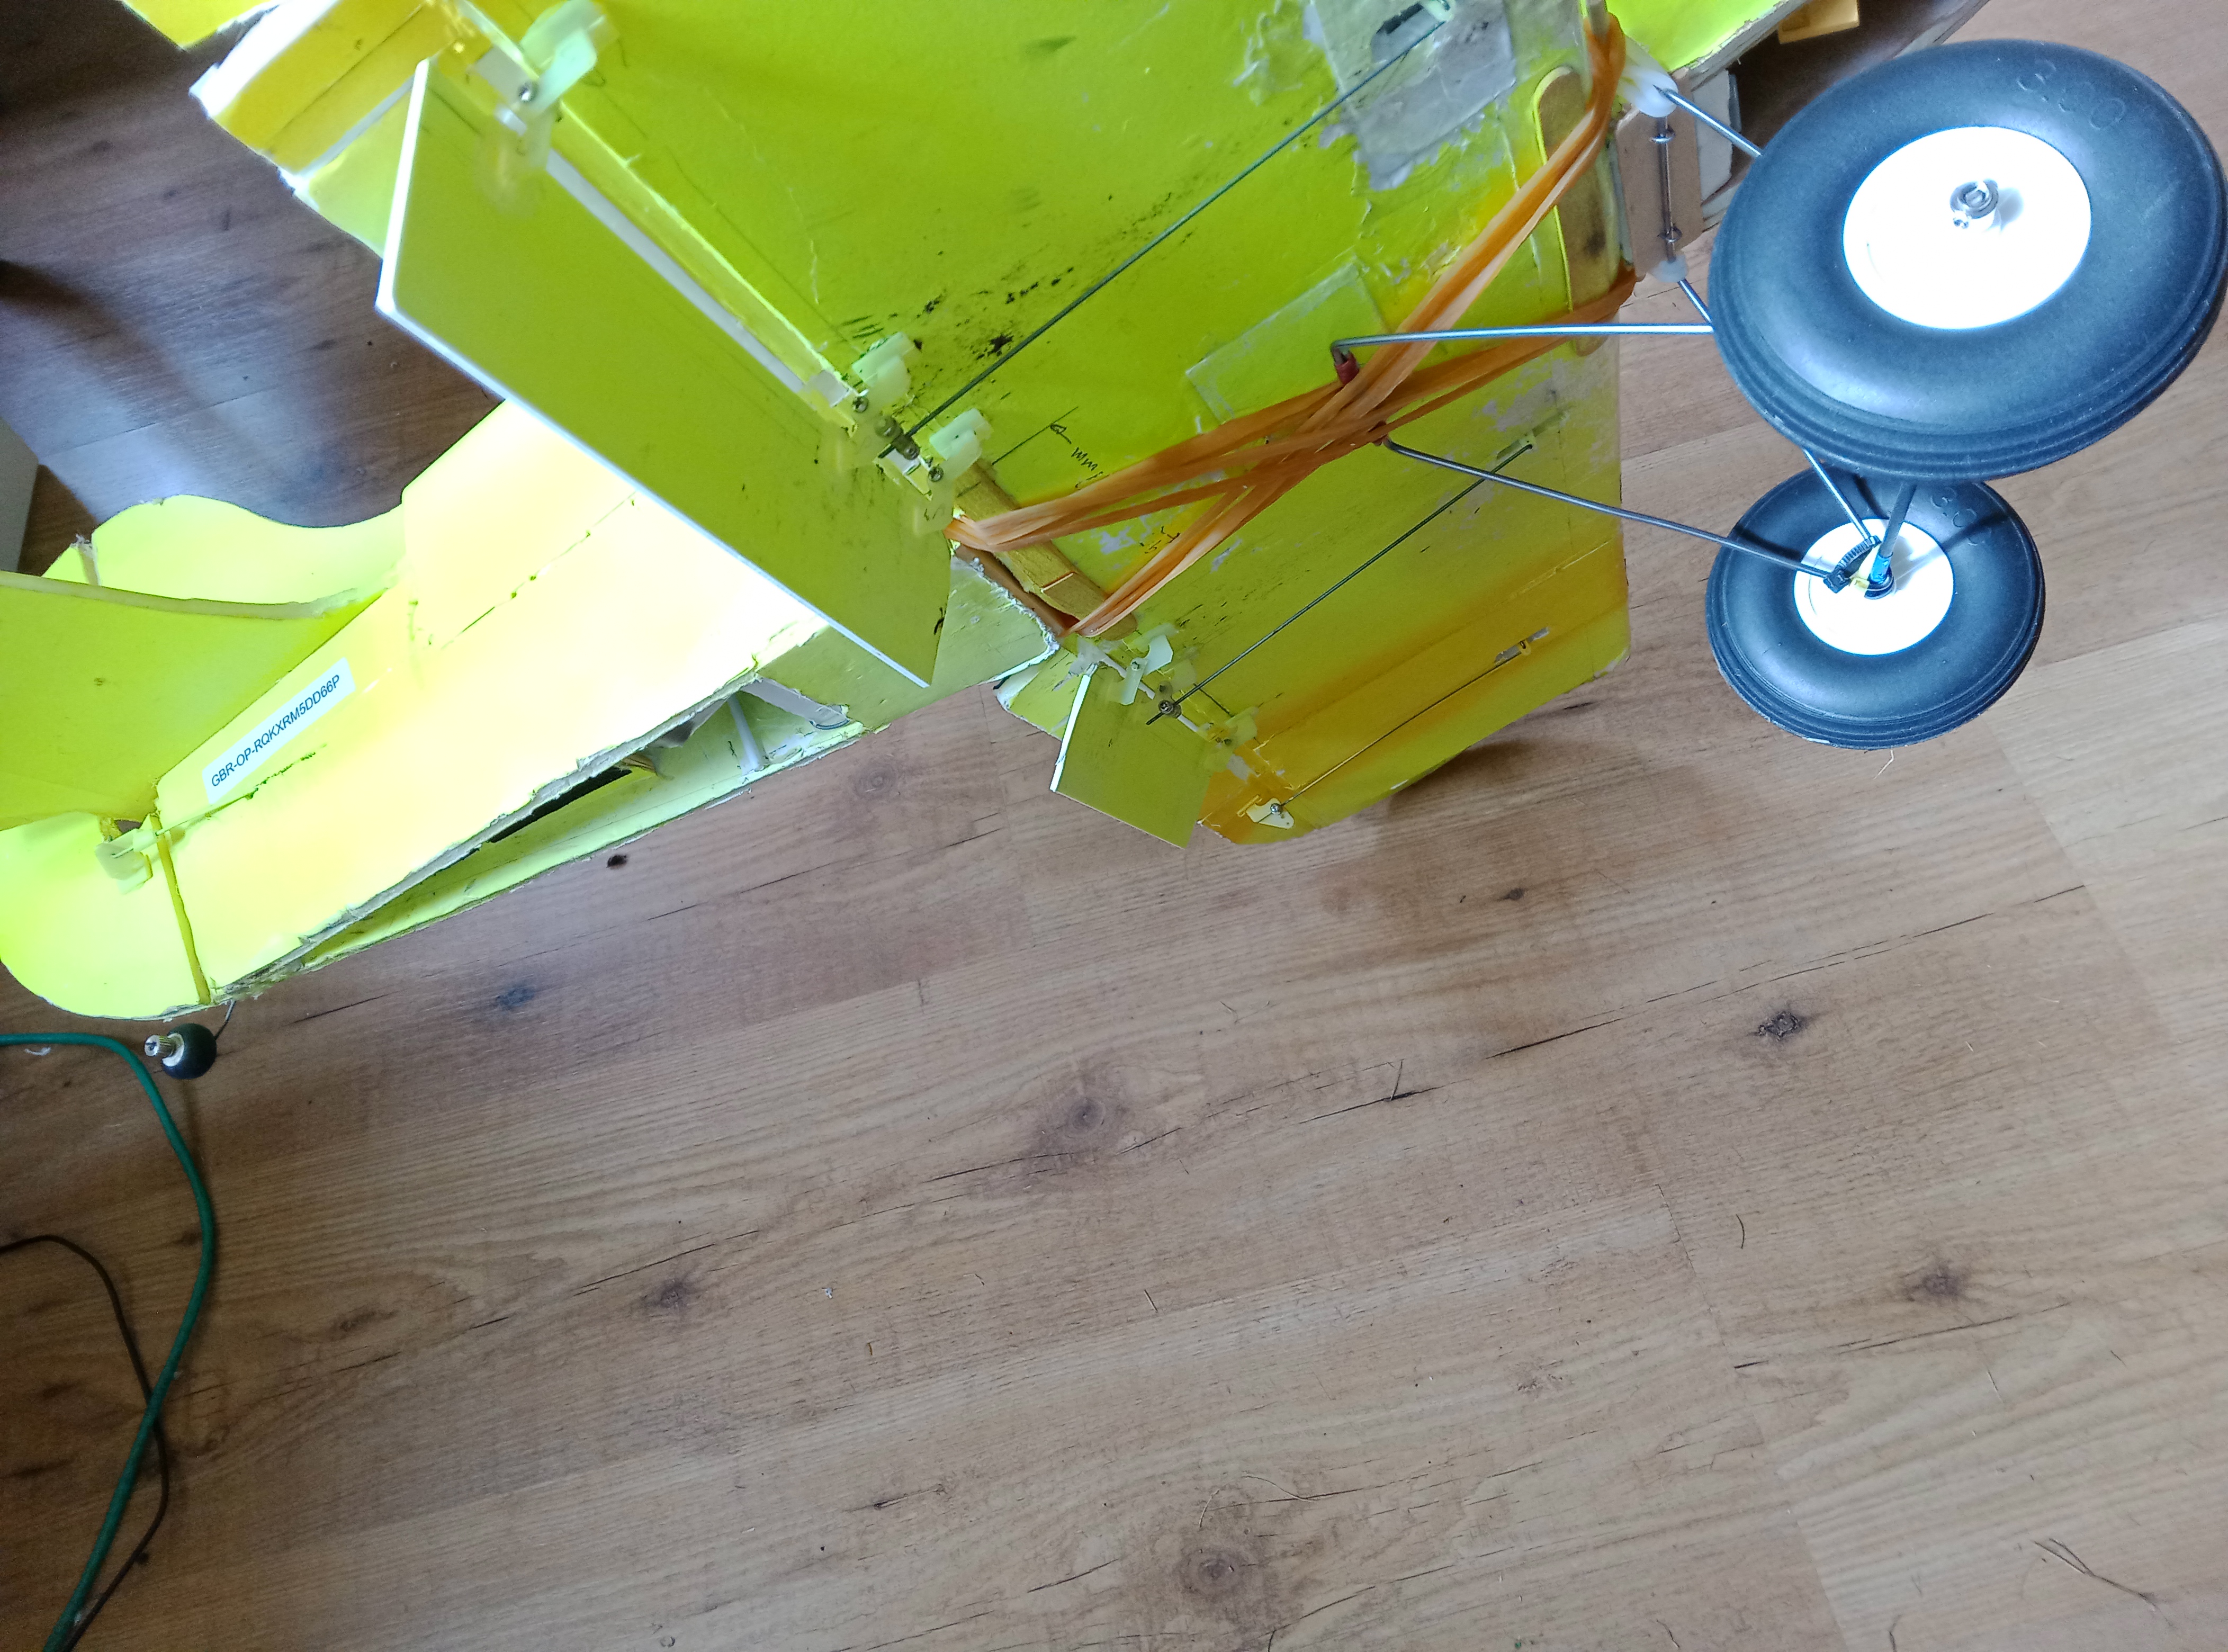
The flaps were bodged up using plasticard and repurposed control horns for the hinges. When retracted they fit neatly back into the gap beneath the single layer of foam on the back edge of the wing.
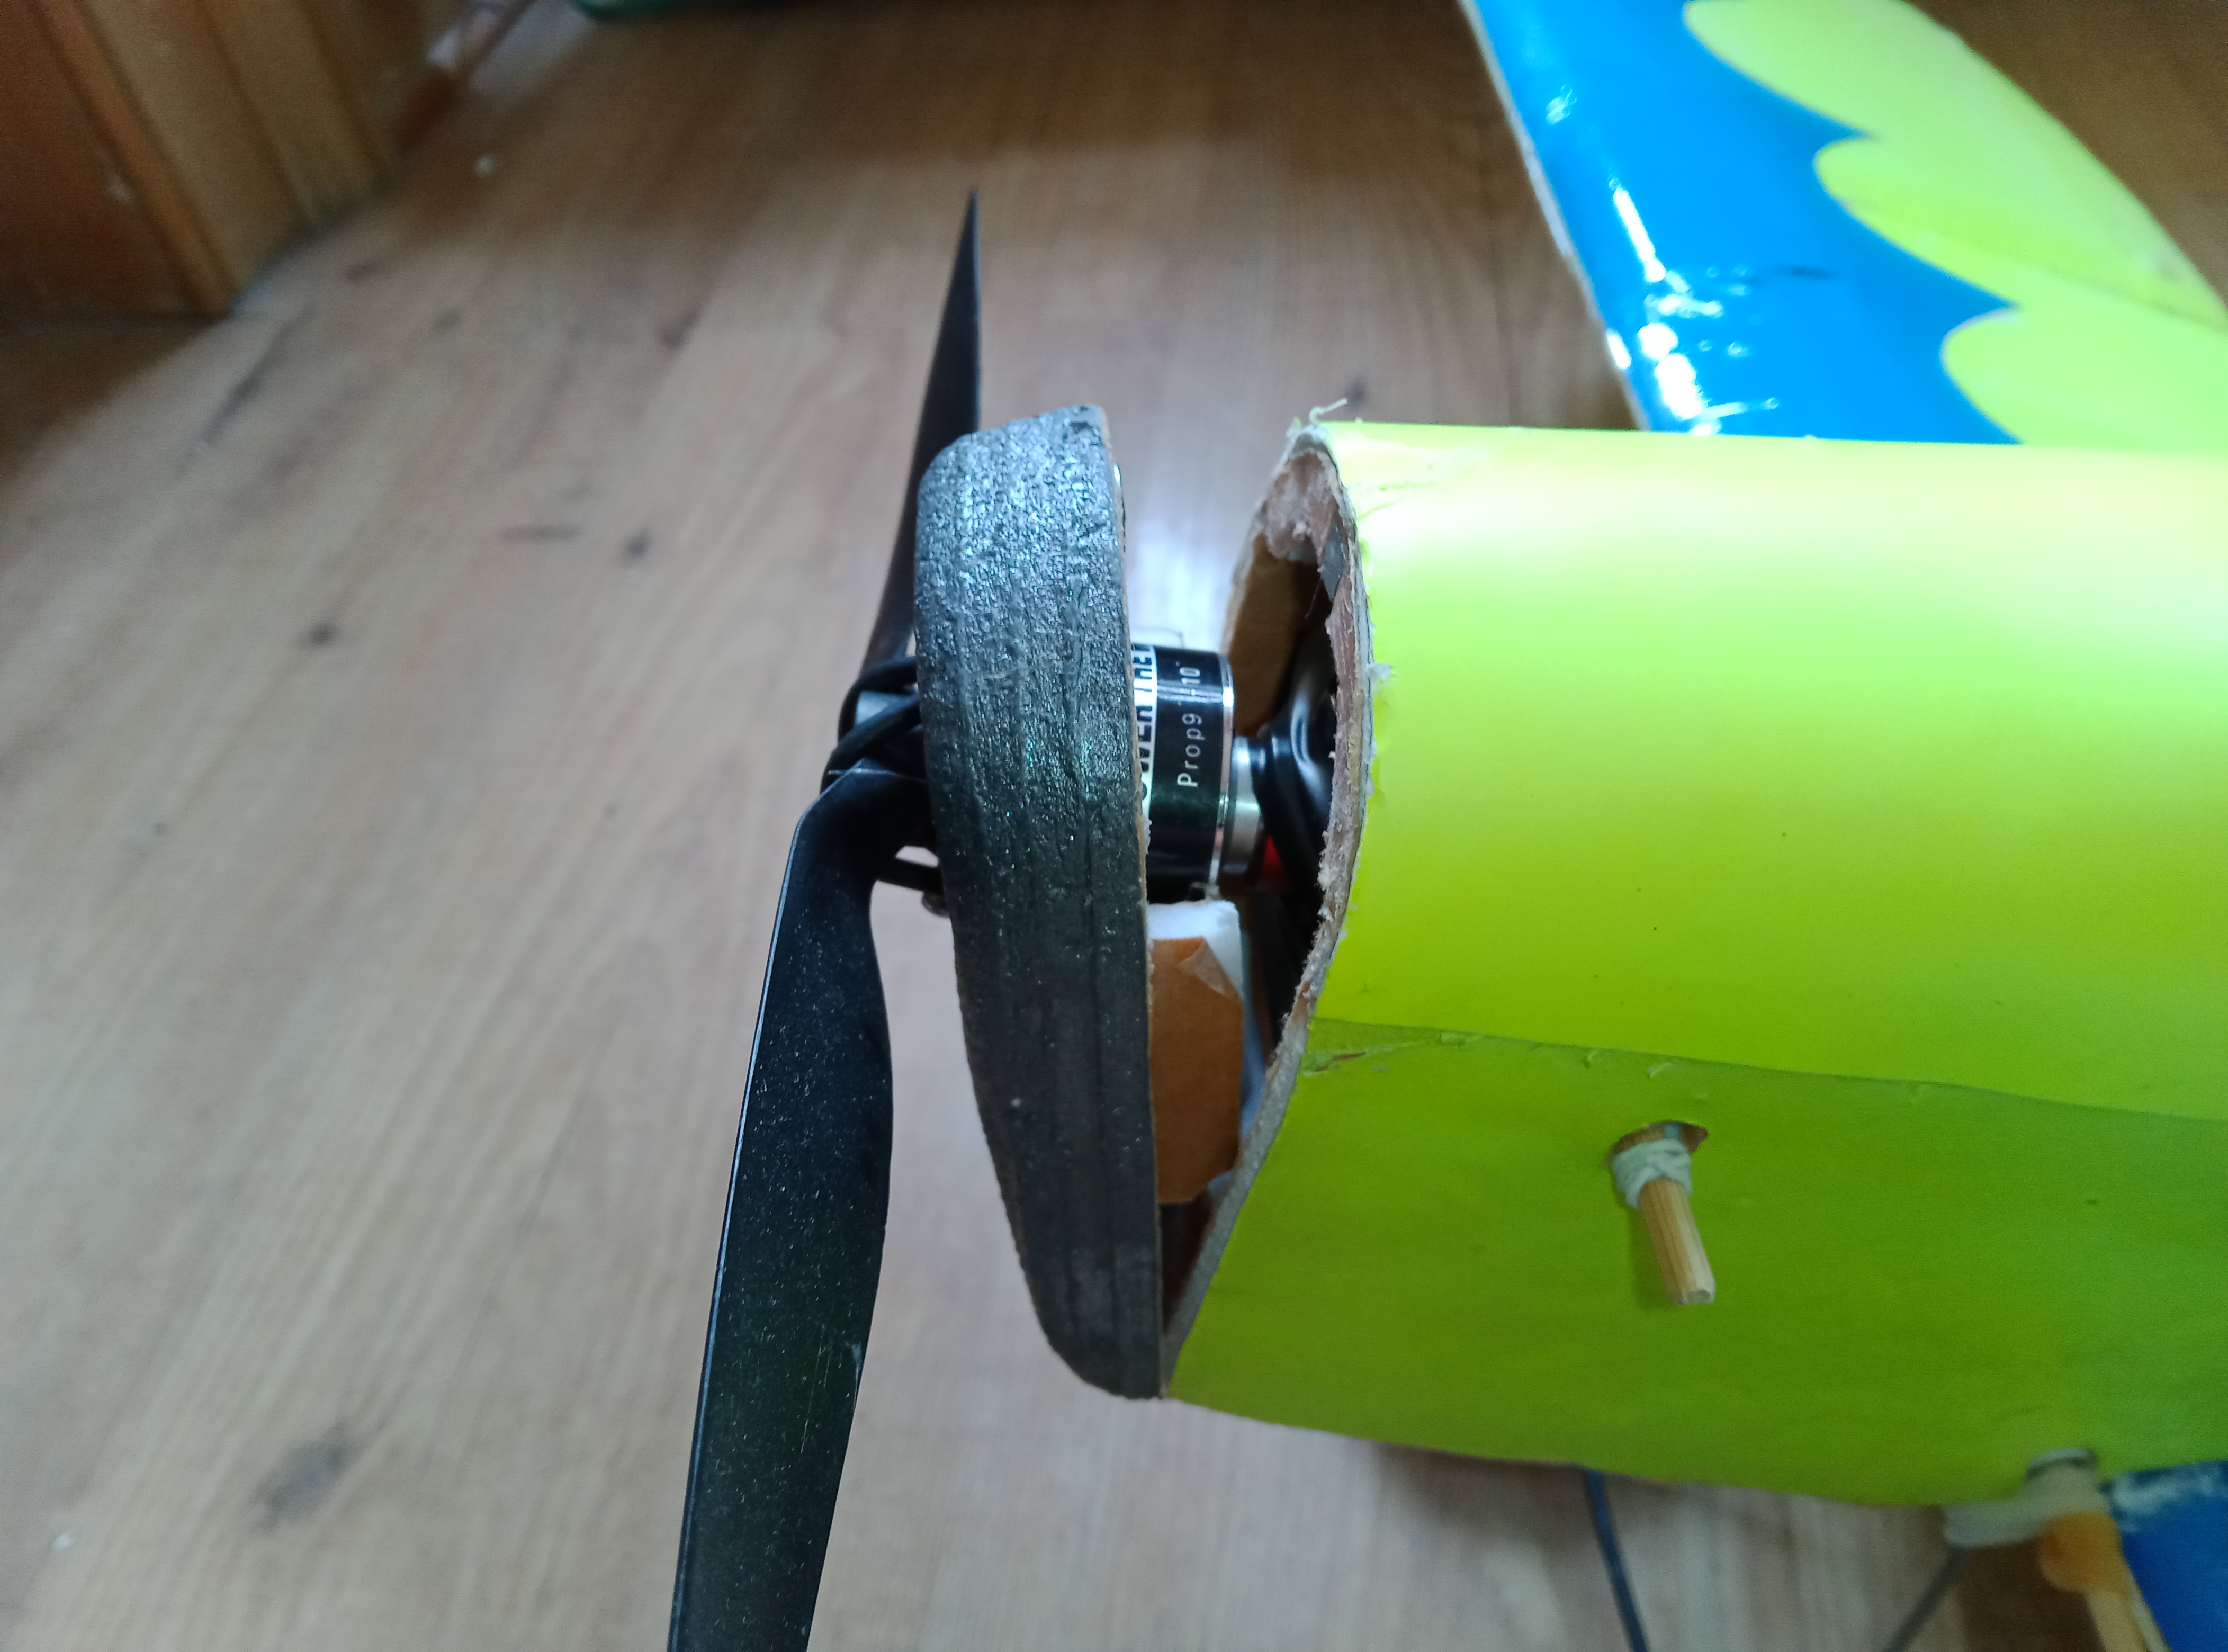
I also took the opportunity to make up a fitted nose piece from layers of foamboard. This is held on with magnets.
It now does what it's supposed to do (in short grass).
NEXT! Rebuild the 1929 Velie Monocoupe
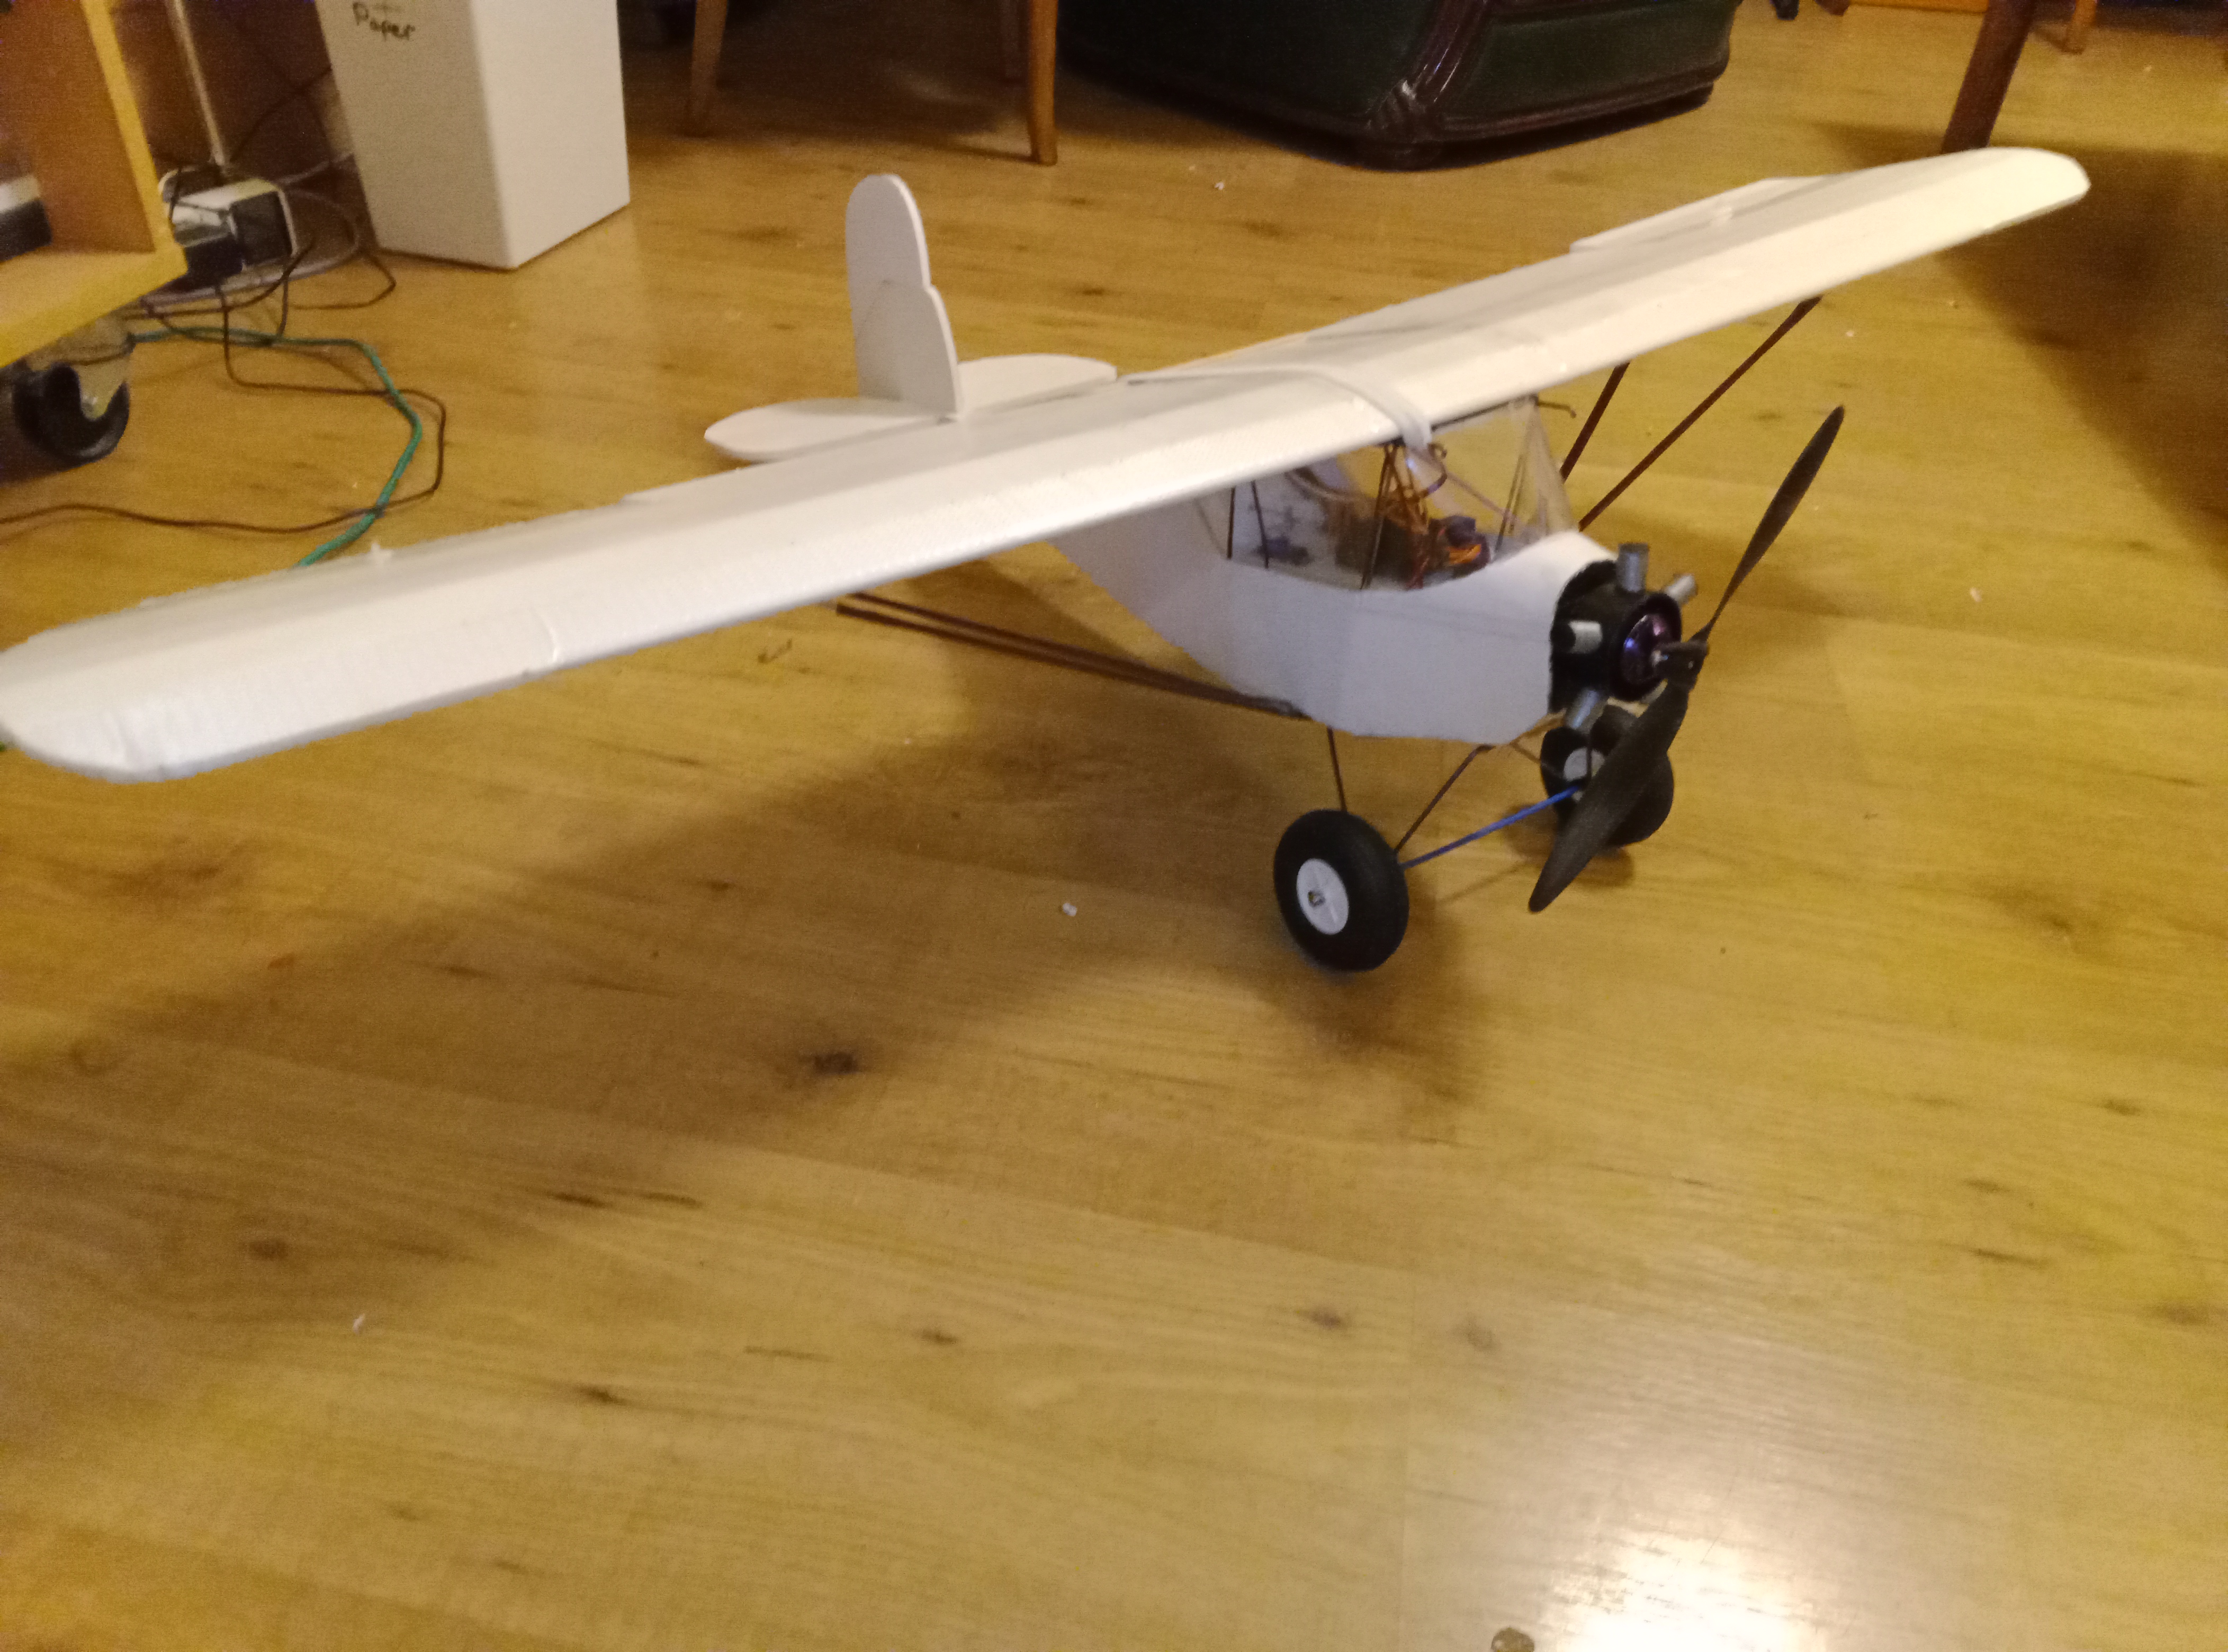
The Velie Monocoupe I built before was a lovely little plane but my inexperience shortened its lifespan. I decided on a complete rebuild using all my original bespoke components. I built this in my heavier 'UK' 5mm foamboard.
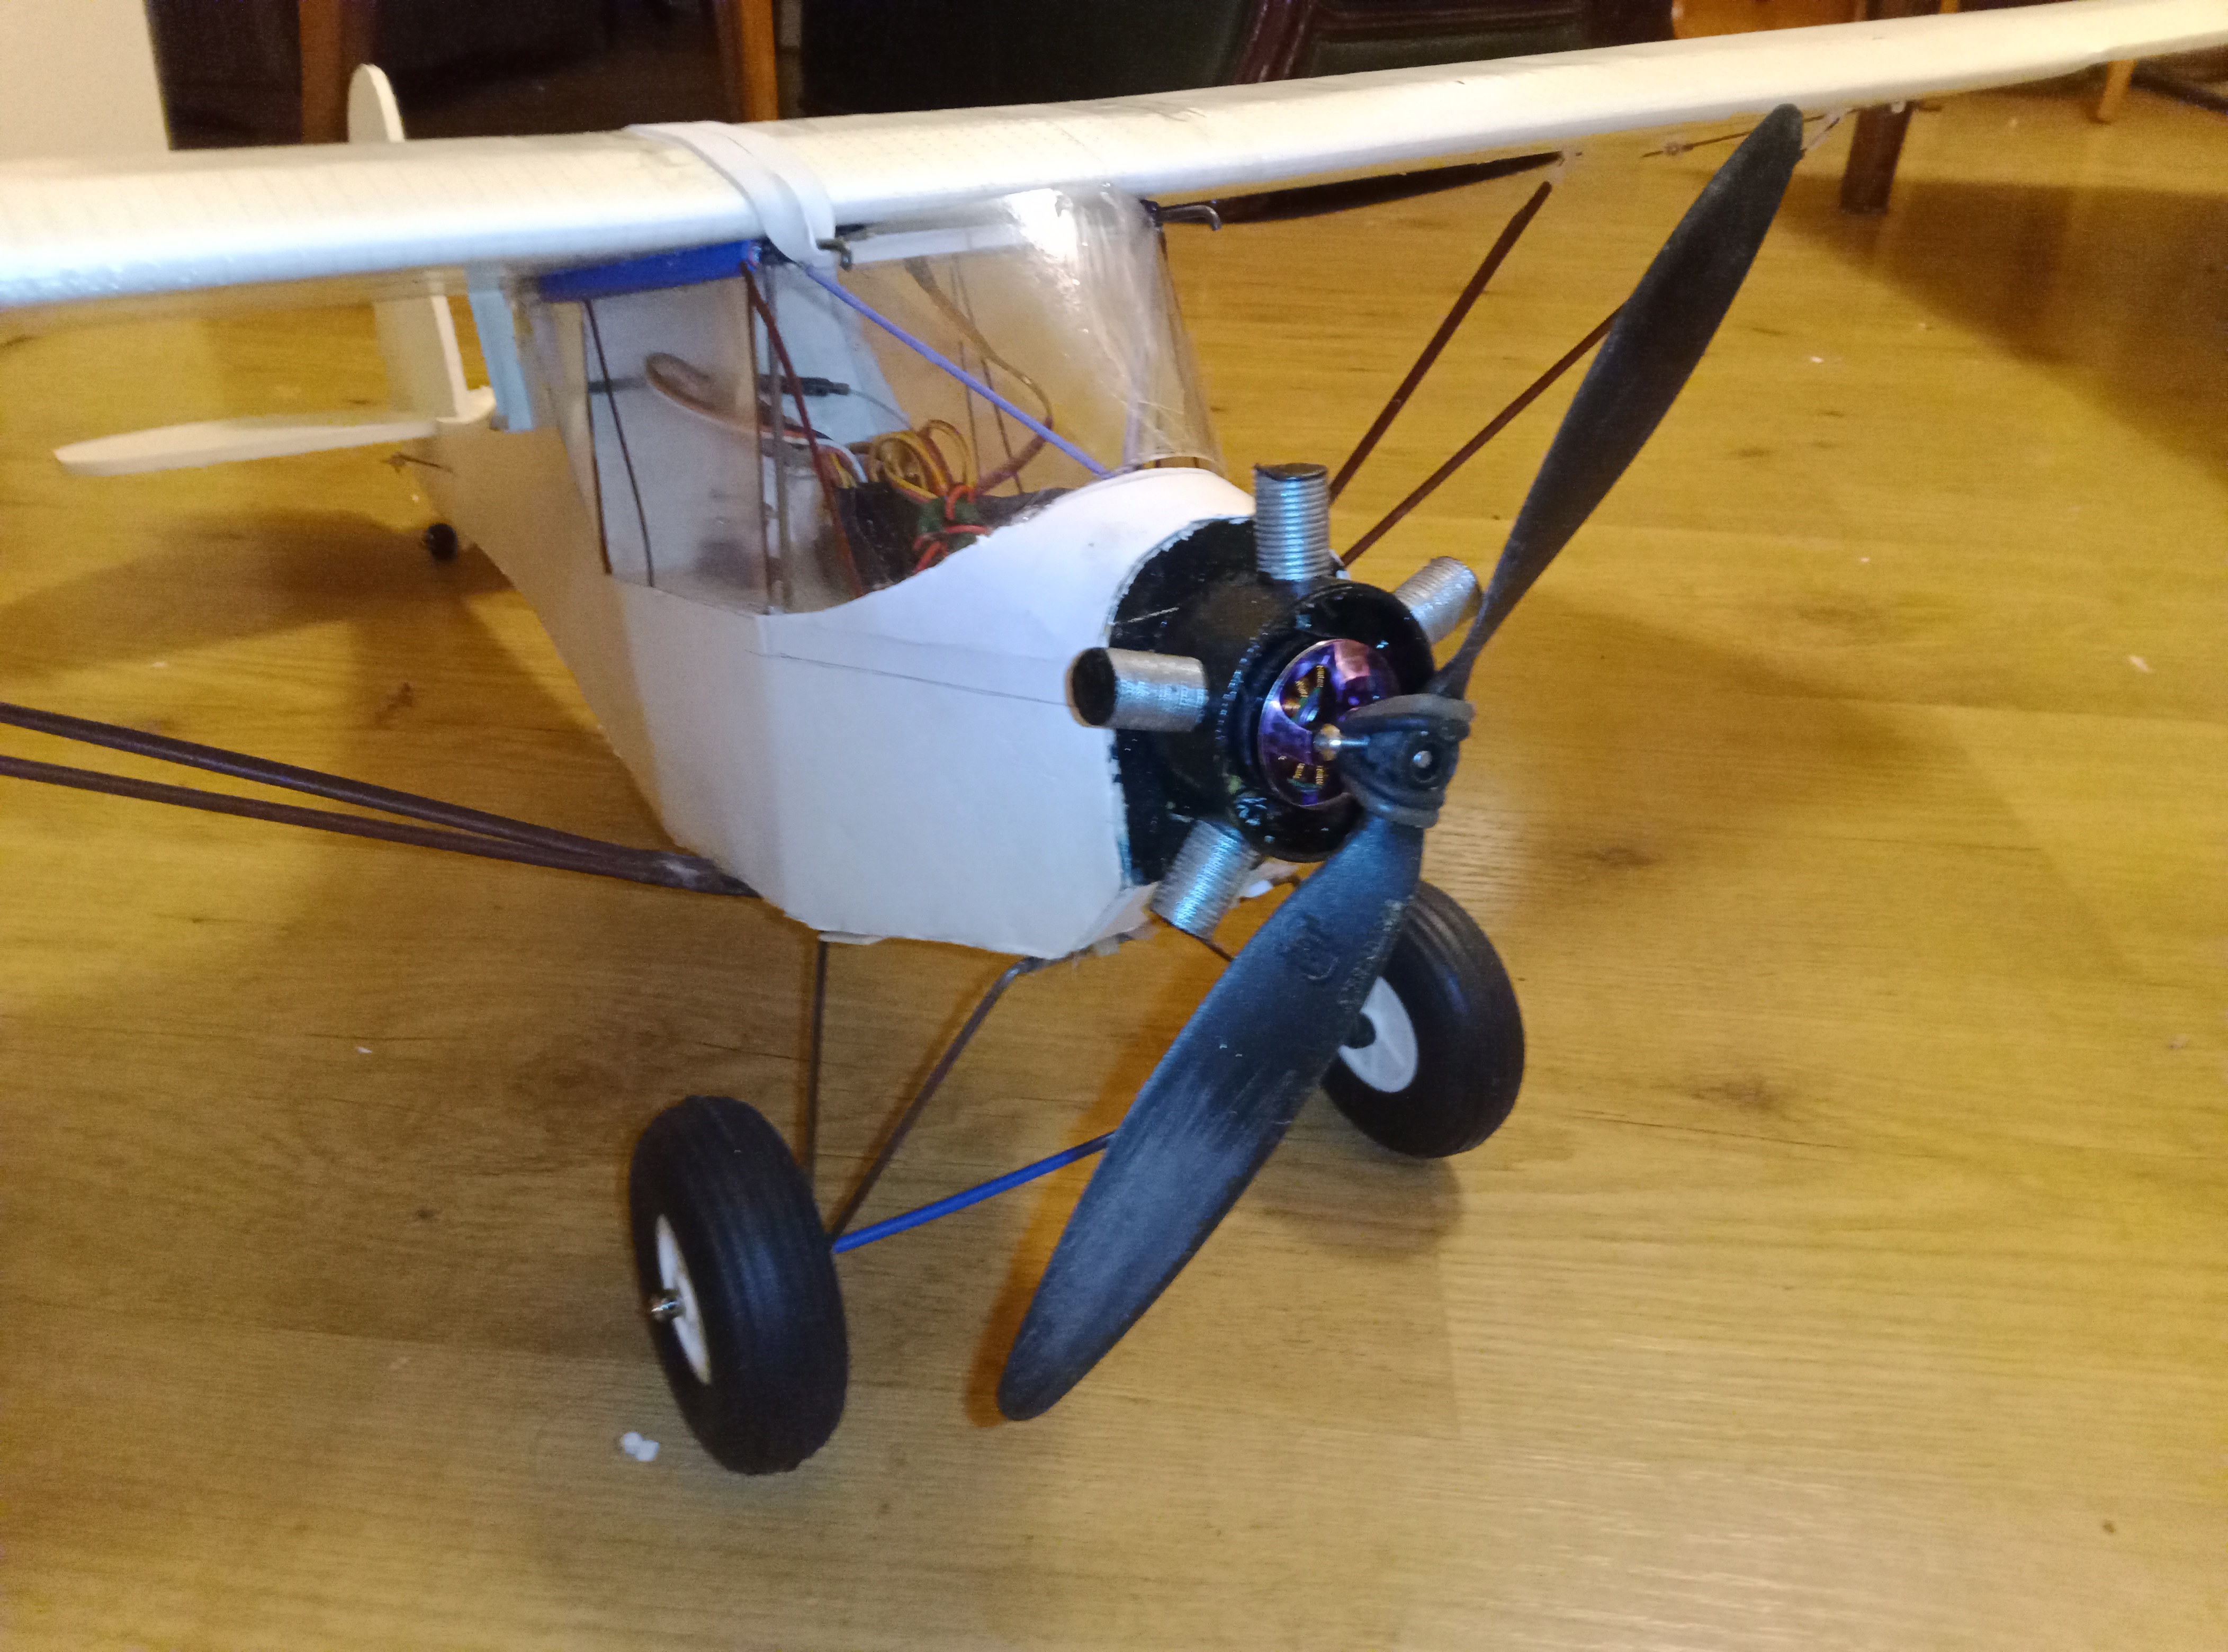
The fake engine cylinders are made from a length of glue stick wrapped in string and soaked with CA glue. When the glue set, the stick was chopped into reasonable lengths and screwed from the inside to a small plastic measuring cup. After painting the cup was screwed to the firewall. Undercarriage is original, as are the wing struts and the internal wire frame that carries the wing.
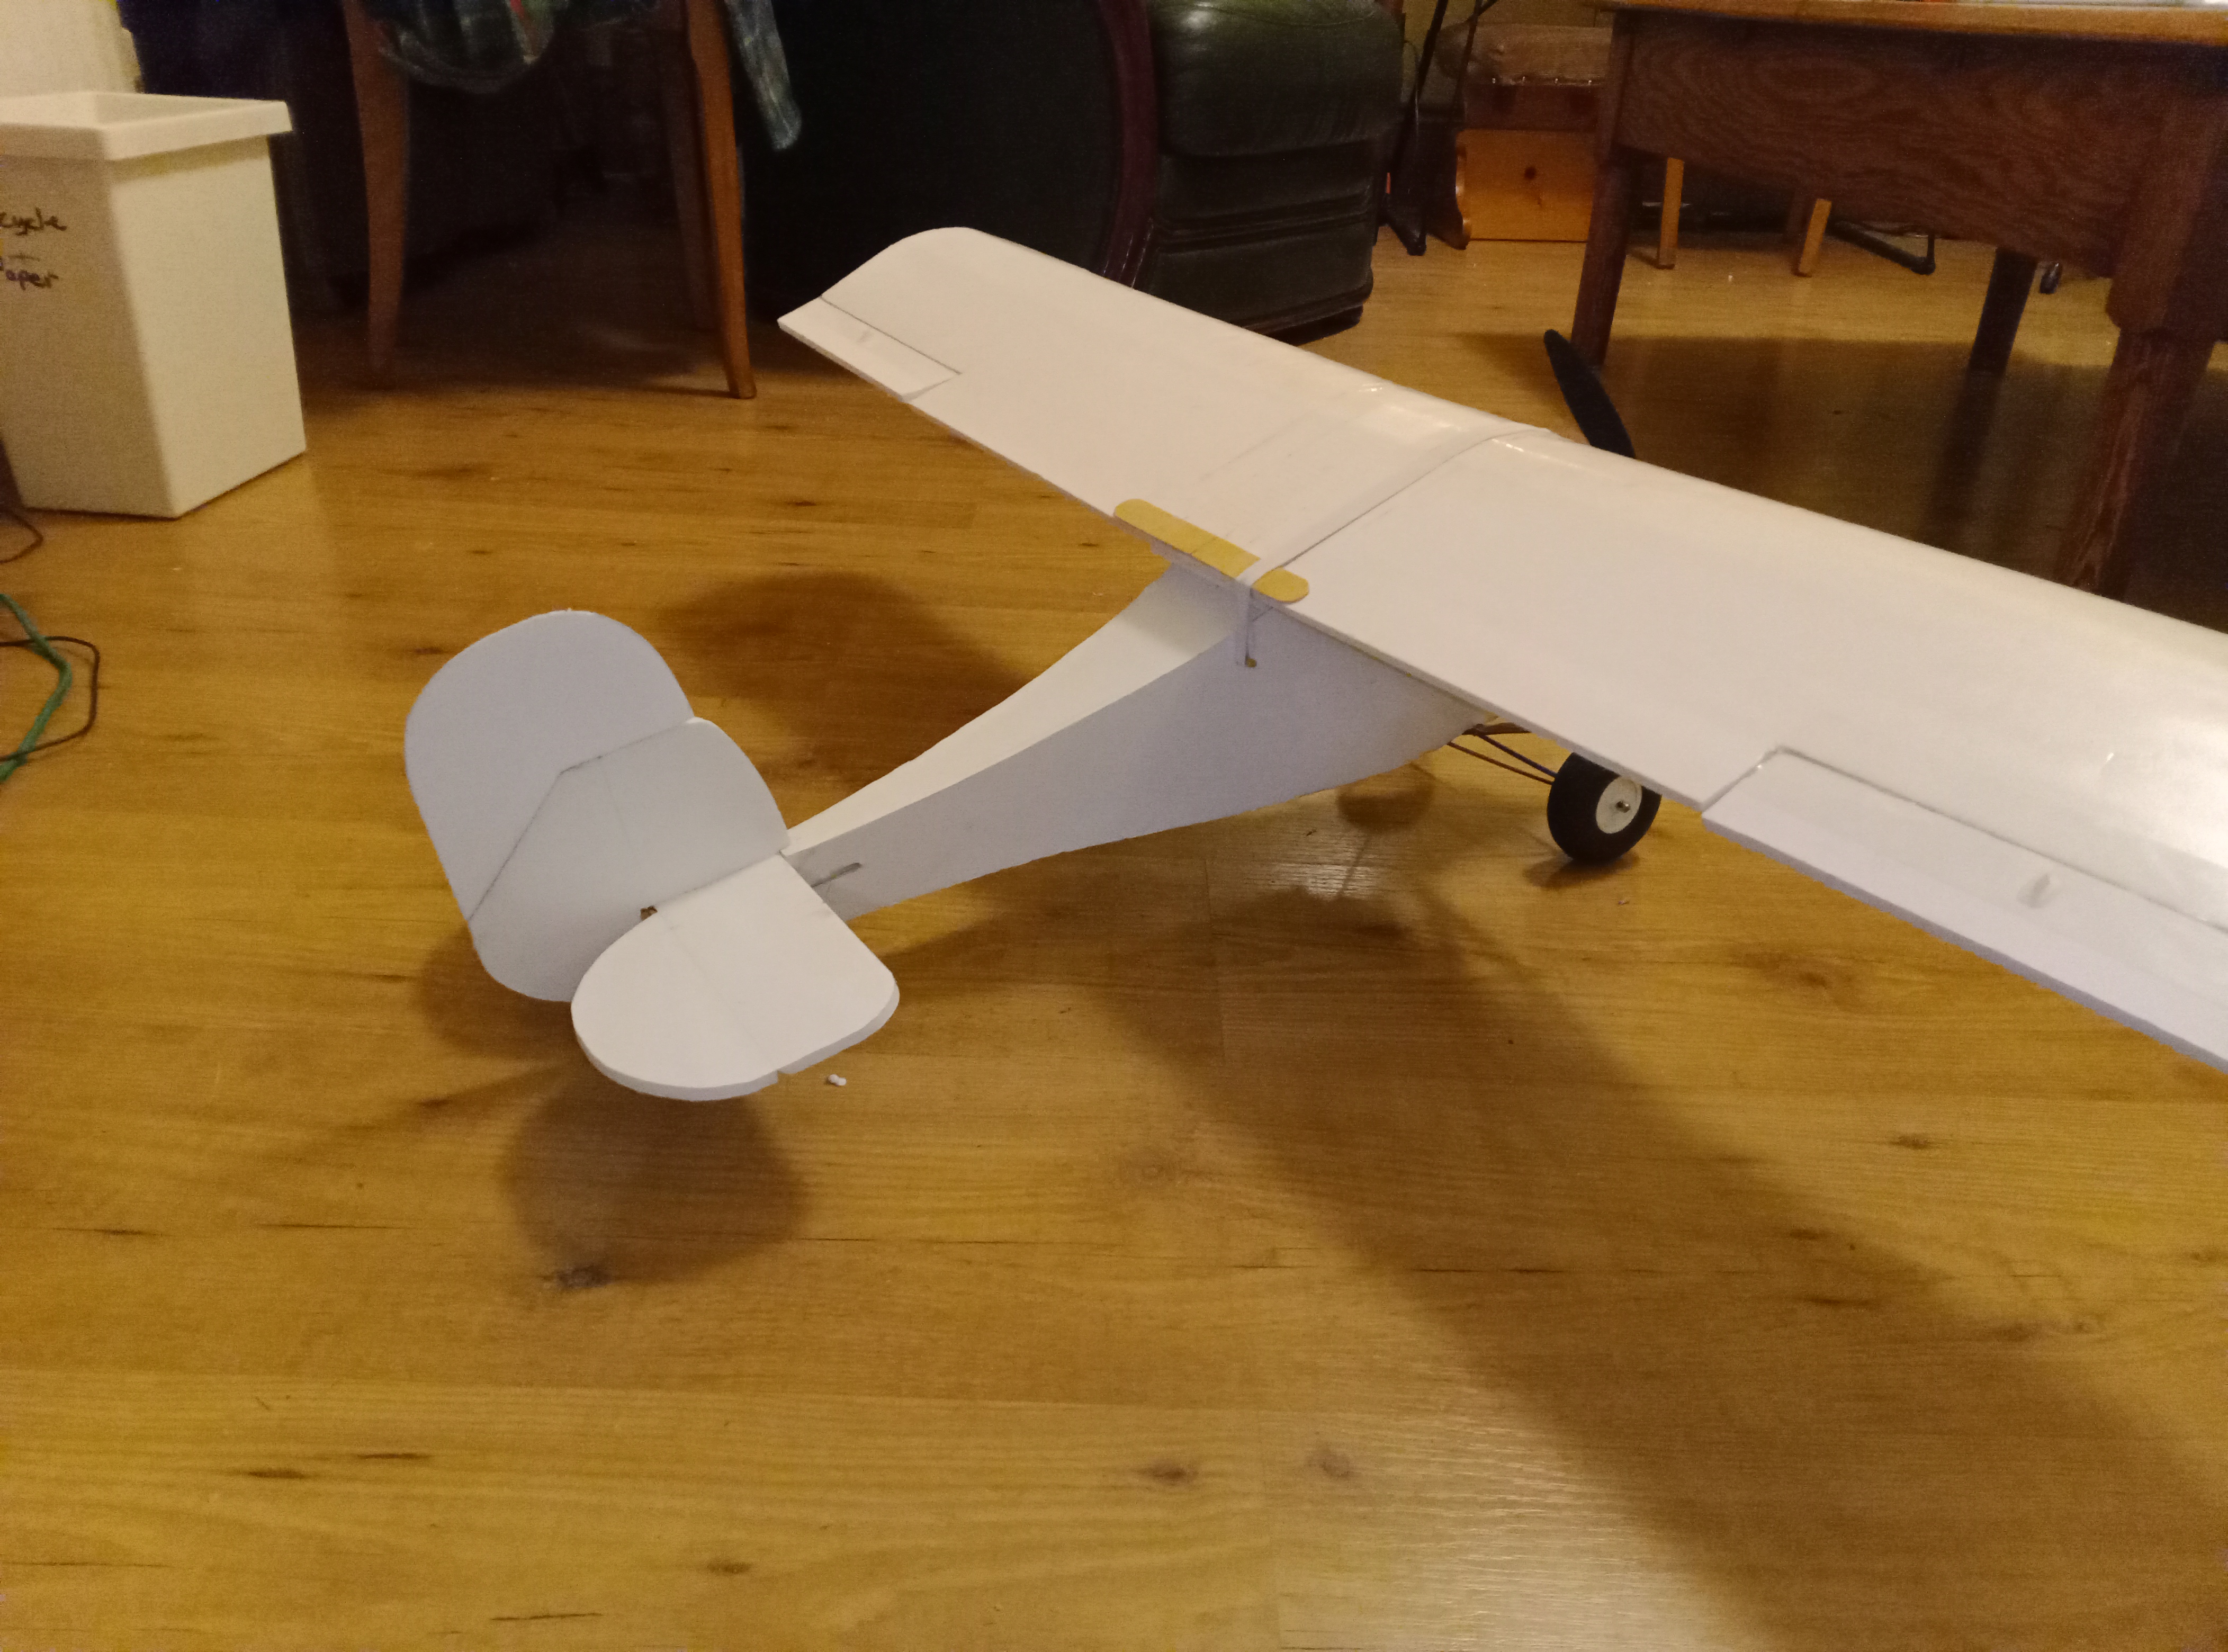
After the first flight it became obvious the rudder was a bit anaemic so I enlarged it by grafting on an extension. It now flies fine and can loop but rolls are a challenge due to the small ailerons, something else I might look at in future.
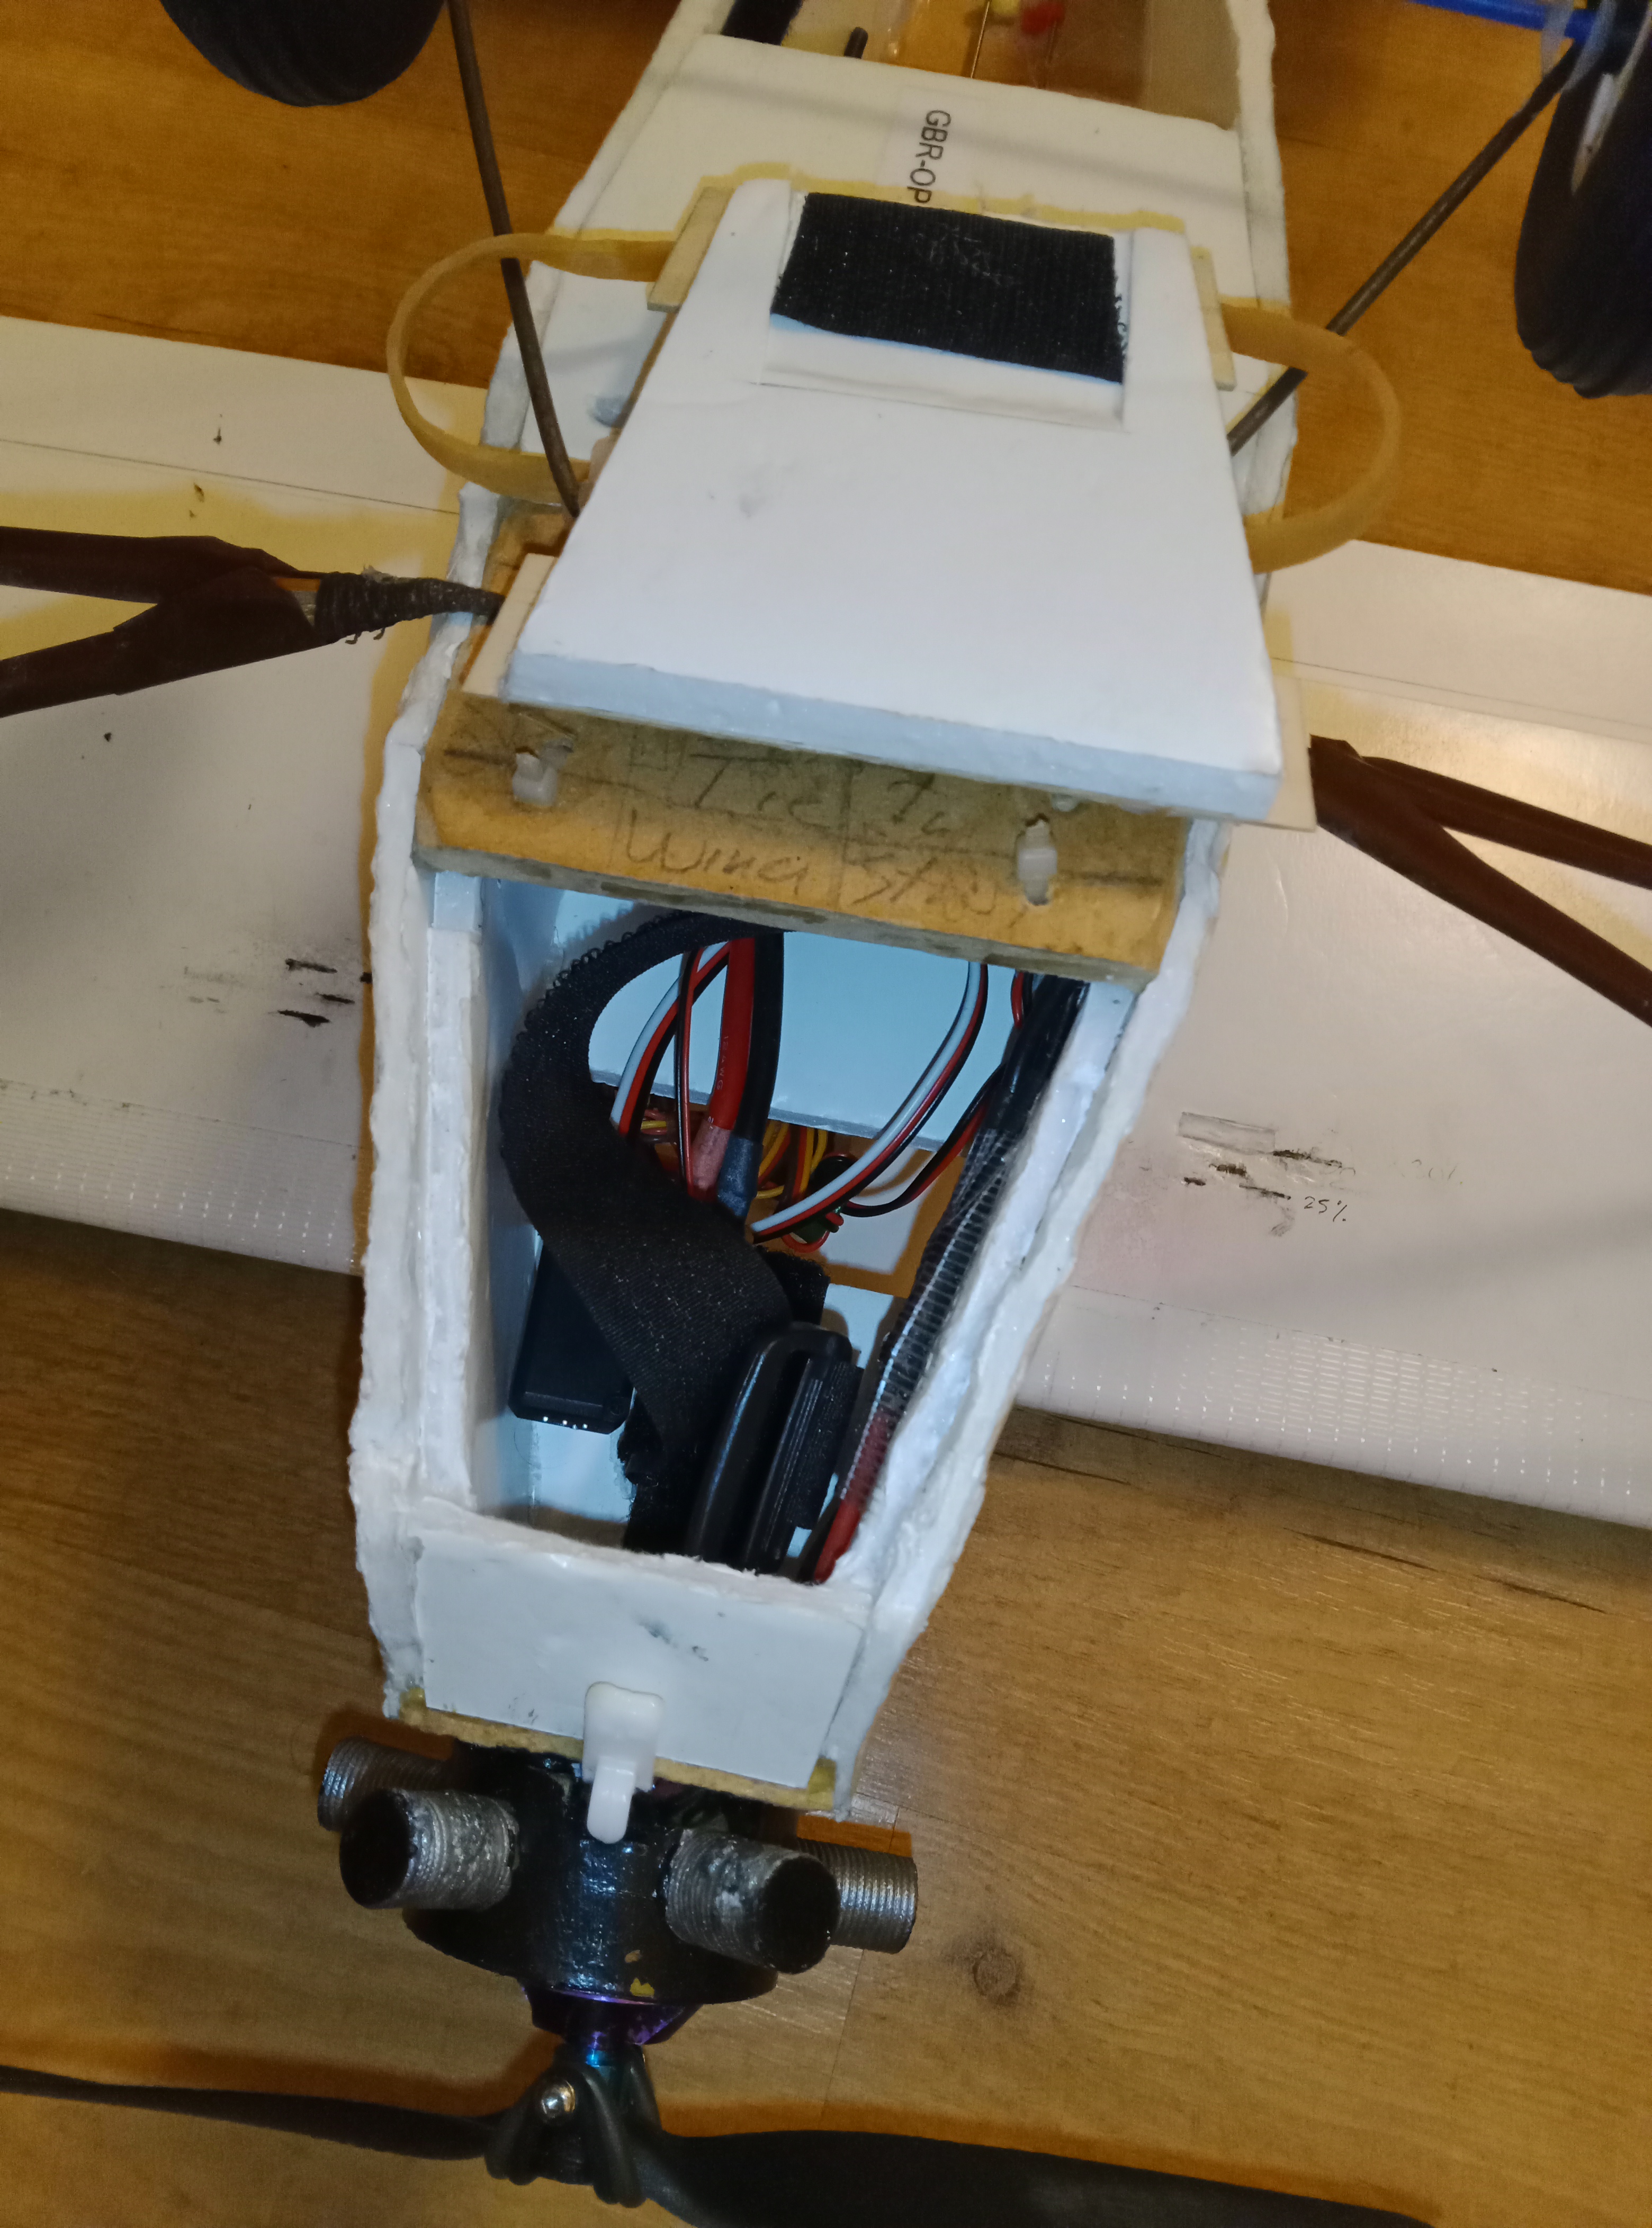
I also eliminated the swappable pod, reducing weight and leaving a vast area inside for a battery. When fitting a battery, the undercarriage folds back. With the battery in place the hatch is replaced and everything gets held in place by a single elastic band. The hatch is reinforced with tongue depressors and the undercarriage has enough give to not damage anything if the landing is too bumpy.
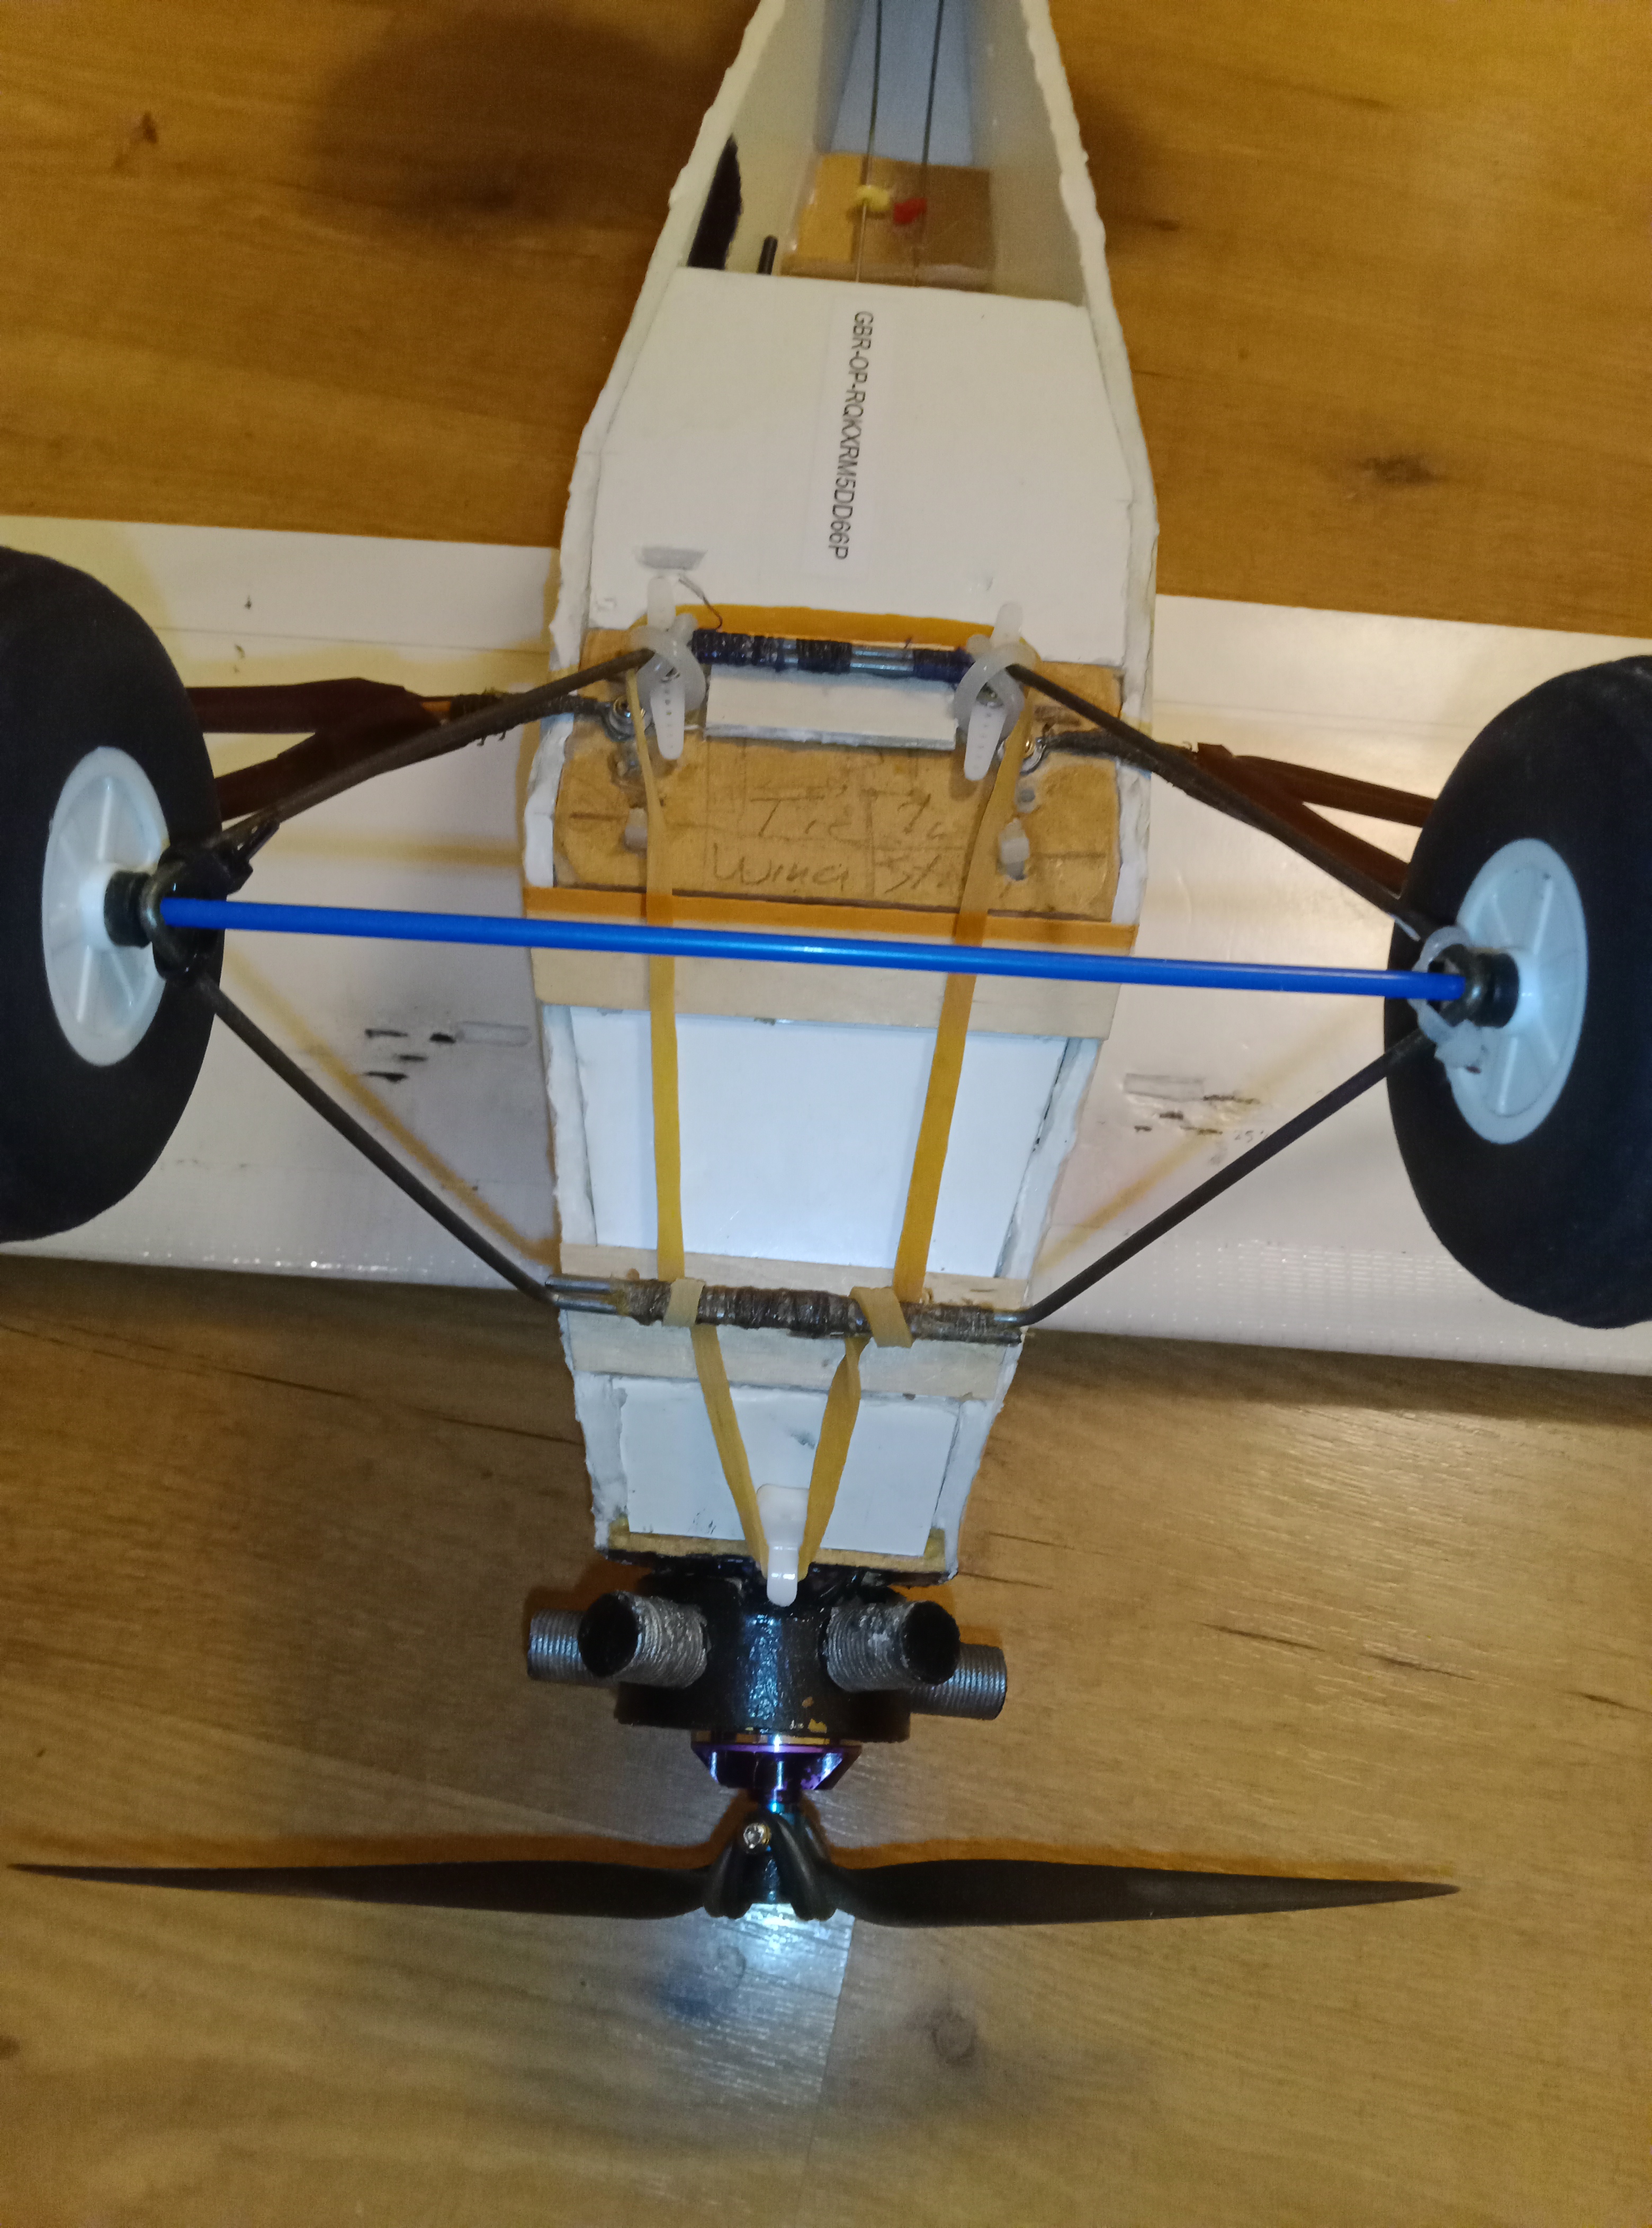
Here's the hatch closed, and the undercarriage firmly enough located to do its job. Note the rear crossbar is held down by the elastic rings normally used on prop savers, with double-ended servo arms acting like a boat cleat. The wheel axle is held on by cable ties, which will break if the landing is too rough; another feature that helps preserve the fuselage!
NEXT! A twin engine plane.
I wanted to build a twin engine plane, and the Guinea Pig kit looked a possibility until I realised there was no way I could get it into my car. A bit of research came up with the De Havilland DH-67.
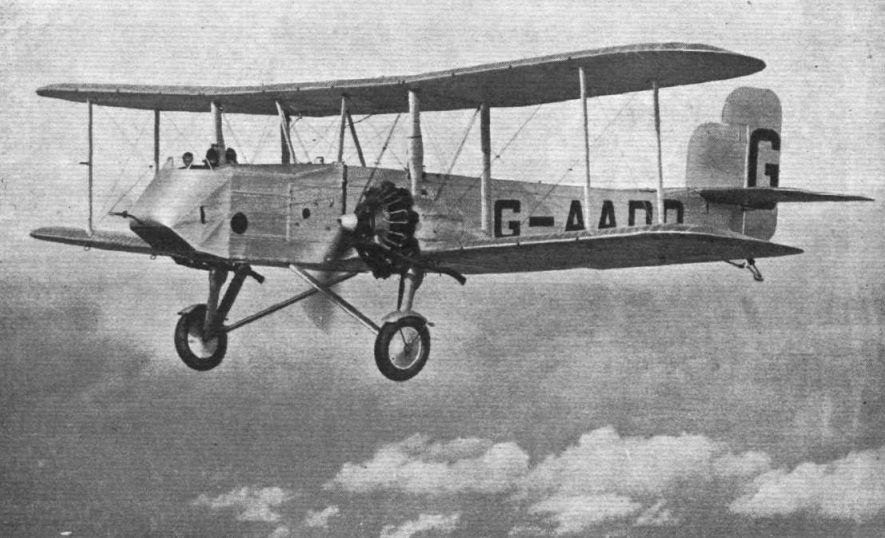
It was a 1930s design used by the UK's Ordnance Survey for mapping 'colonial' territories in South Africa. Only two were ever built. But they did the job well enough. The attraction for me was a biplane design, which I've cracked with my wire cabane system, and a slab-sided design that's easy to replicate in foamboard. This was still an open cockpit plane and those little blobs on top are the pilot's heads. This gives a hint to the size of the actual plane.
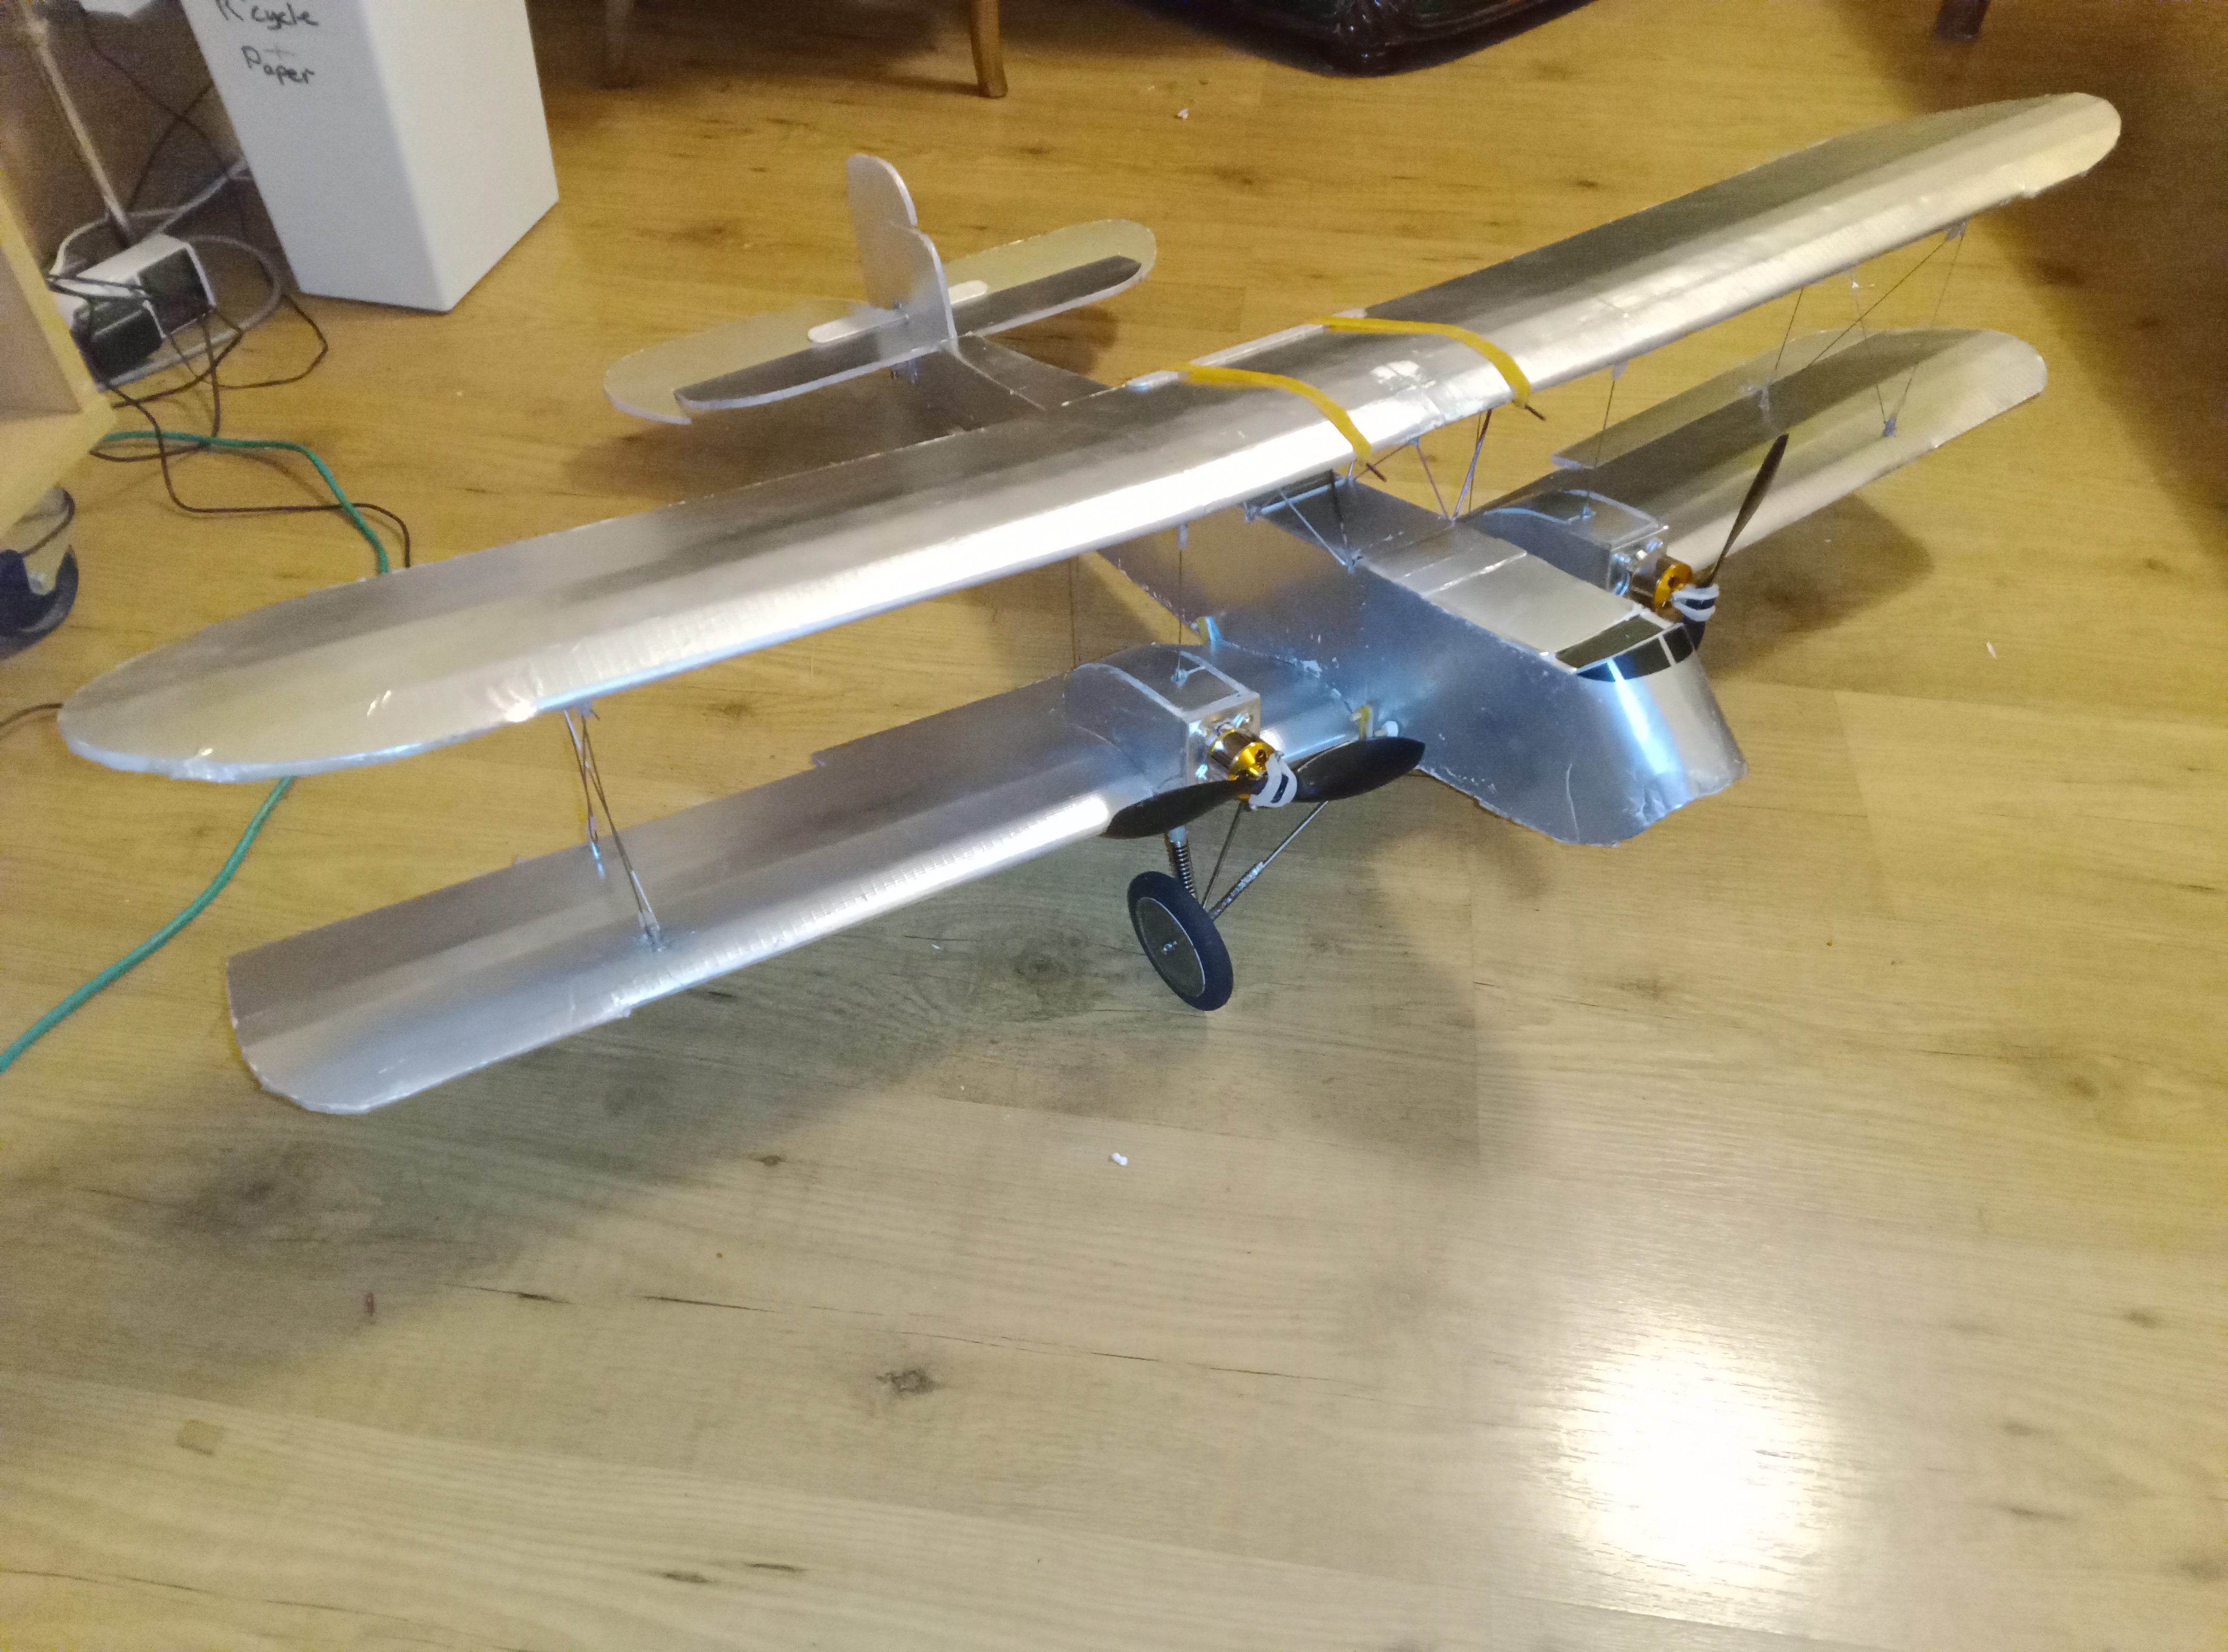
It turned out nice, and is a super-majestic plane in flight! Silver is the 'standard' colour.
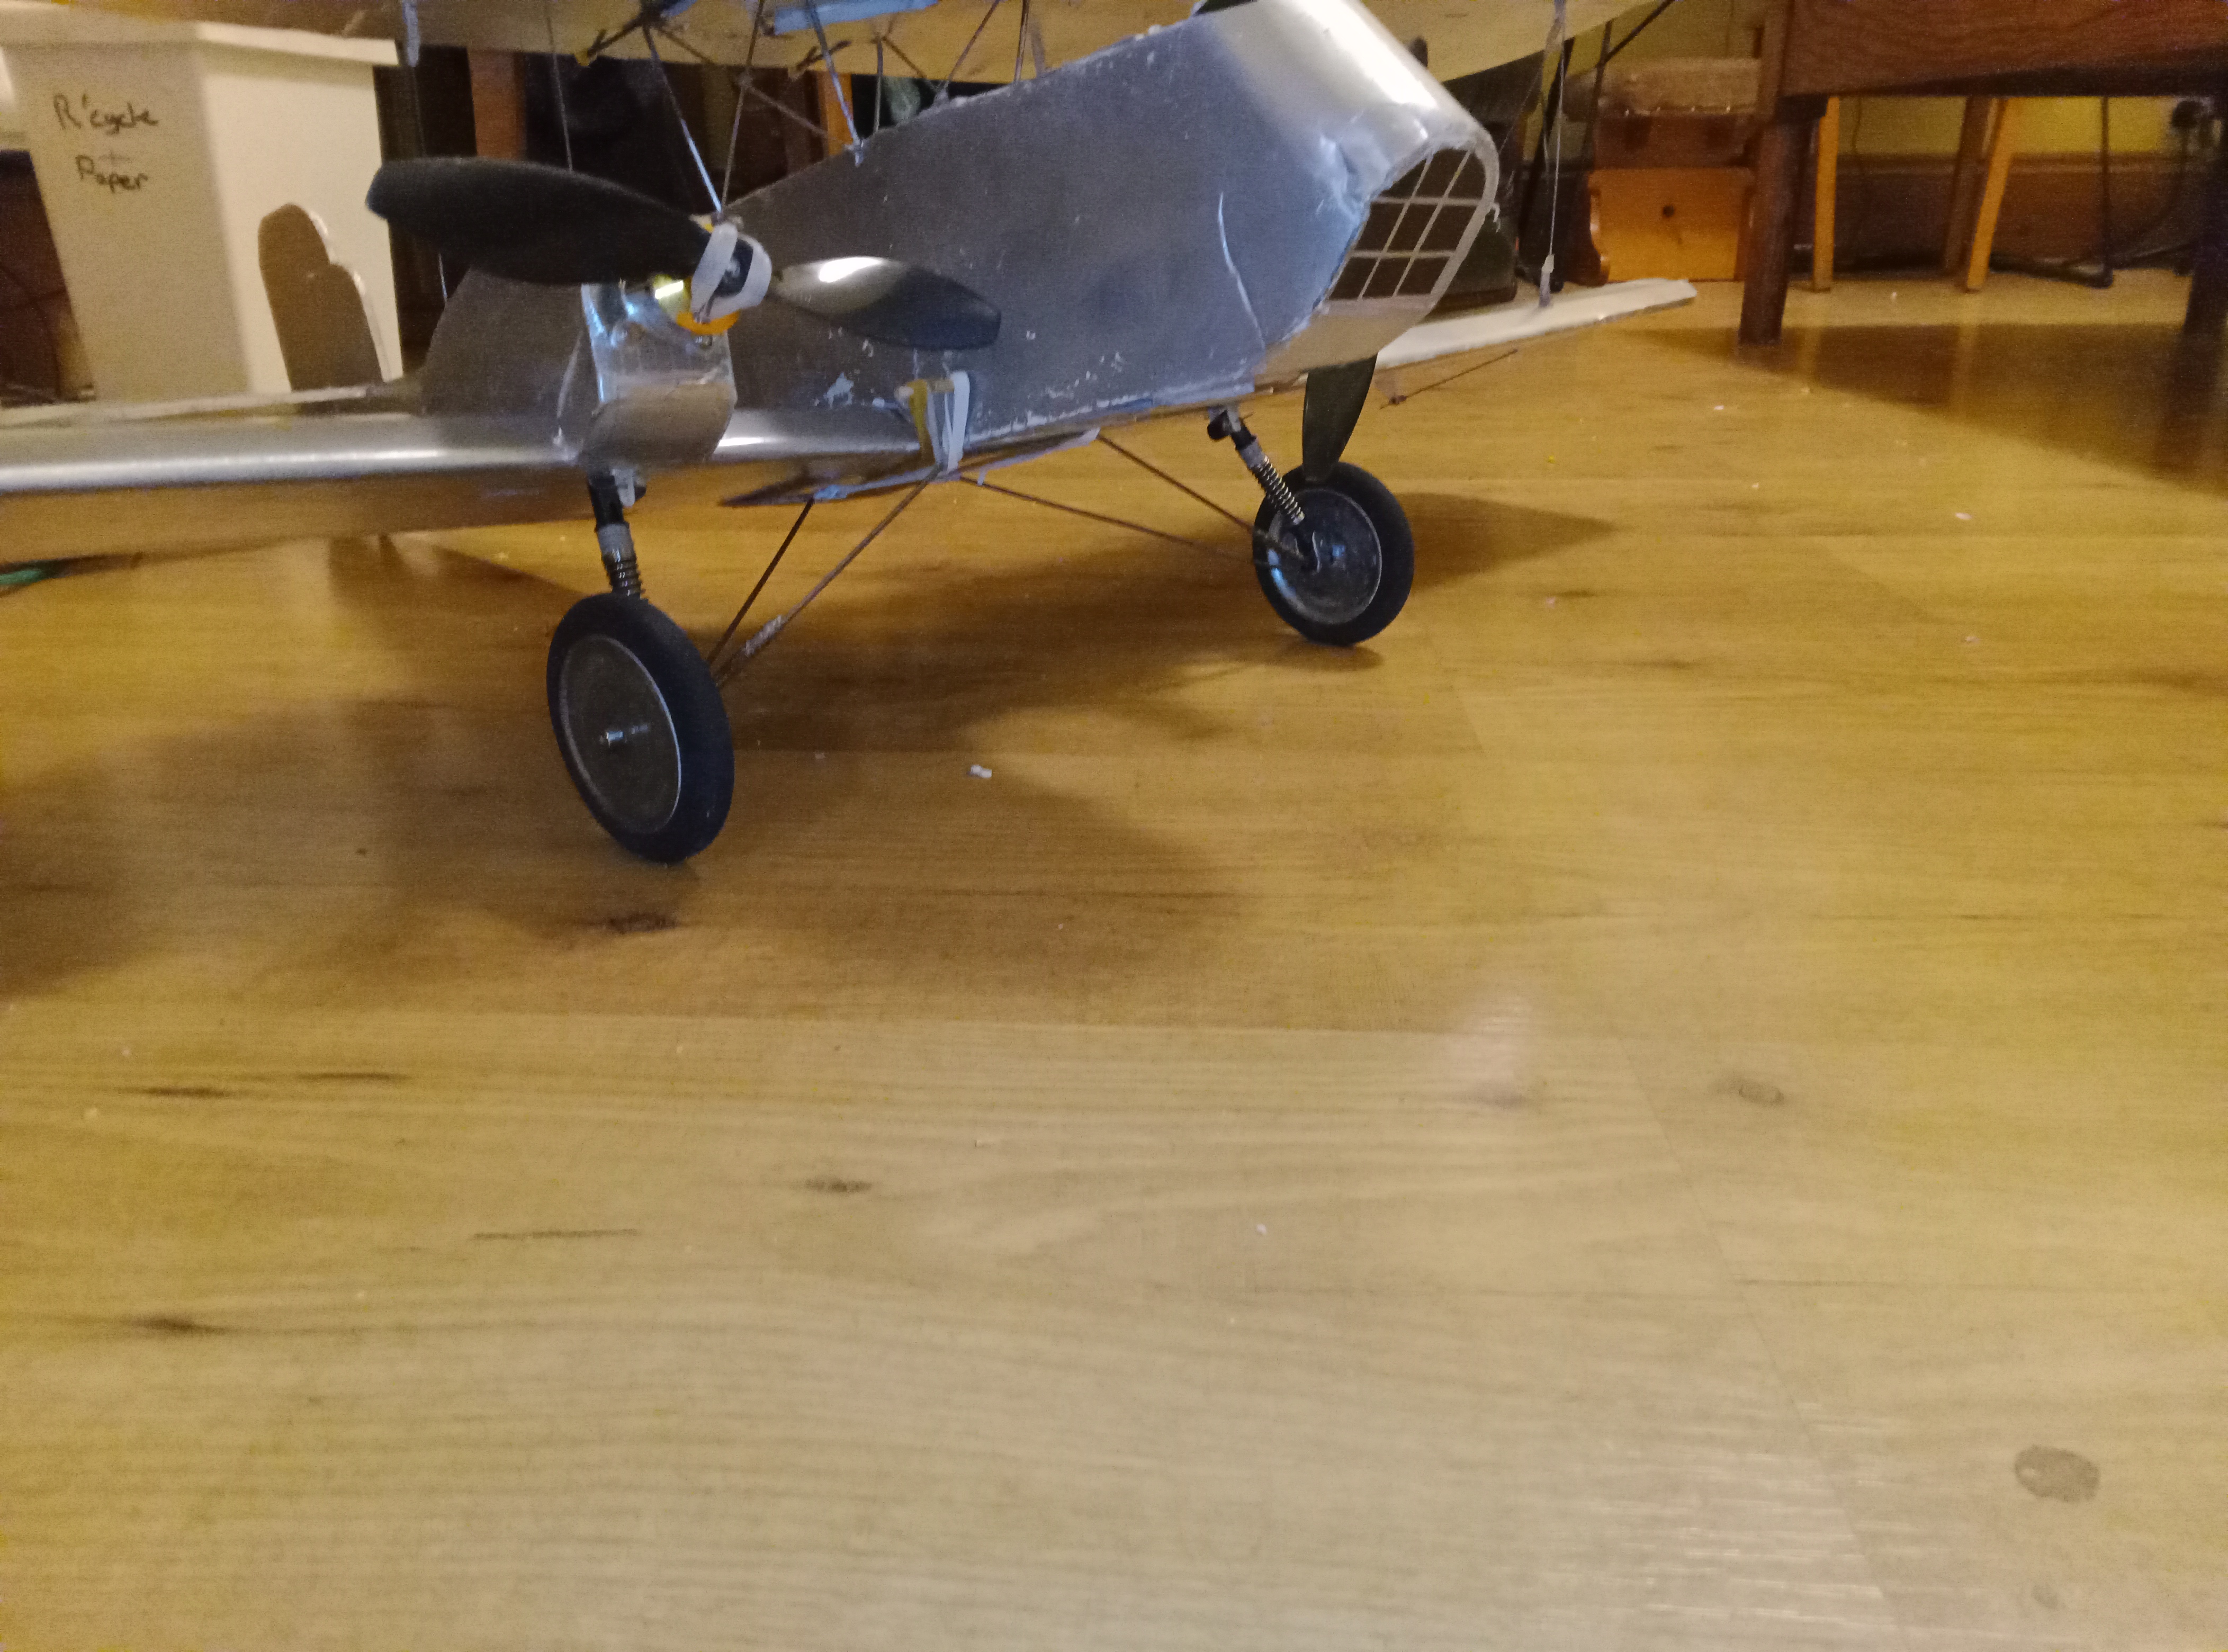
I used black tape to suggest the pilot's windscreen and the glazed forward window used for taking photographs. I also mocked up a scale (enough) undercarriage with suspension pinched from a lego kit. The engine mounts are a bodge, but functional. More recently I've got rid of the propsavers in favour of a bolt on props. I may work up a fake radial engine surround for the motors, but it's a daunting task as each engine has 9 cylinders.
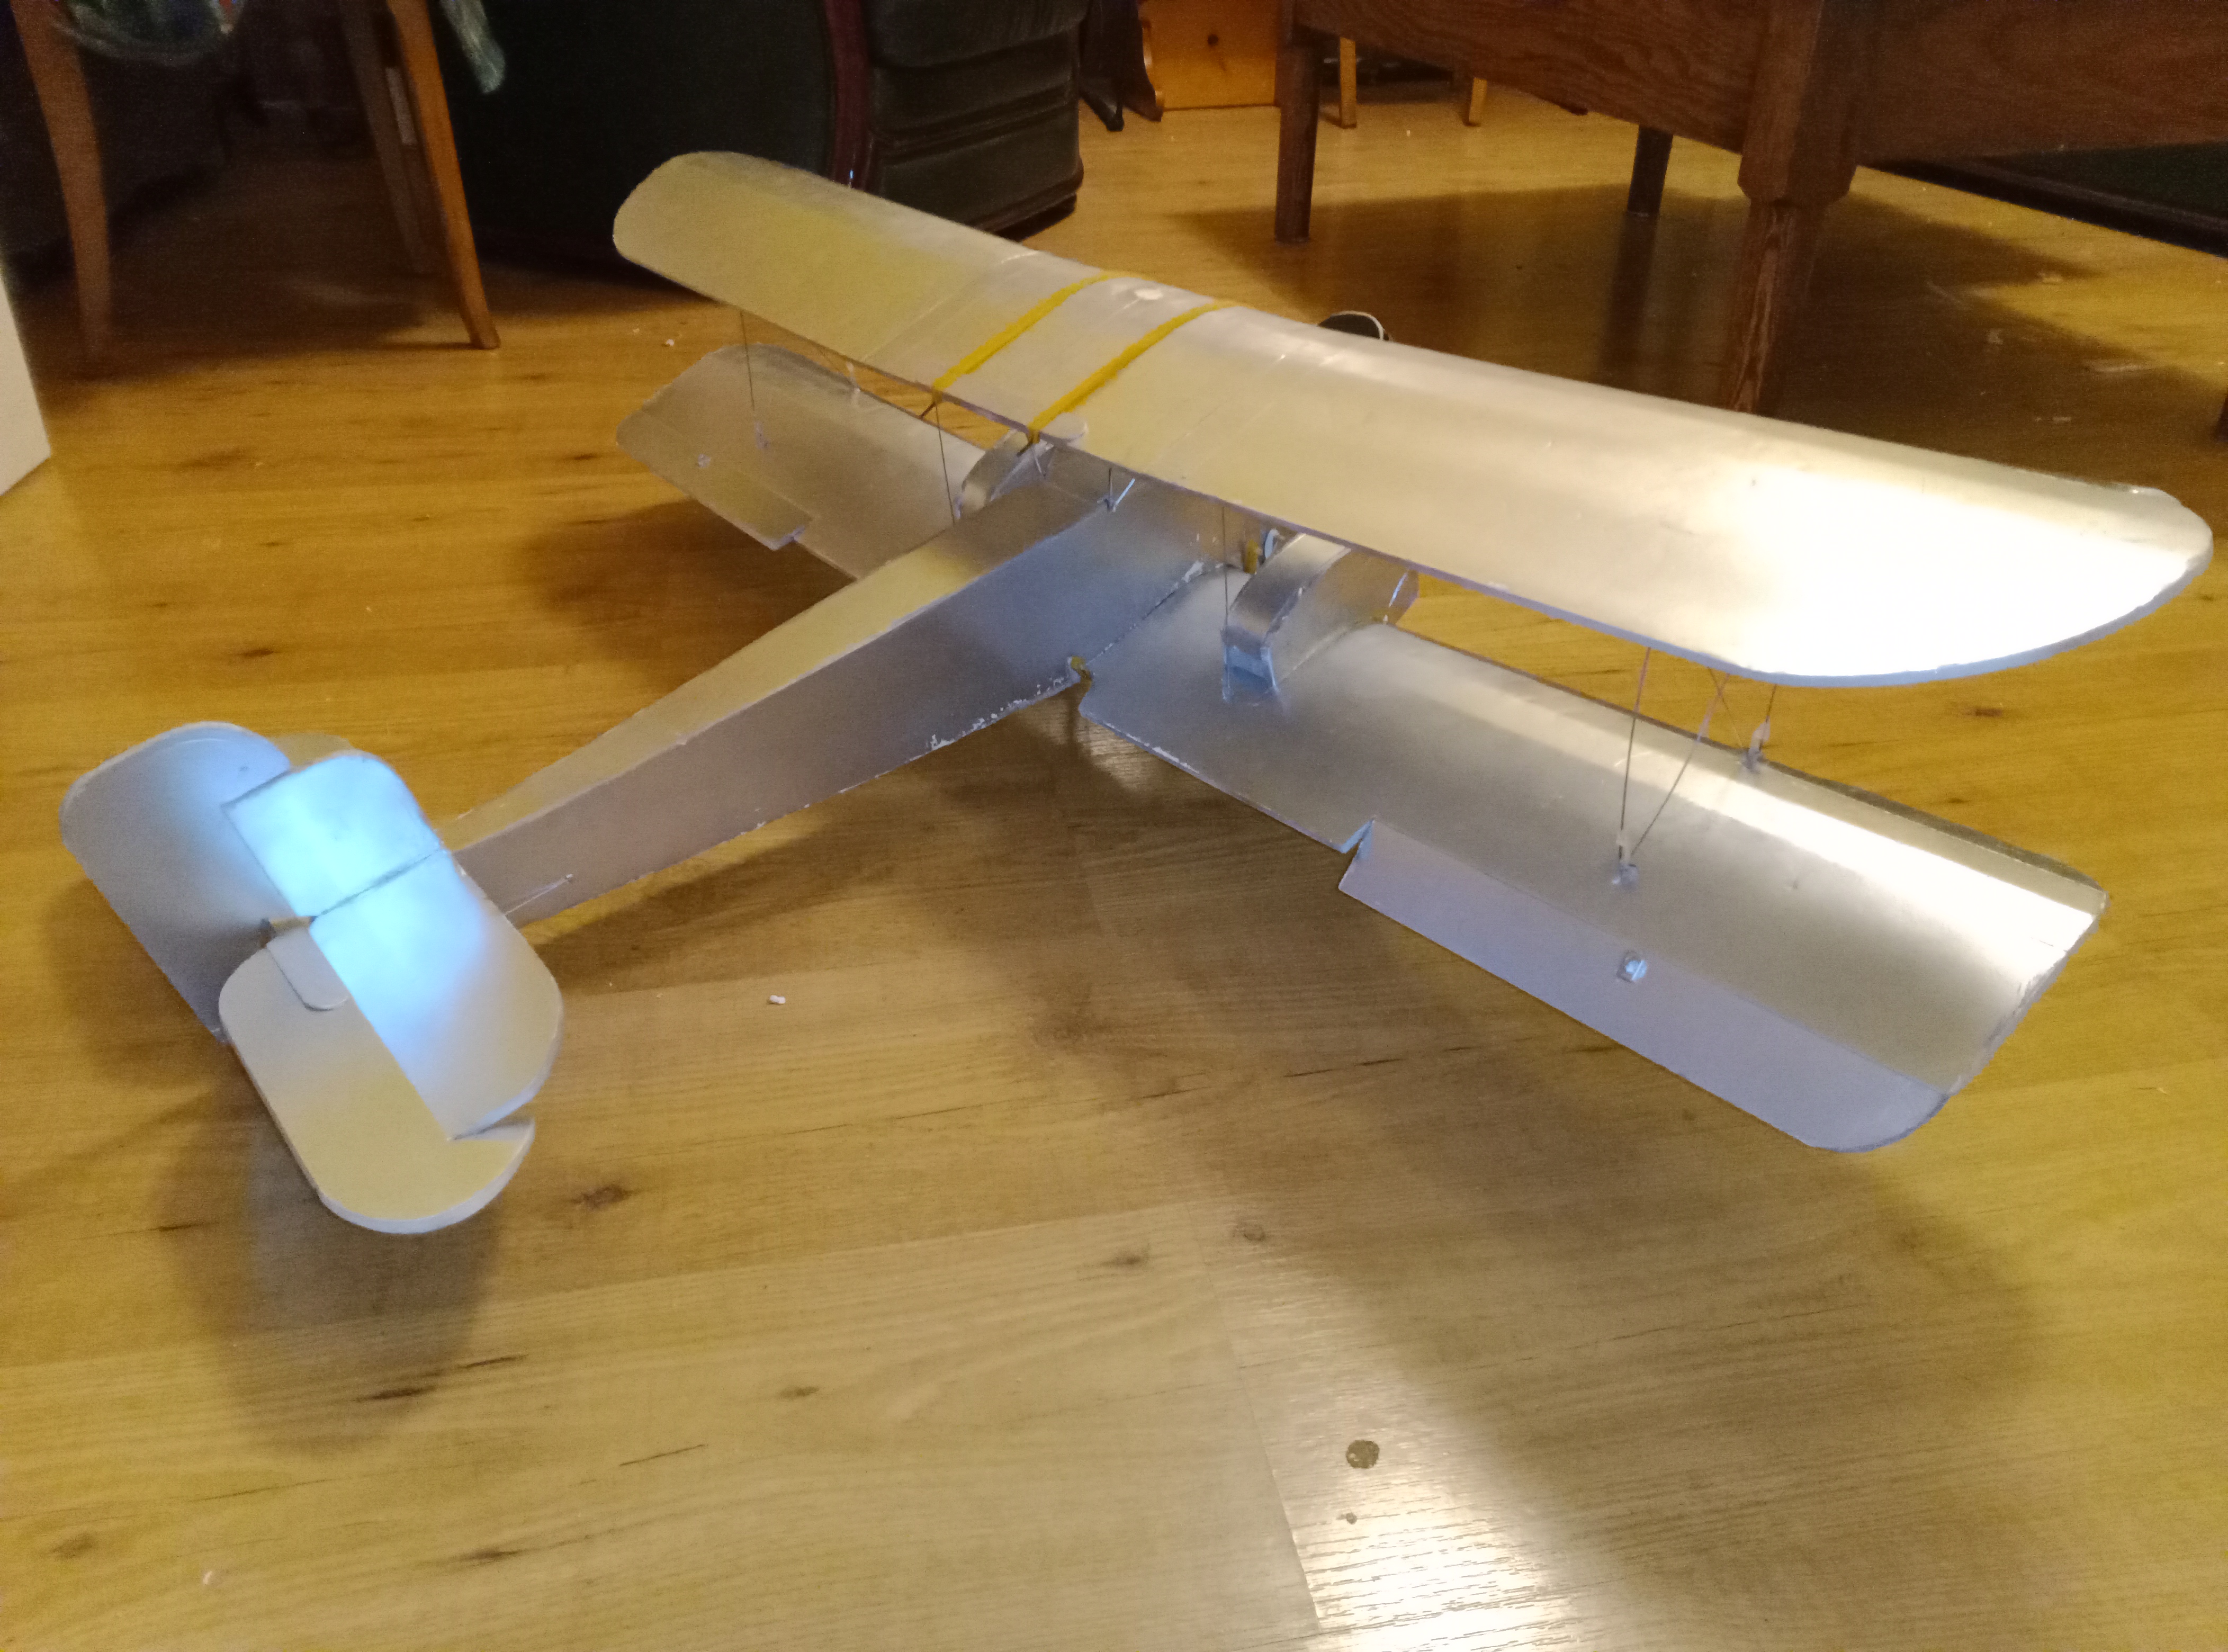
View from the back. Ailerons, rudder and elevator are all scale and do a very good job. I might add differential thrust one day, but the rudder does the job just fine for scale-type flying.
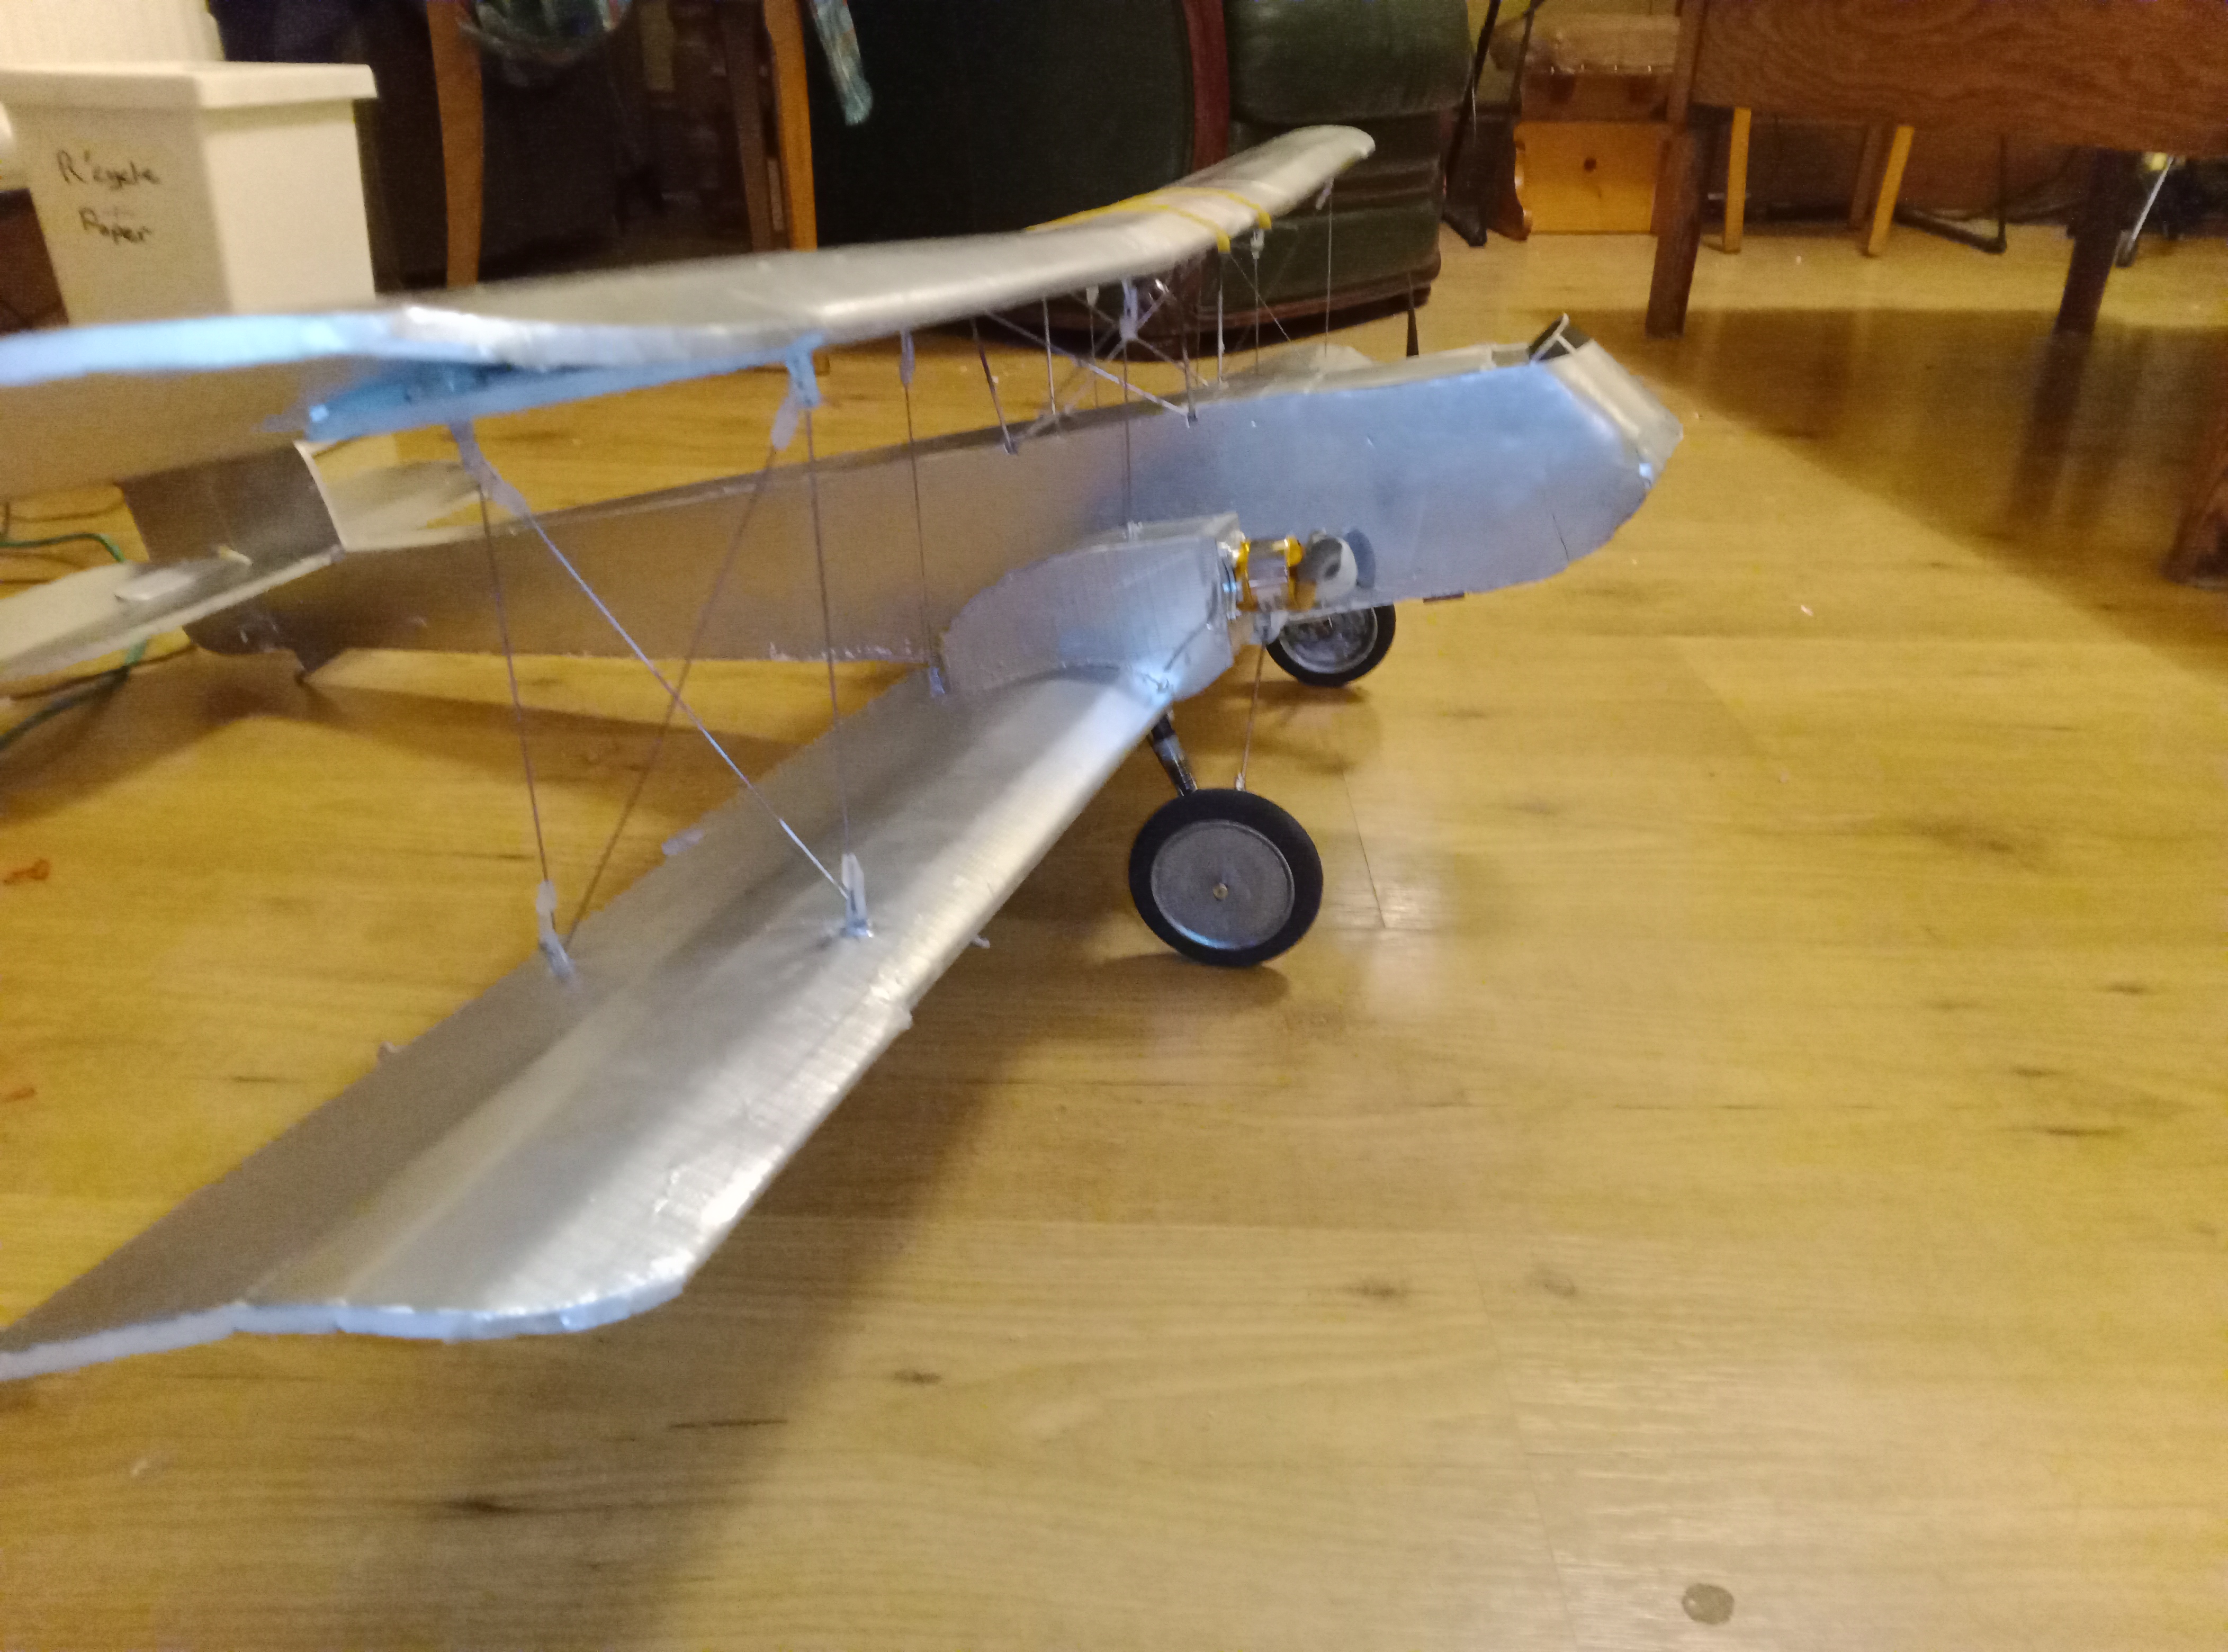
View from the side.
NEXT! My snub-nosed and fat bodied Avro 539 biplane. 10 years old and still going strong.
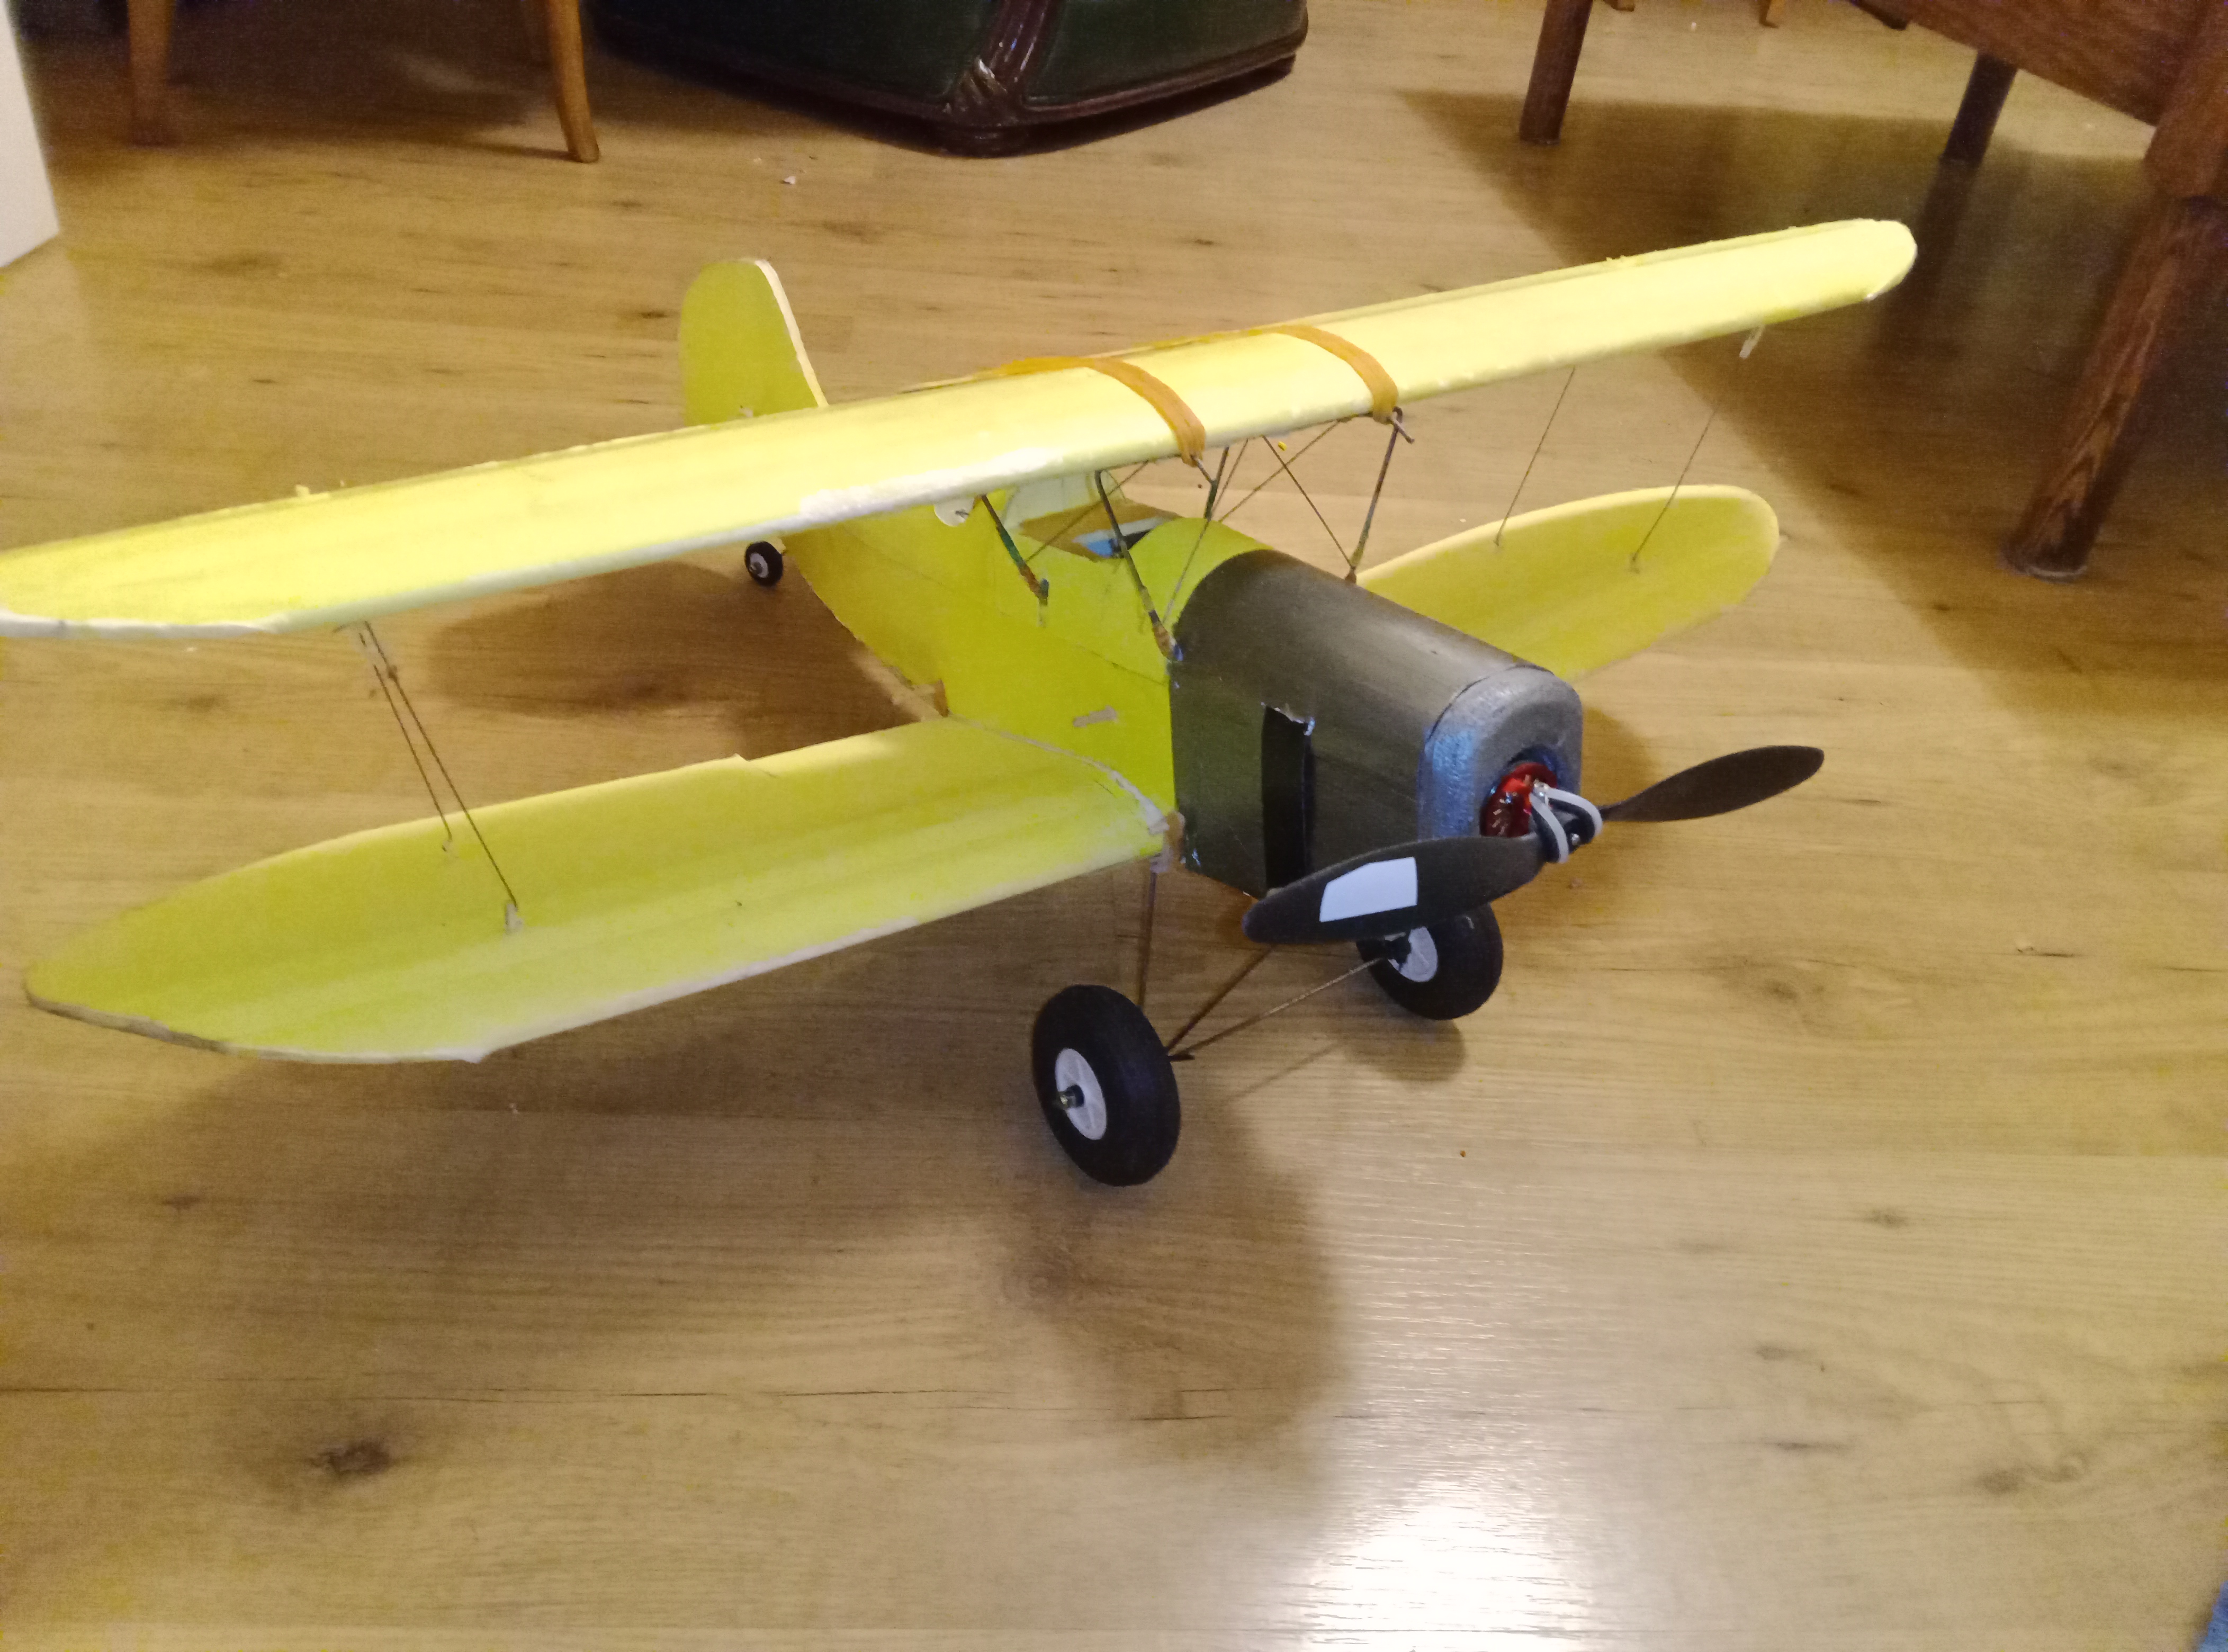
The fuselage was very wide, likely a result of the very low quality 3-view image I used to create the model plan.
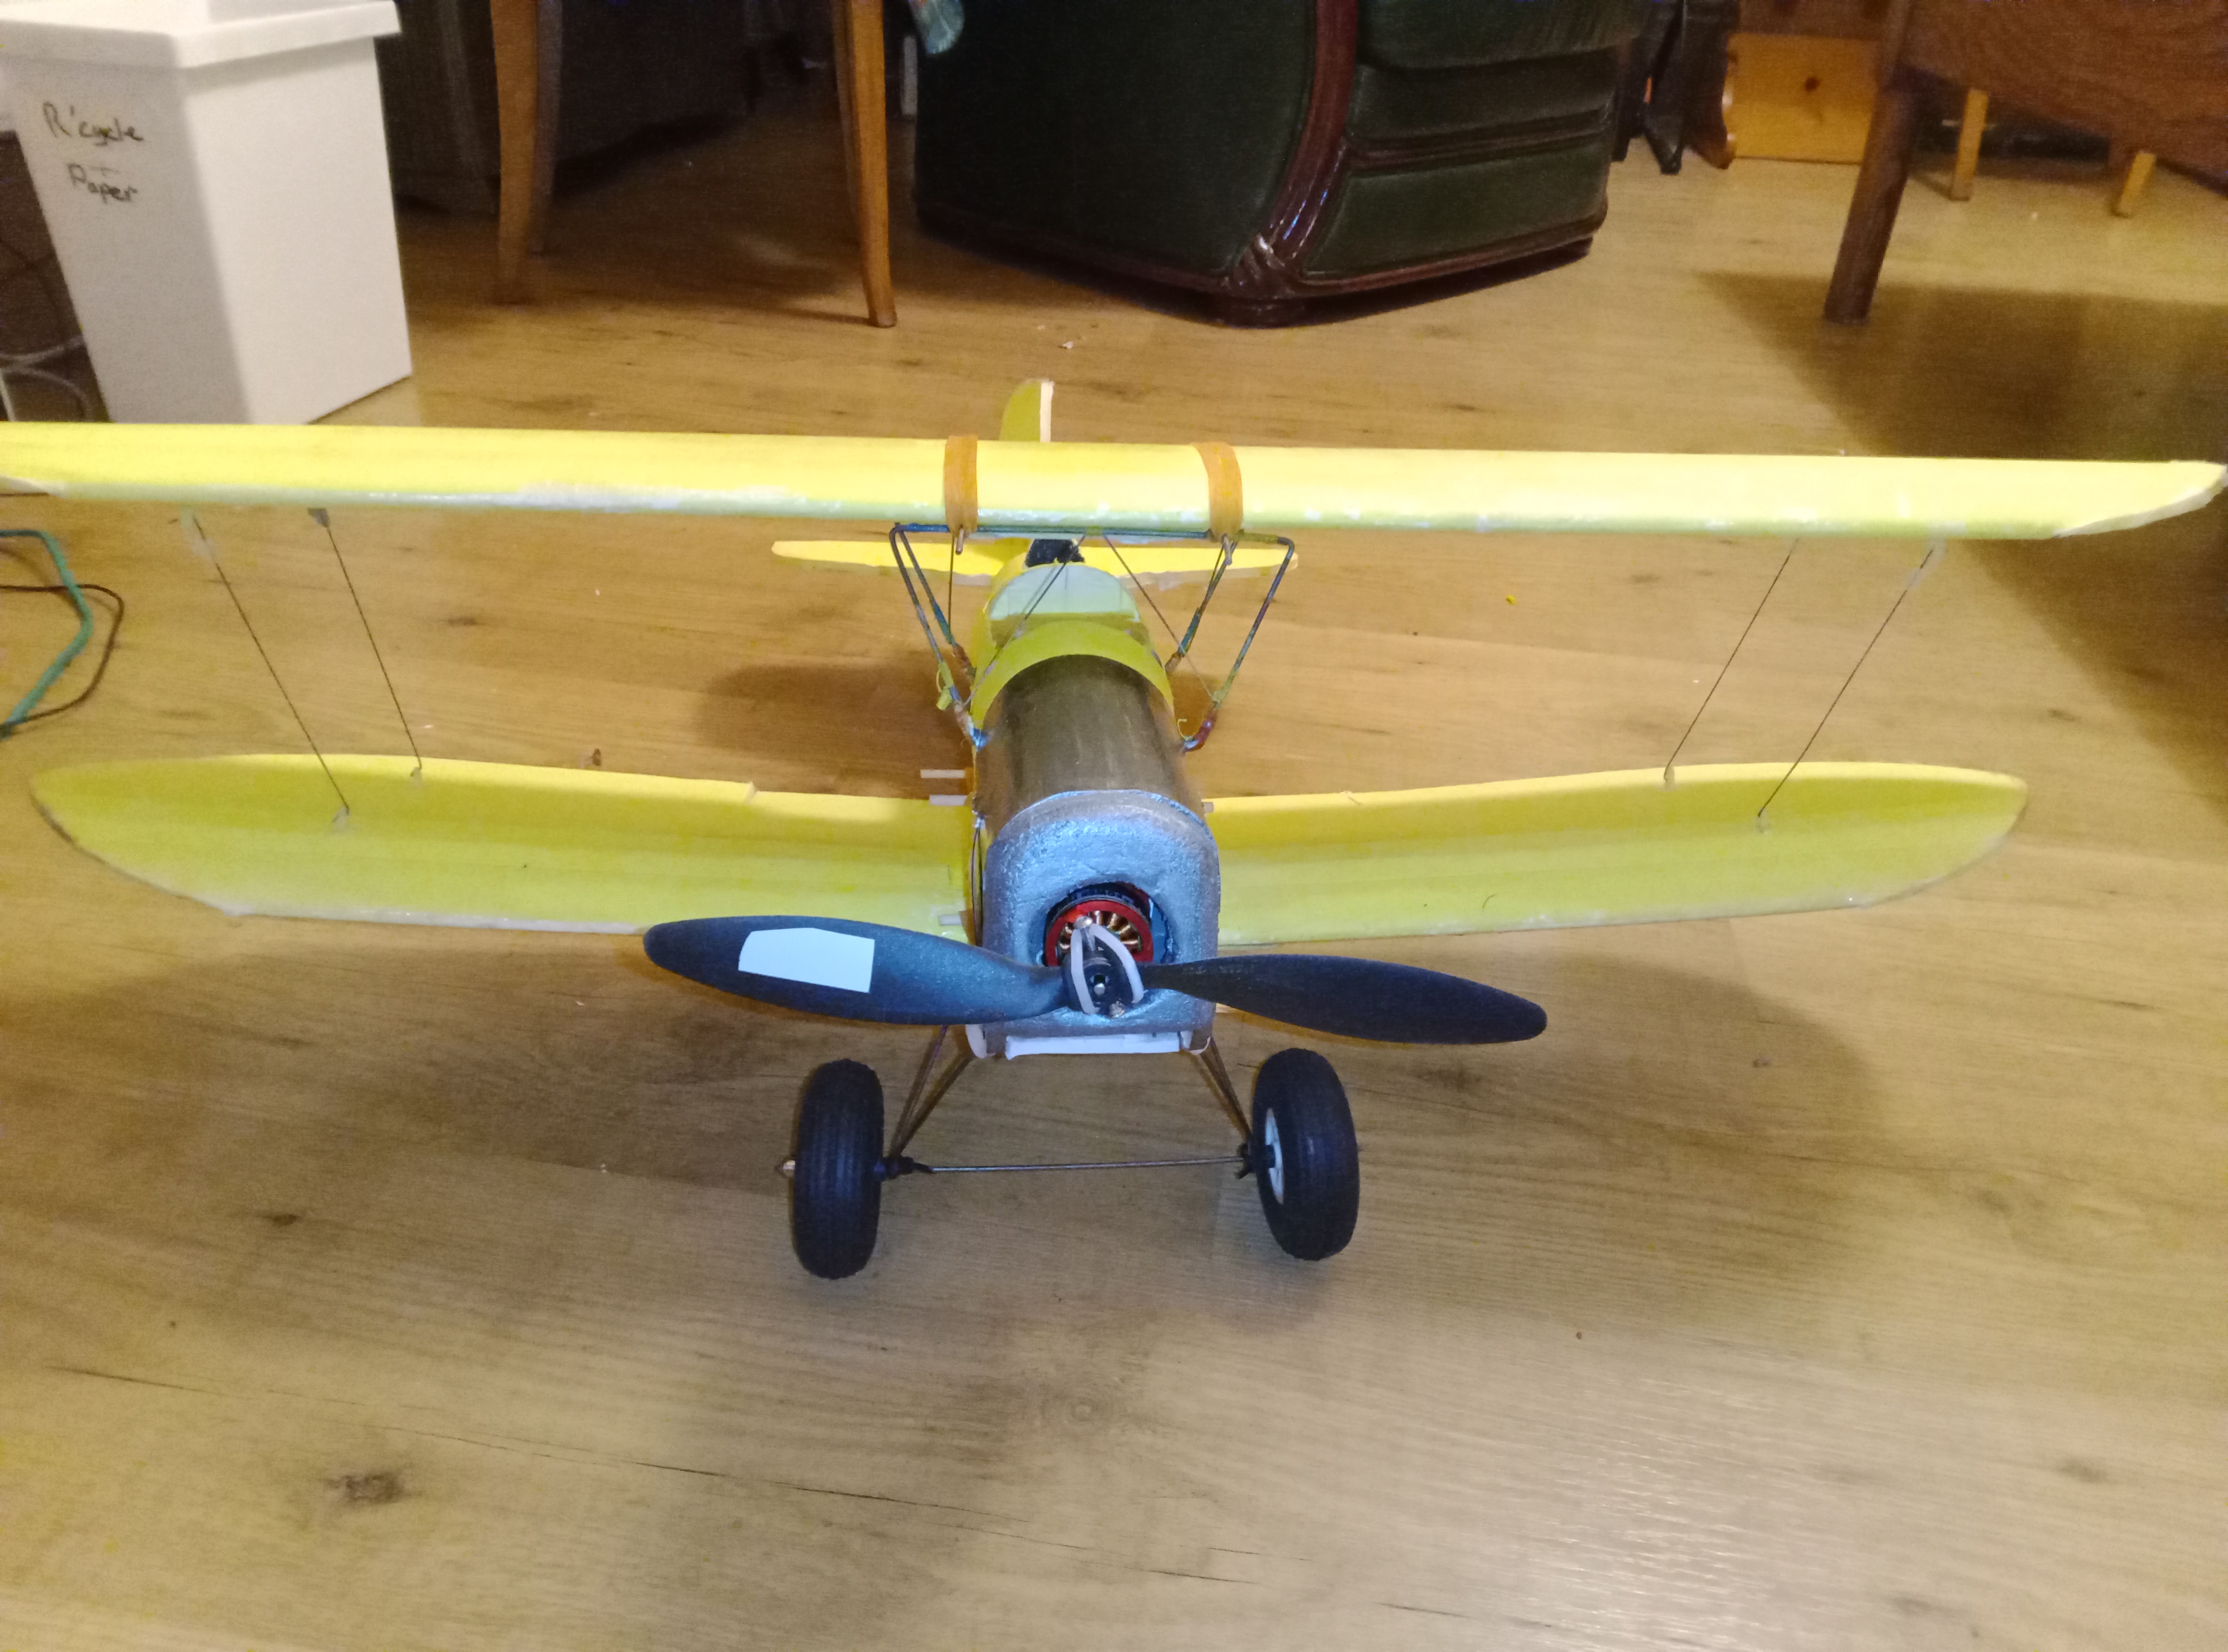
Some pretty radical surgery reduced the fuselage width giving the plane a much sleeker appearance. A longer nose eliminated the need for extra weight at the front, and is similar to later developments and alterations to the original plane. A new layered foam nose held on by magnets helps with the character of the plane, and a redesign of the undercarriage attachment was needed as it overlaps the battery area.
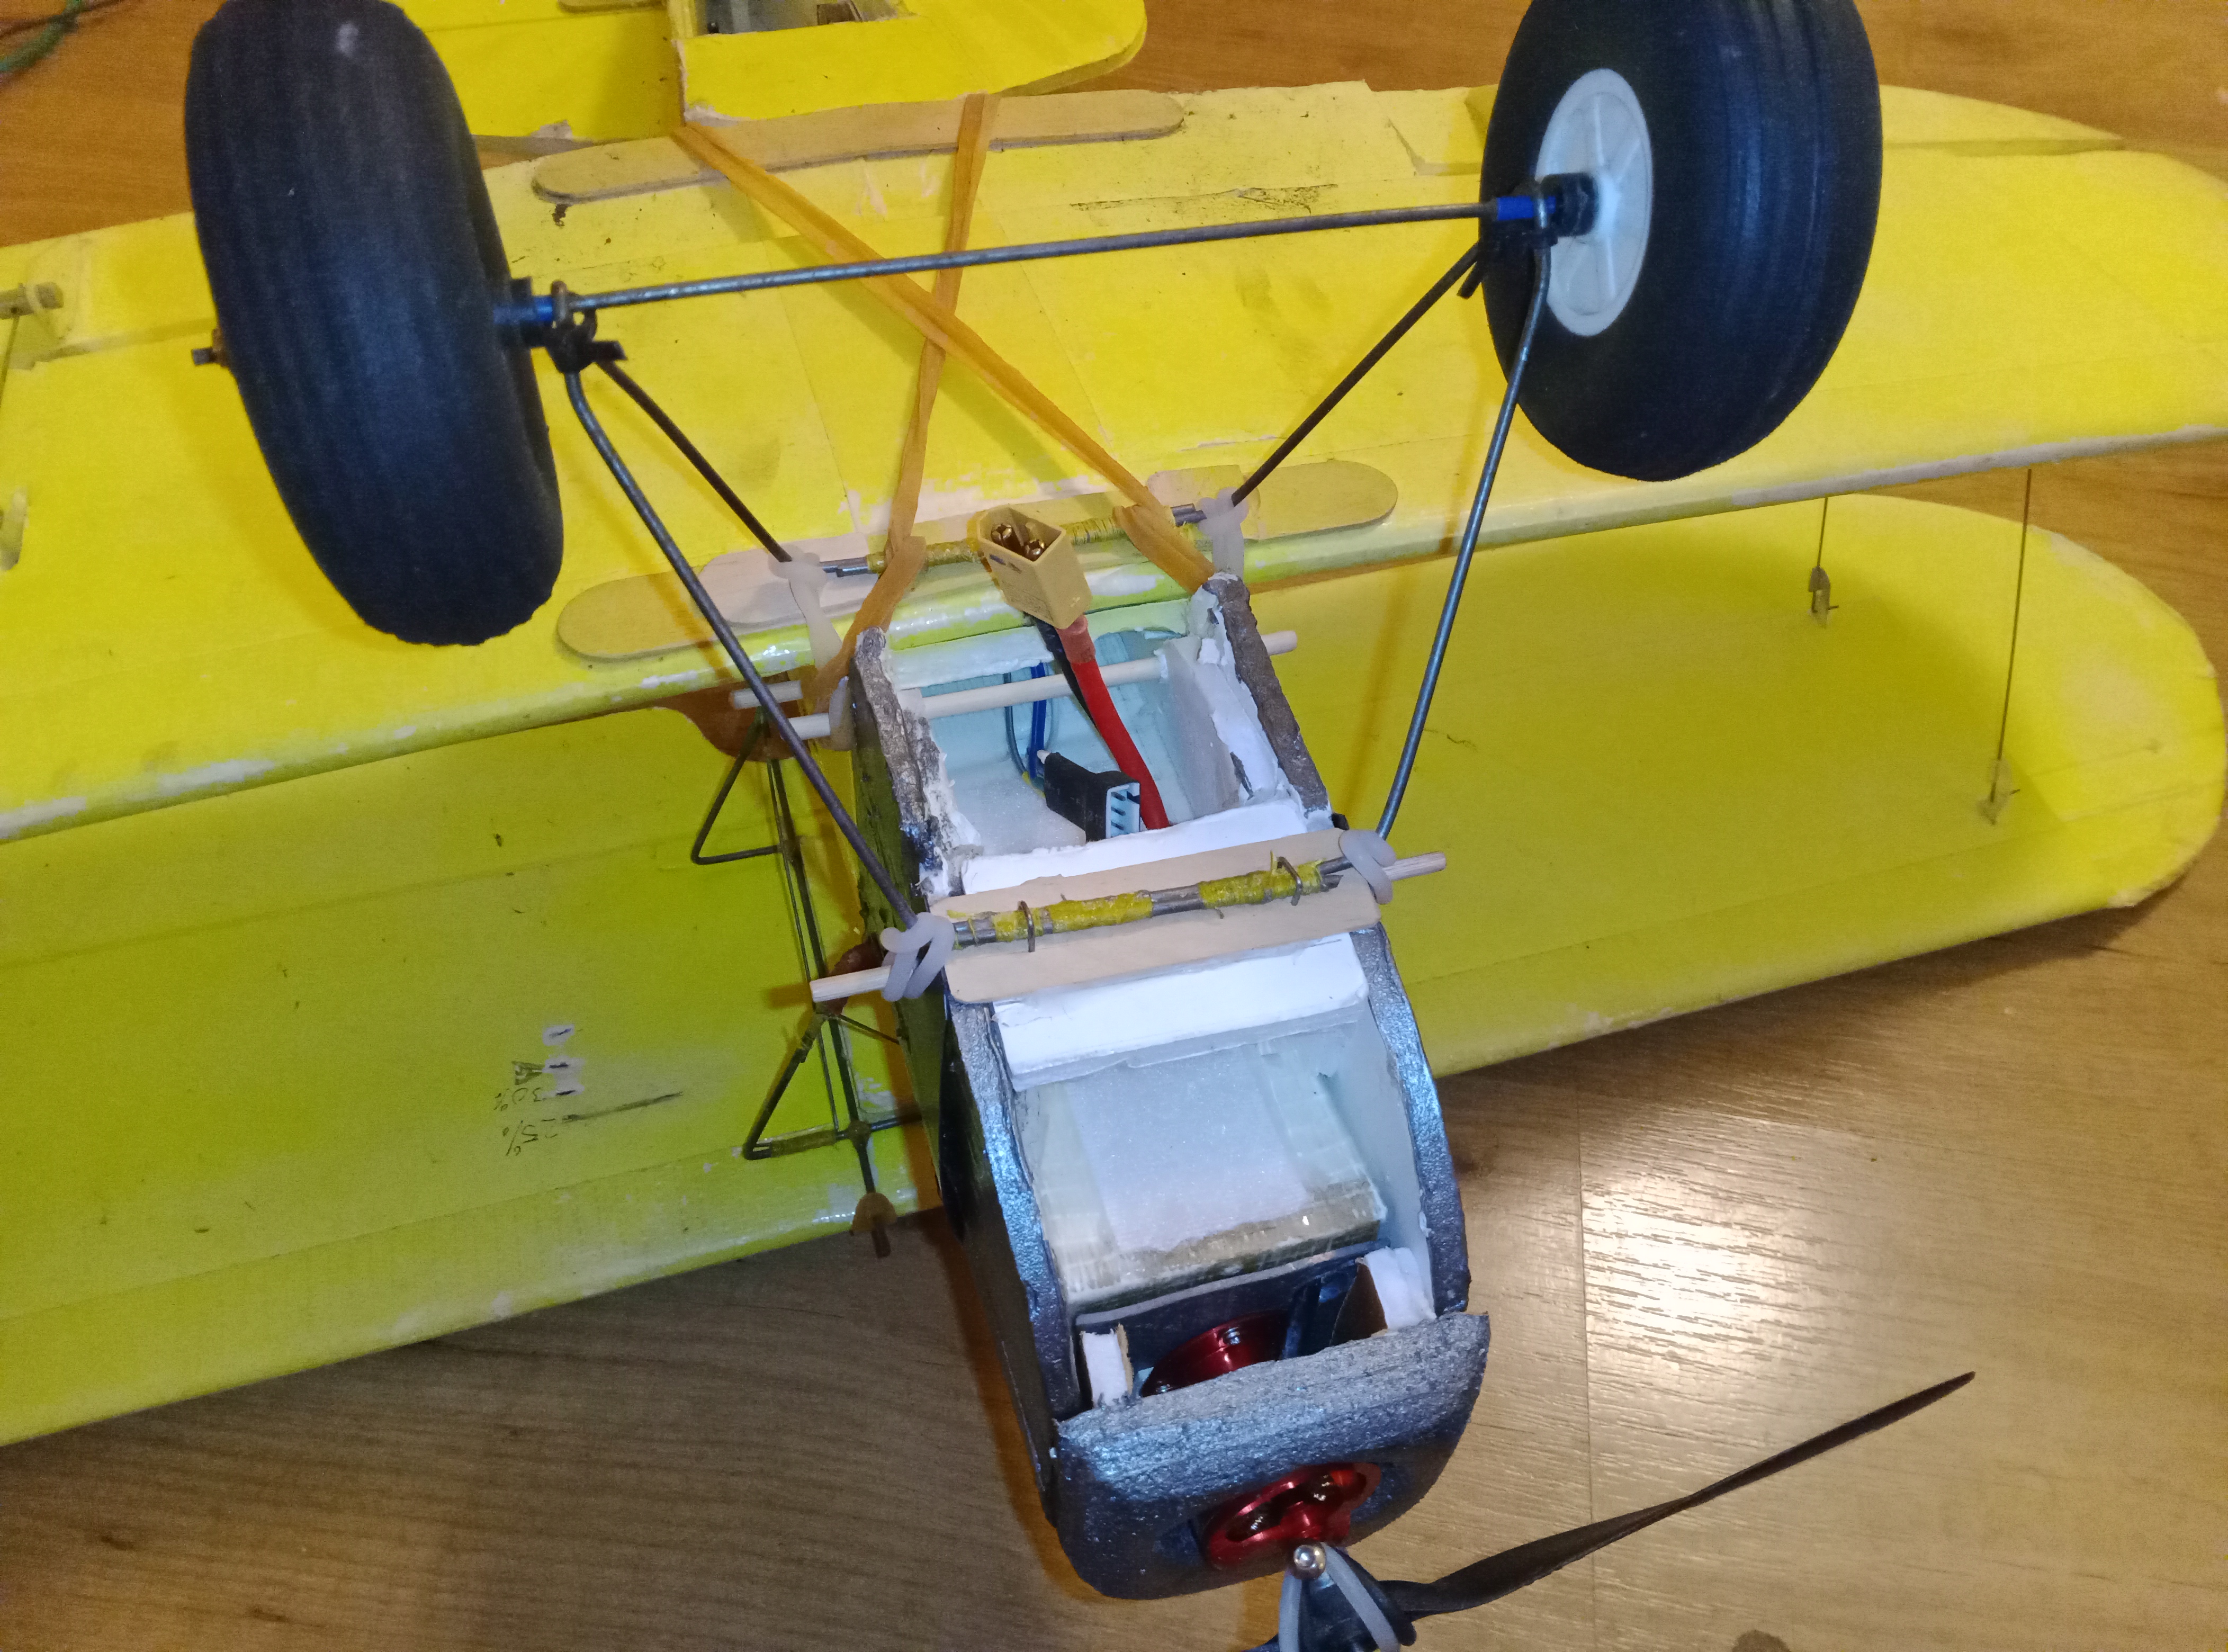
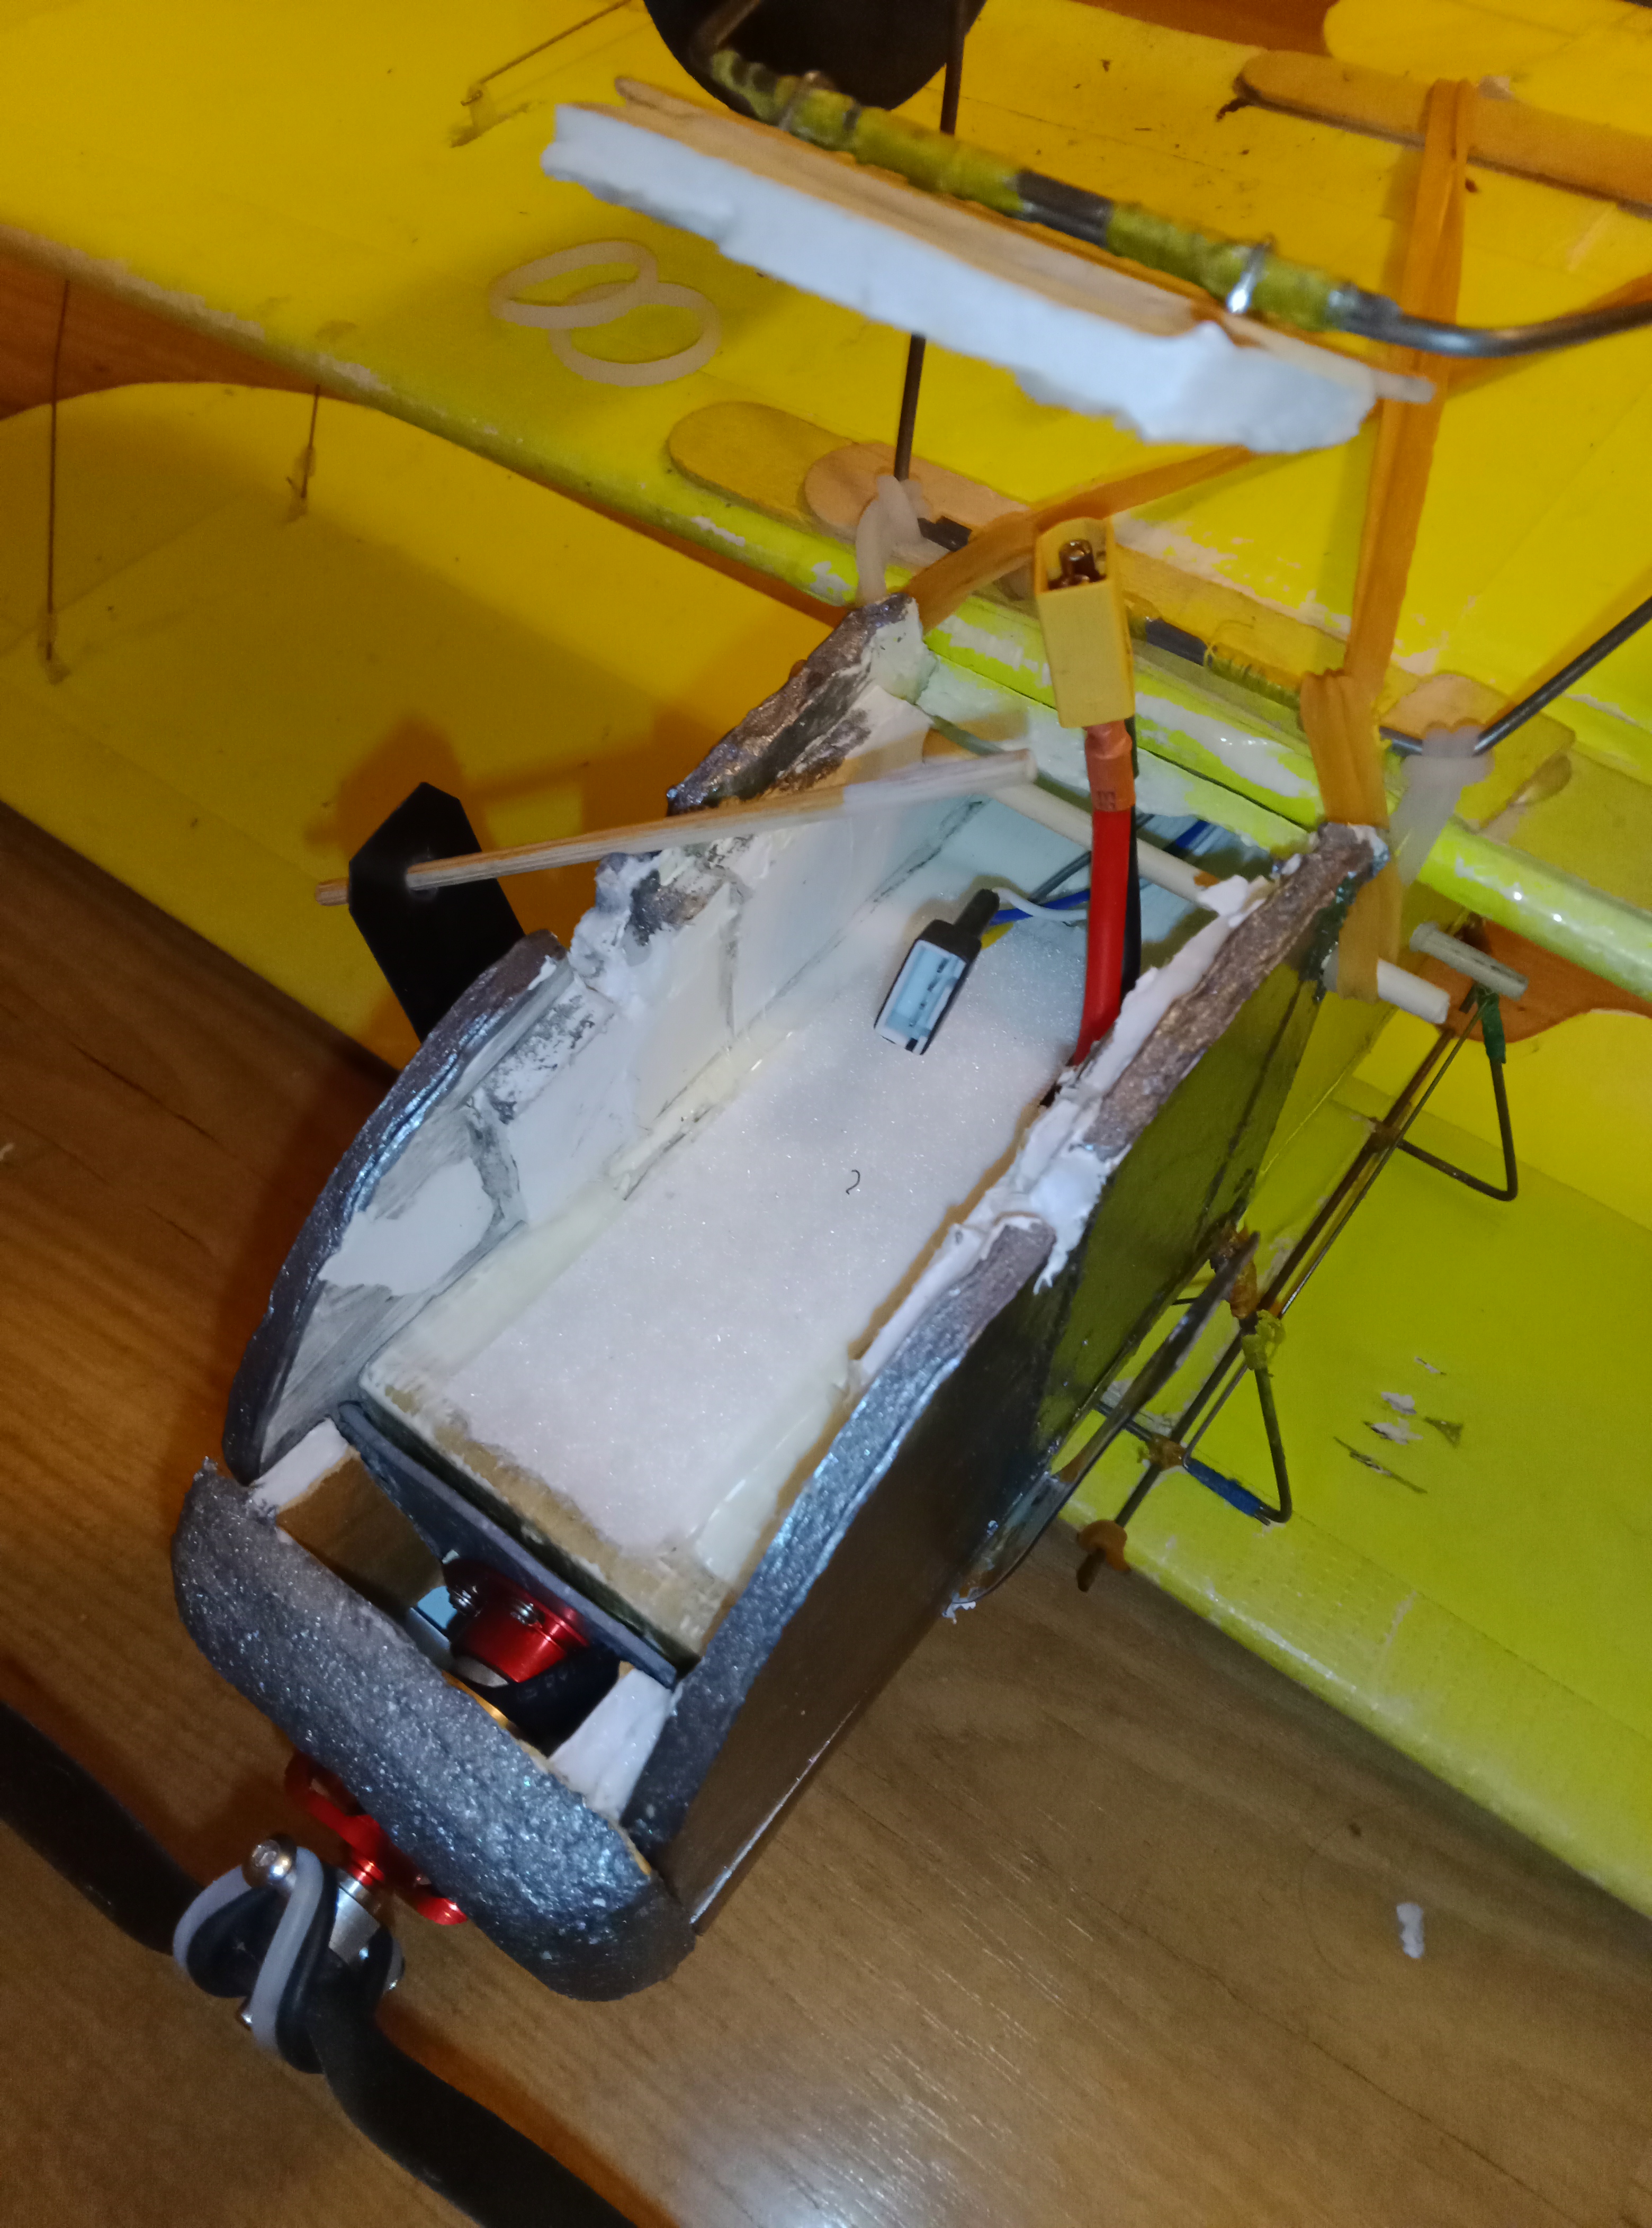
As with the Monocoupe, the undercarriage swings back to give access to the battery area. The foam holding the skewer in place wasn't strong enough to cope with landing knocks, and putting a skewer further up the fuselage would have cut across the battery area. My solution was a length of hard fibreglass packing tape wrapped across the top of the fuselage box. This sits outside the fuselage sides, and is a little untidy but it holds everything in place just fine.
NEXT! A sub 250 gram mini style plane.
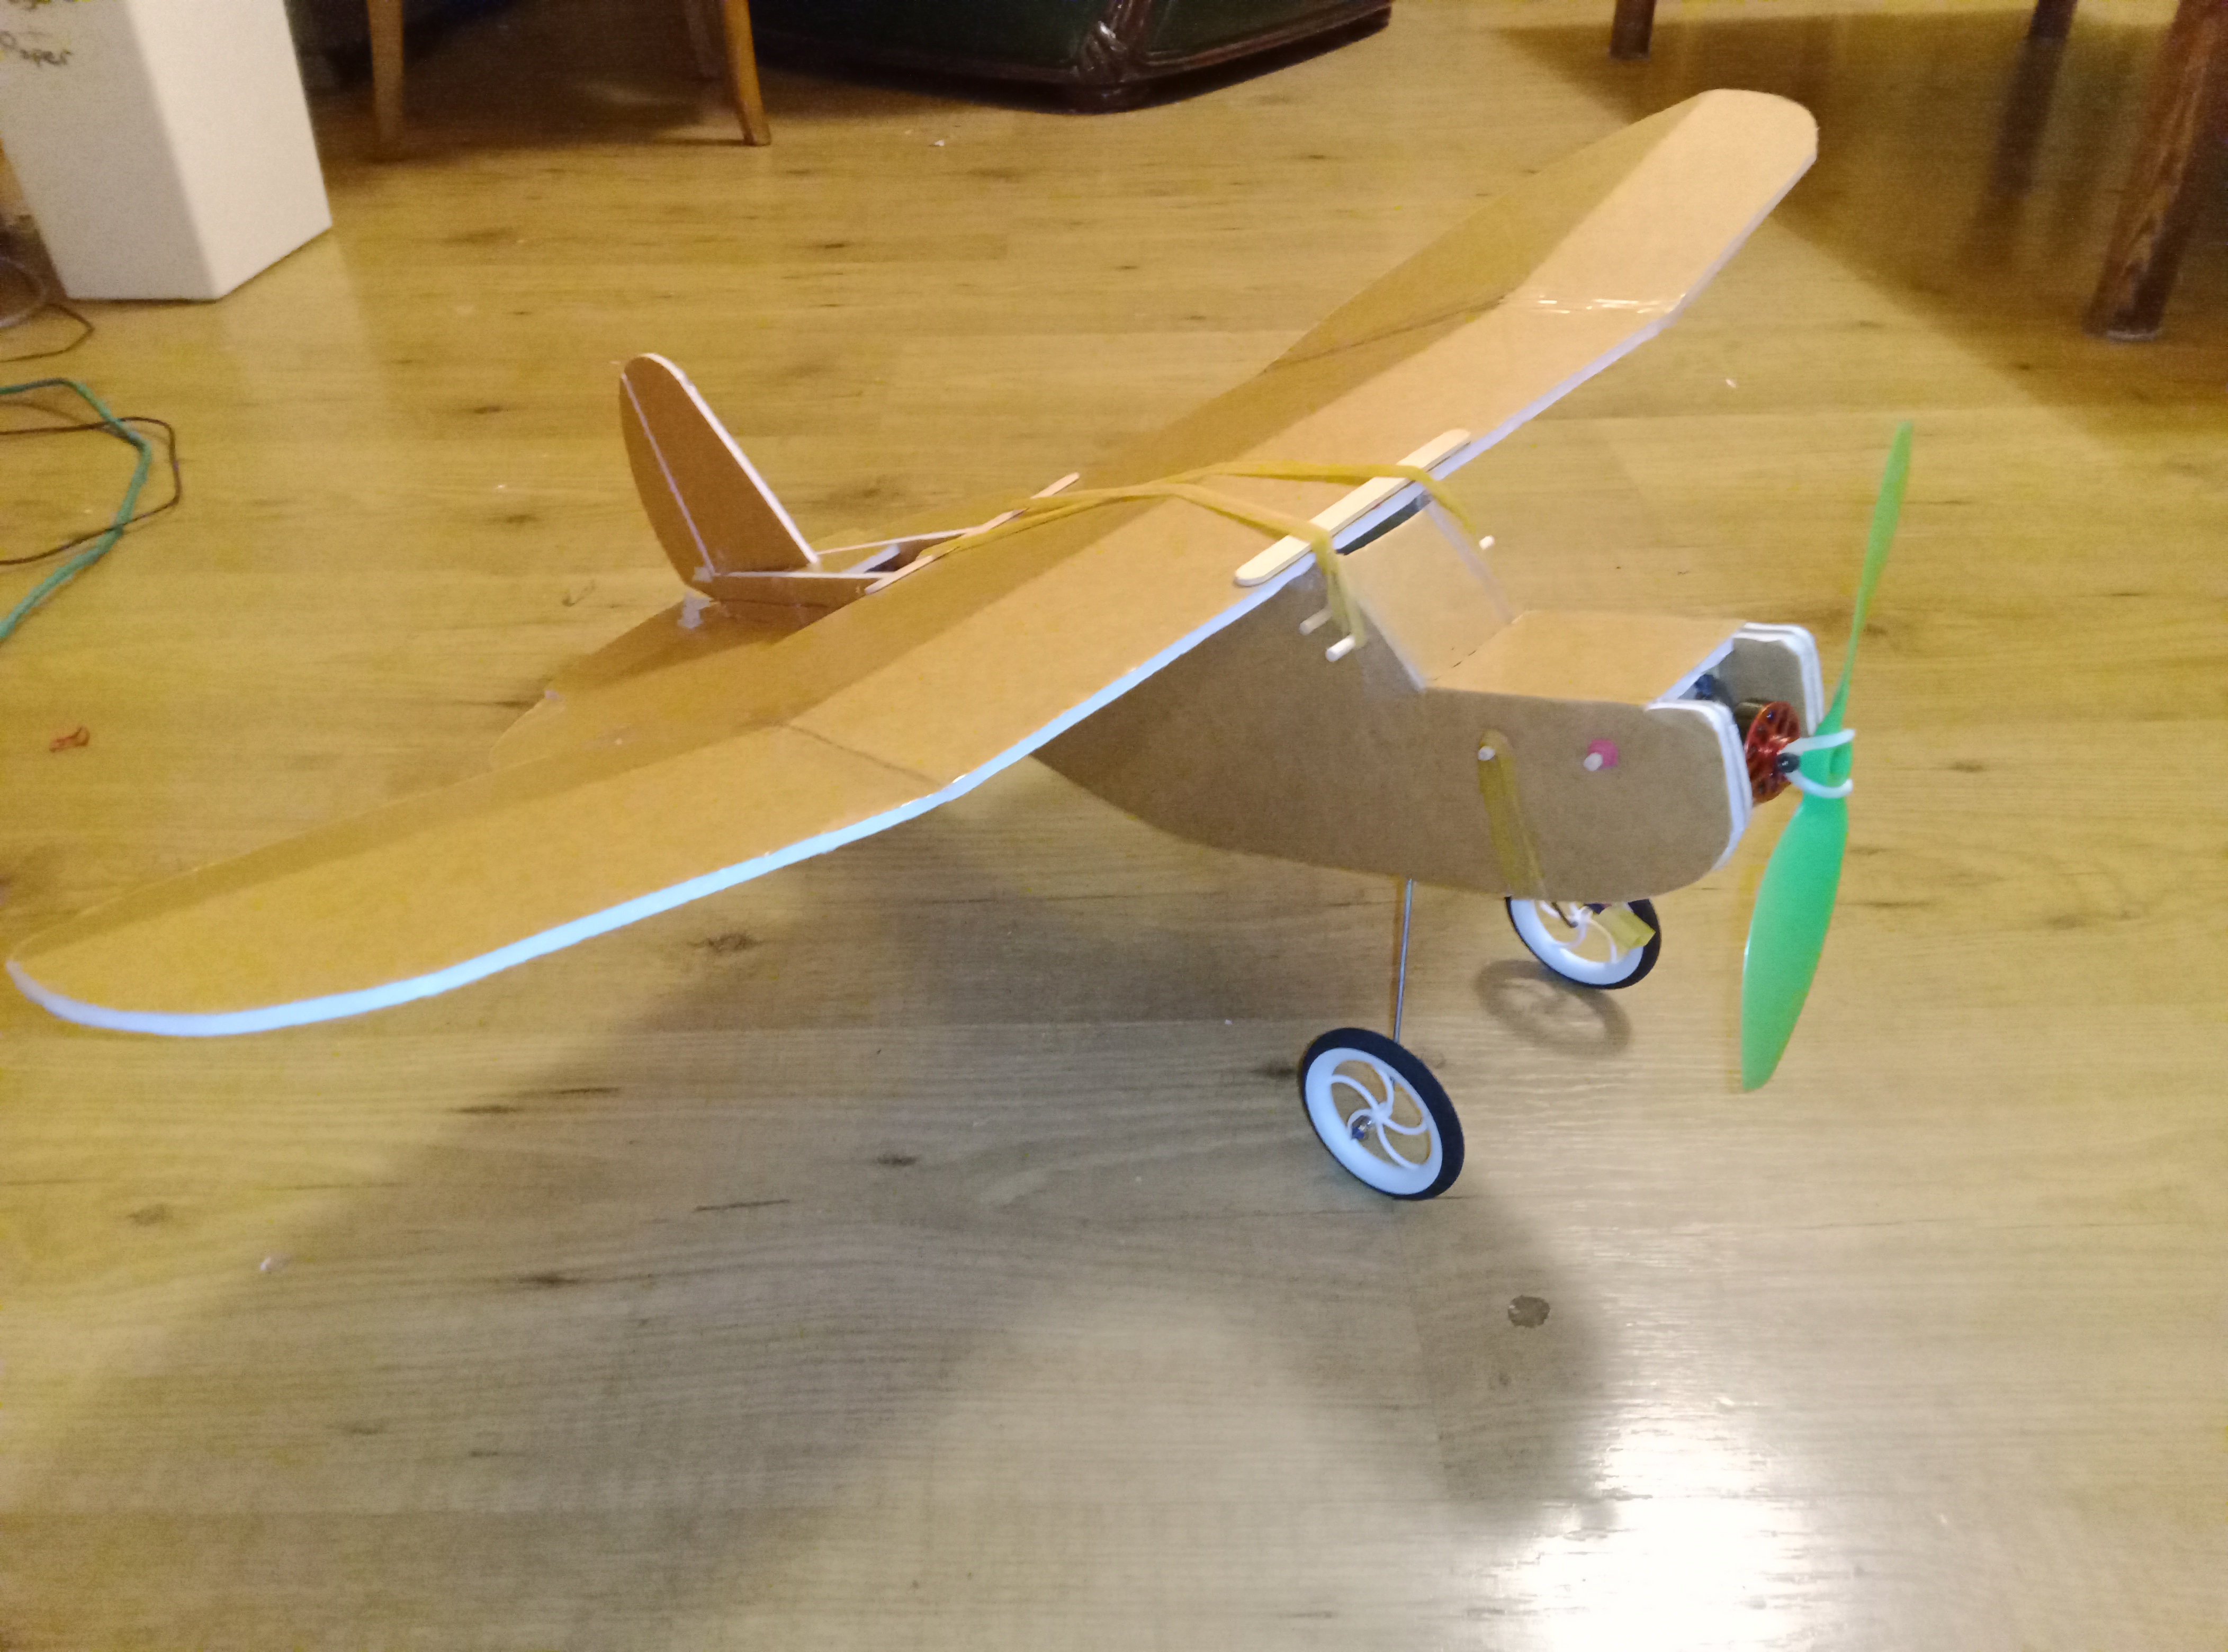
In line with the other minis being built by Flite Test I built a mini/midi version of my Old Fogey adaptation, the Bush Fogey. This floats along on a 2s battery and just comes in under the weight limit without undercarriage. More of a midi than a mini, a tiny further reduction in scale would bring it into the sub 250 gram category with undercarriage.

Built in the 'proper' Flite Test foamboard, the depth of the fuselage at the tail would best be increased for a little more strength and durability.
NEXT! Build the kits!
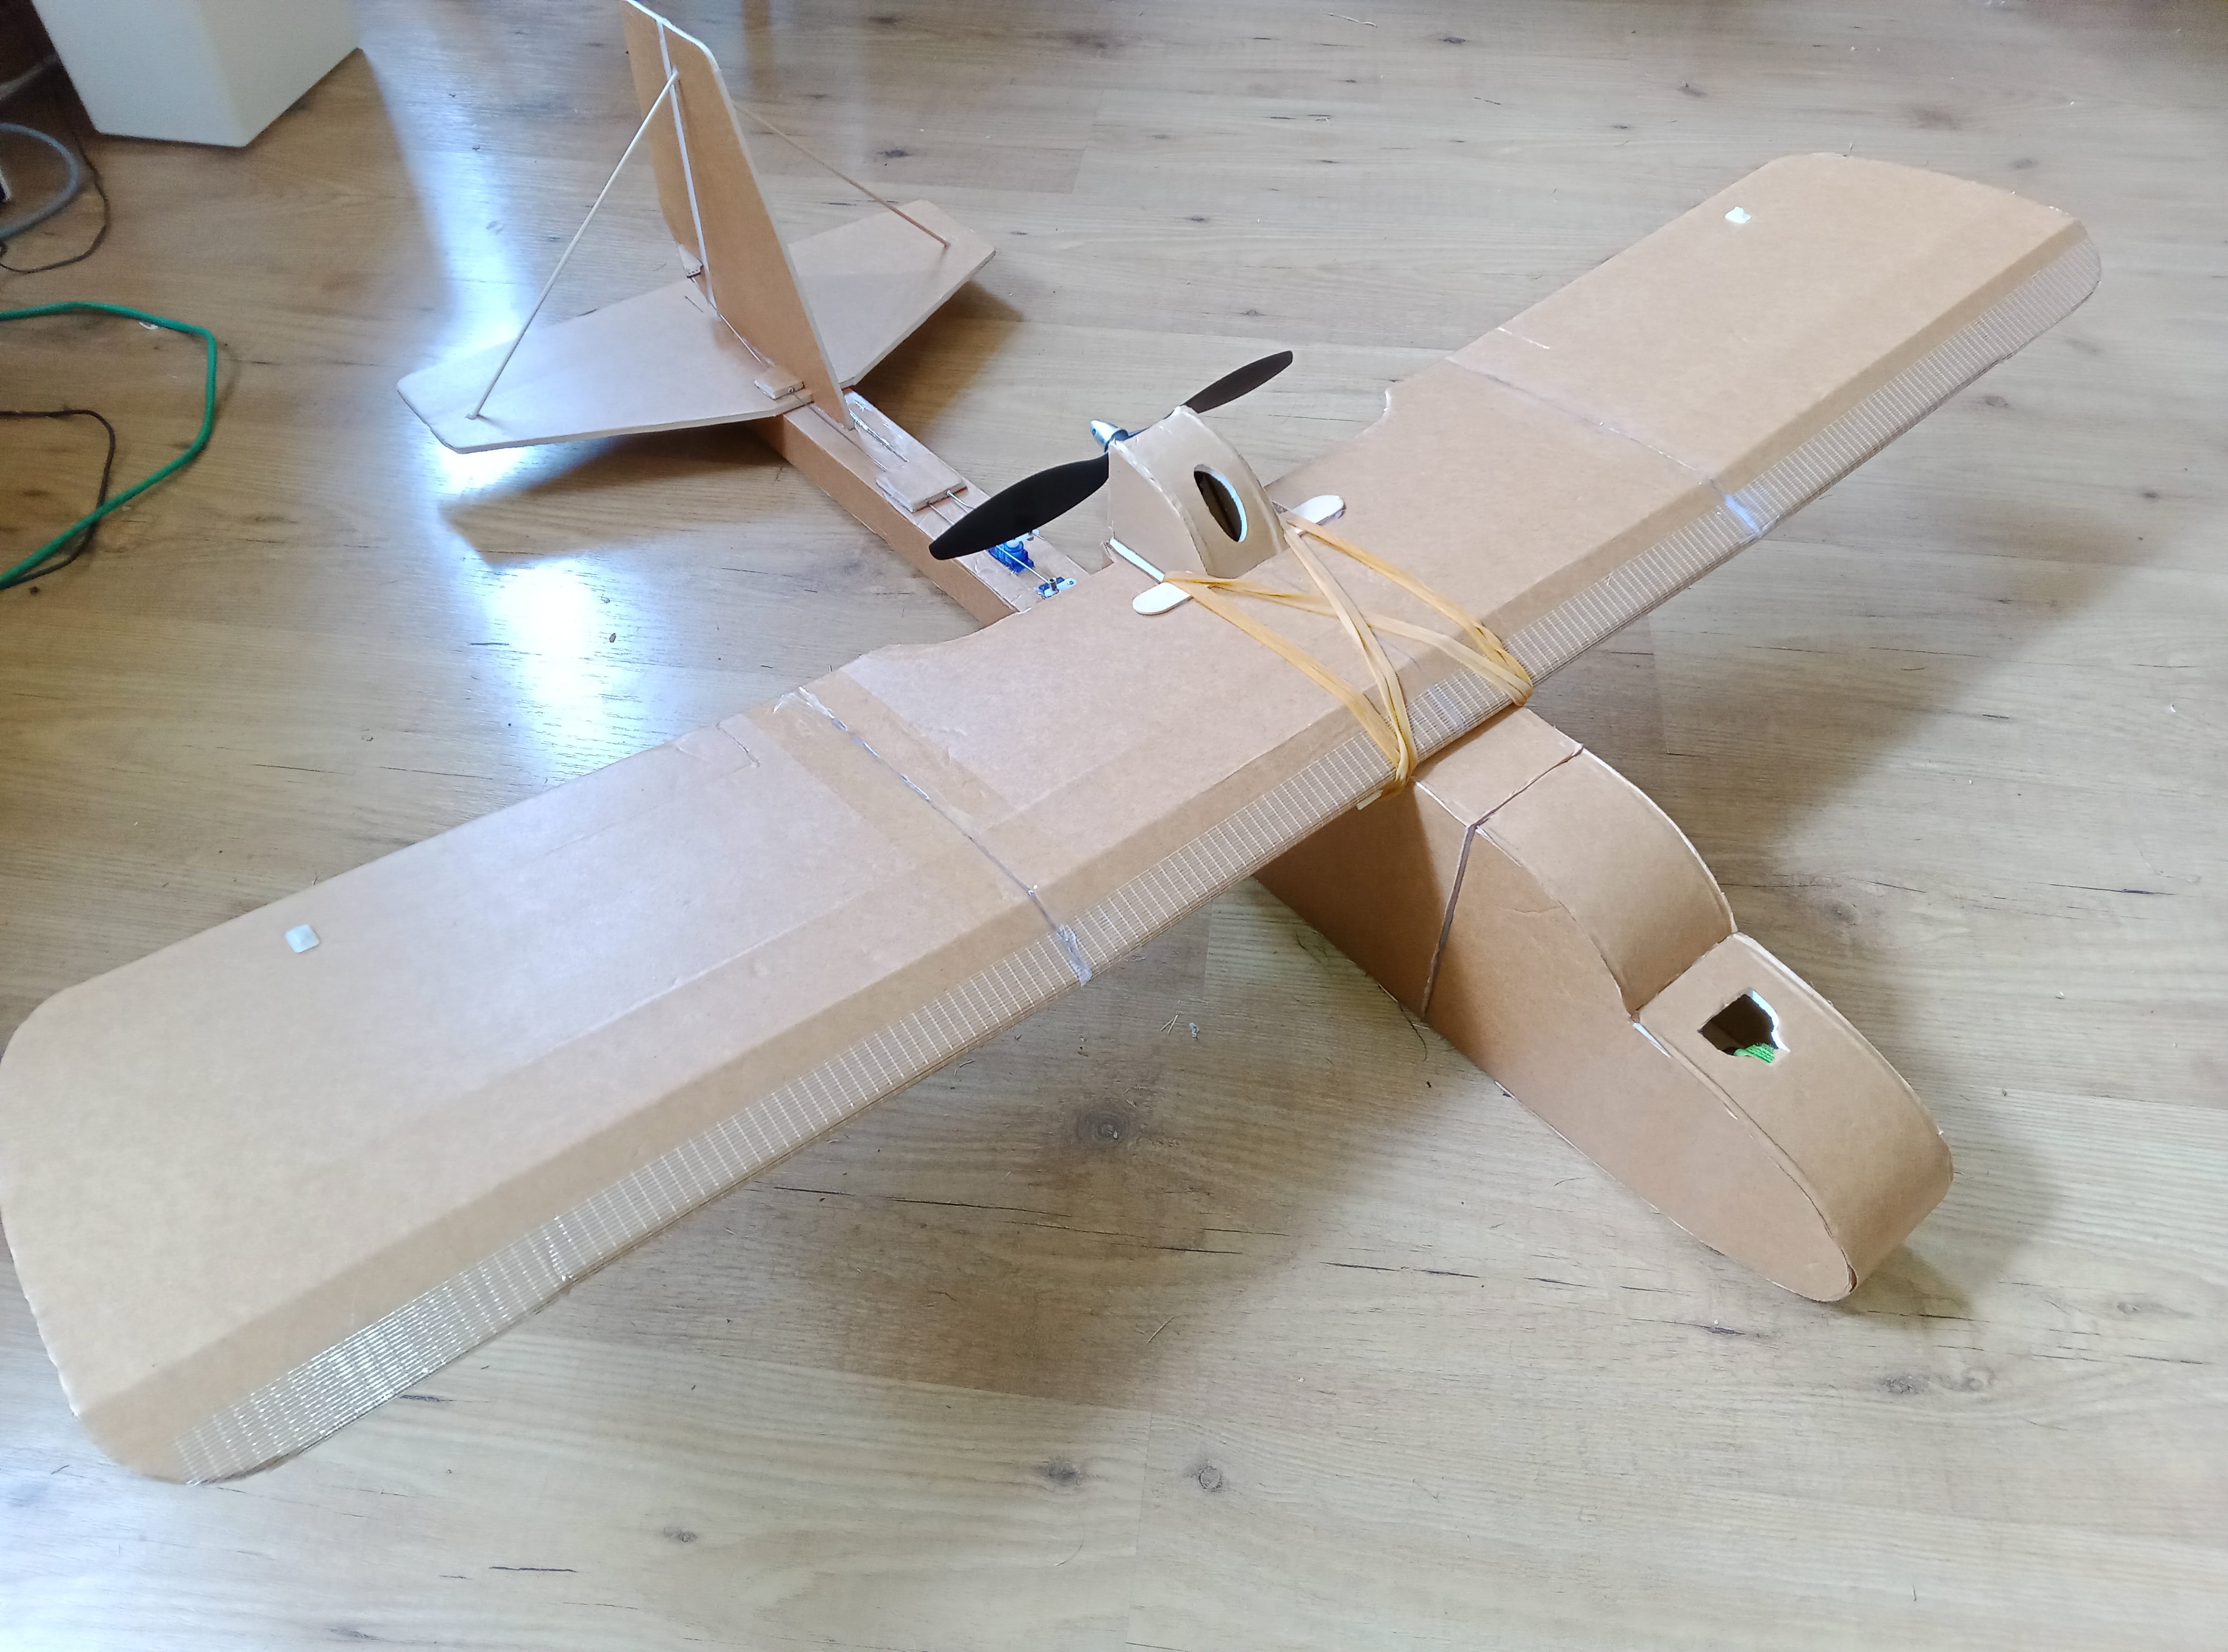
I built two Explorer pushers, one scaled down a little for more confined space flying and the other 'full size' but I chopped the wings to make it easier to get into my car. Both flew fine but what a racket compared to my other near silent flyers.
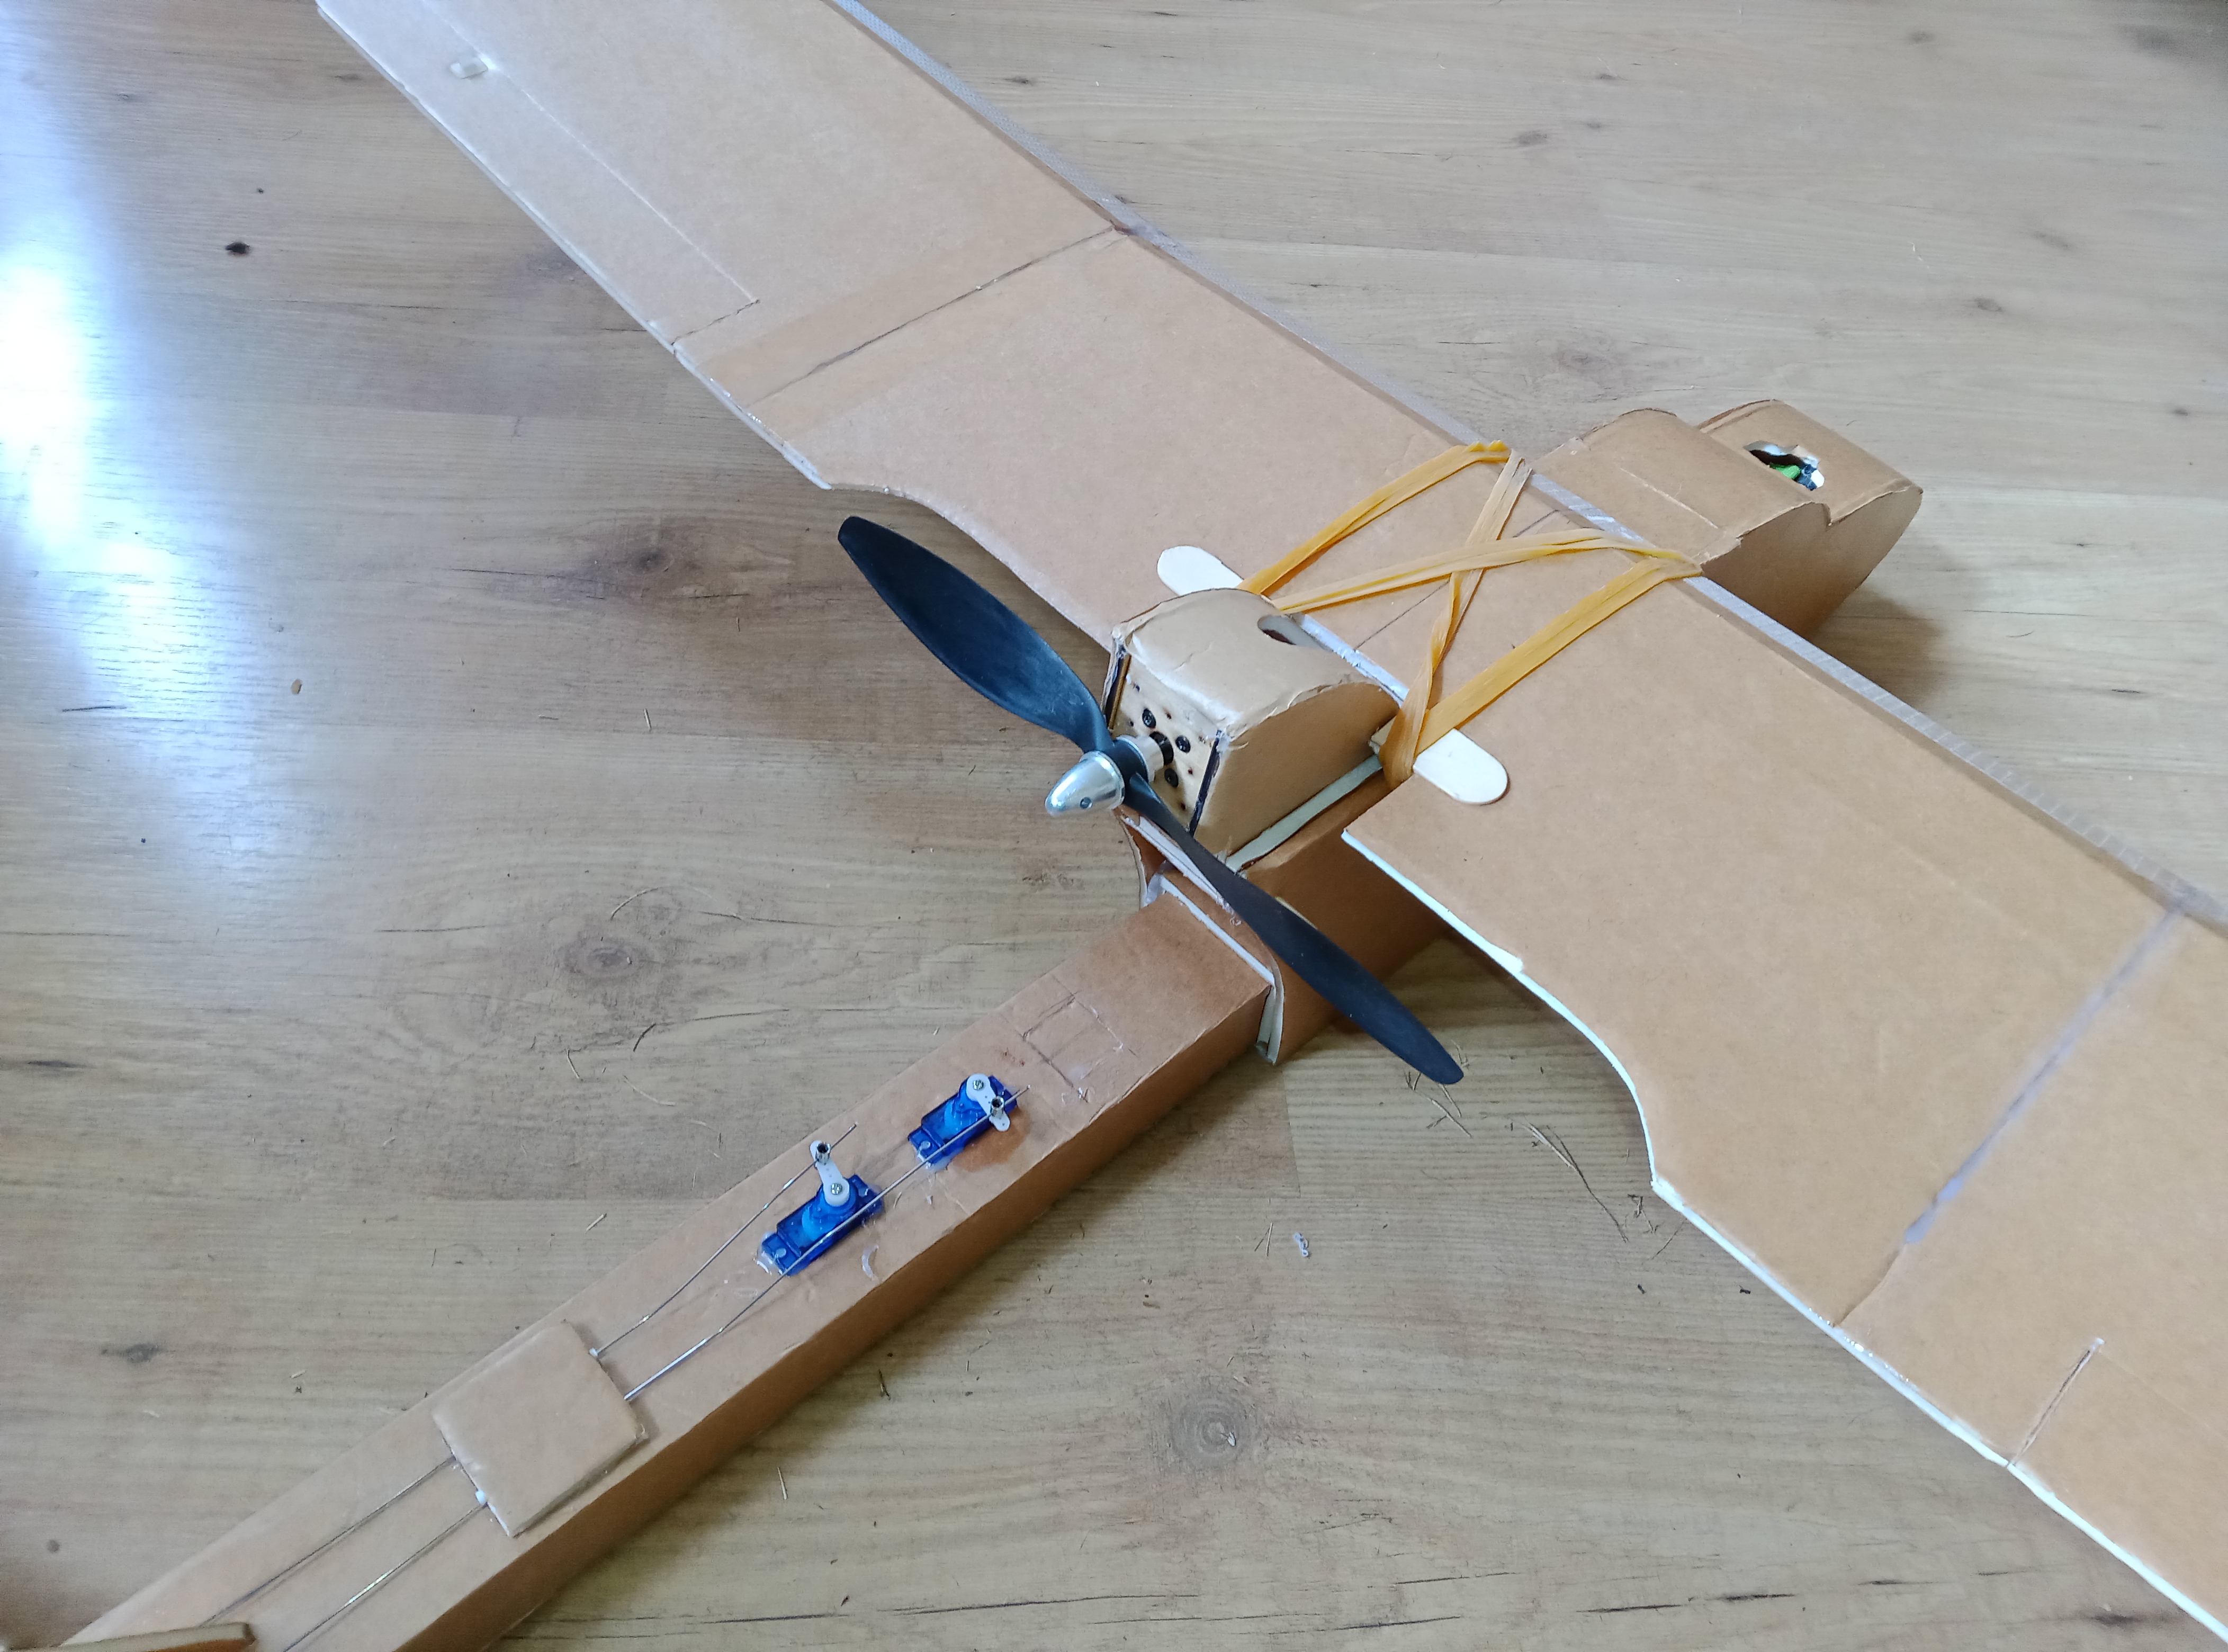
The 'big' Explorer stayed a pusher, but with the wing profile sculpted away from the prop to reduce noise.
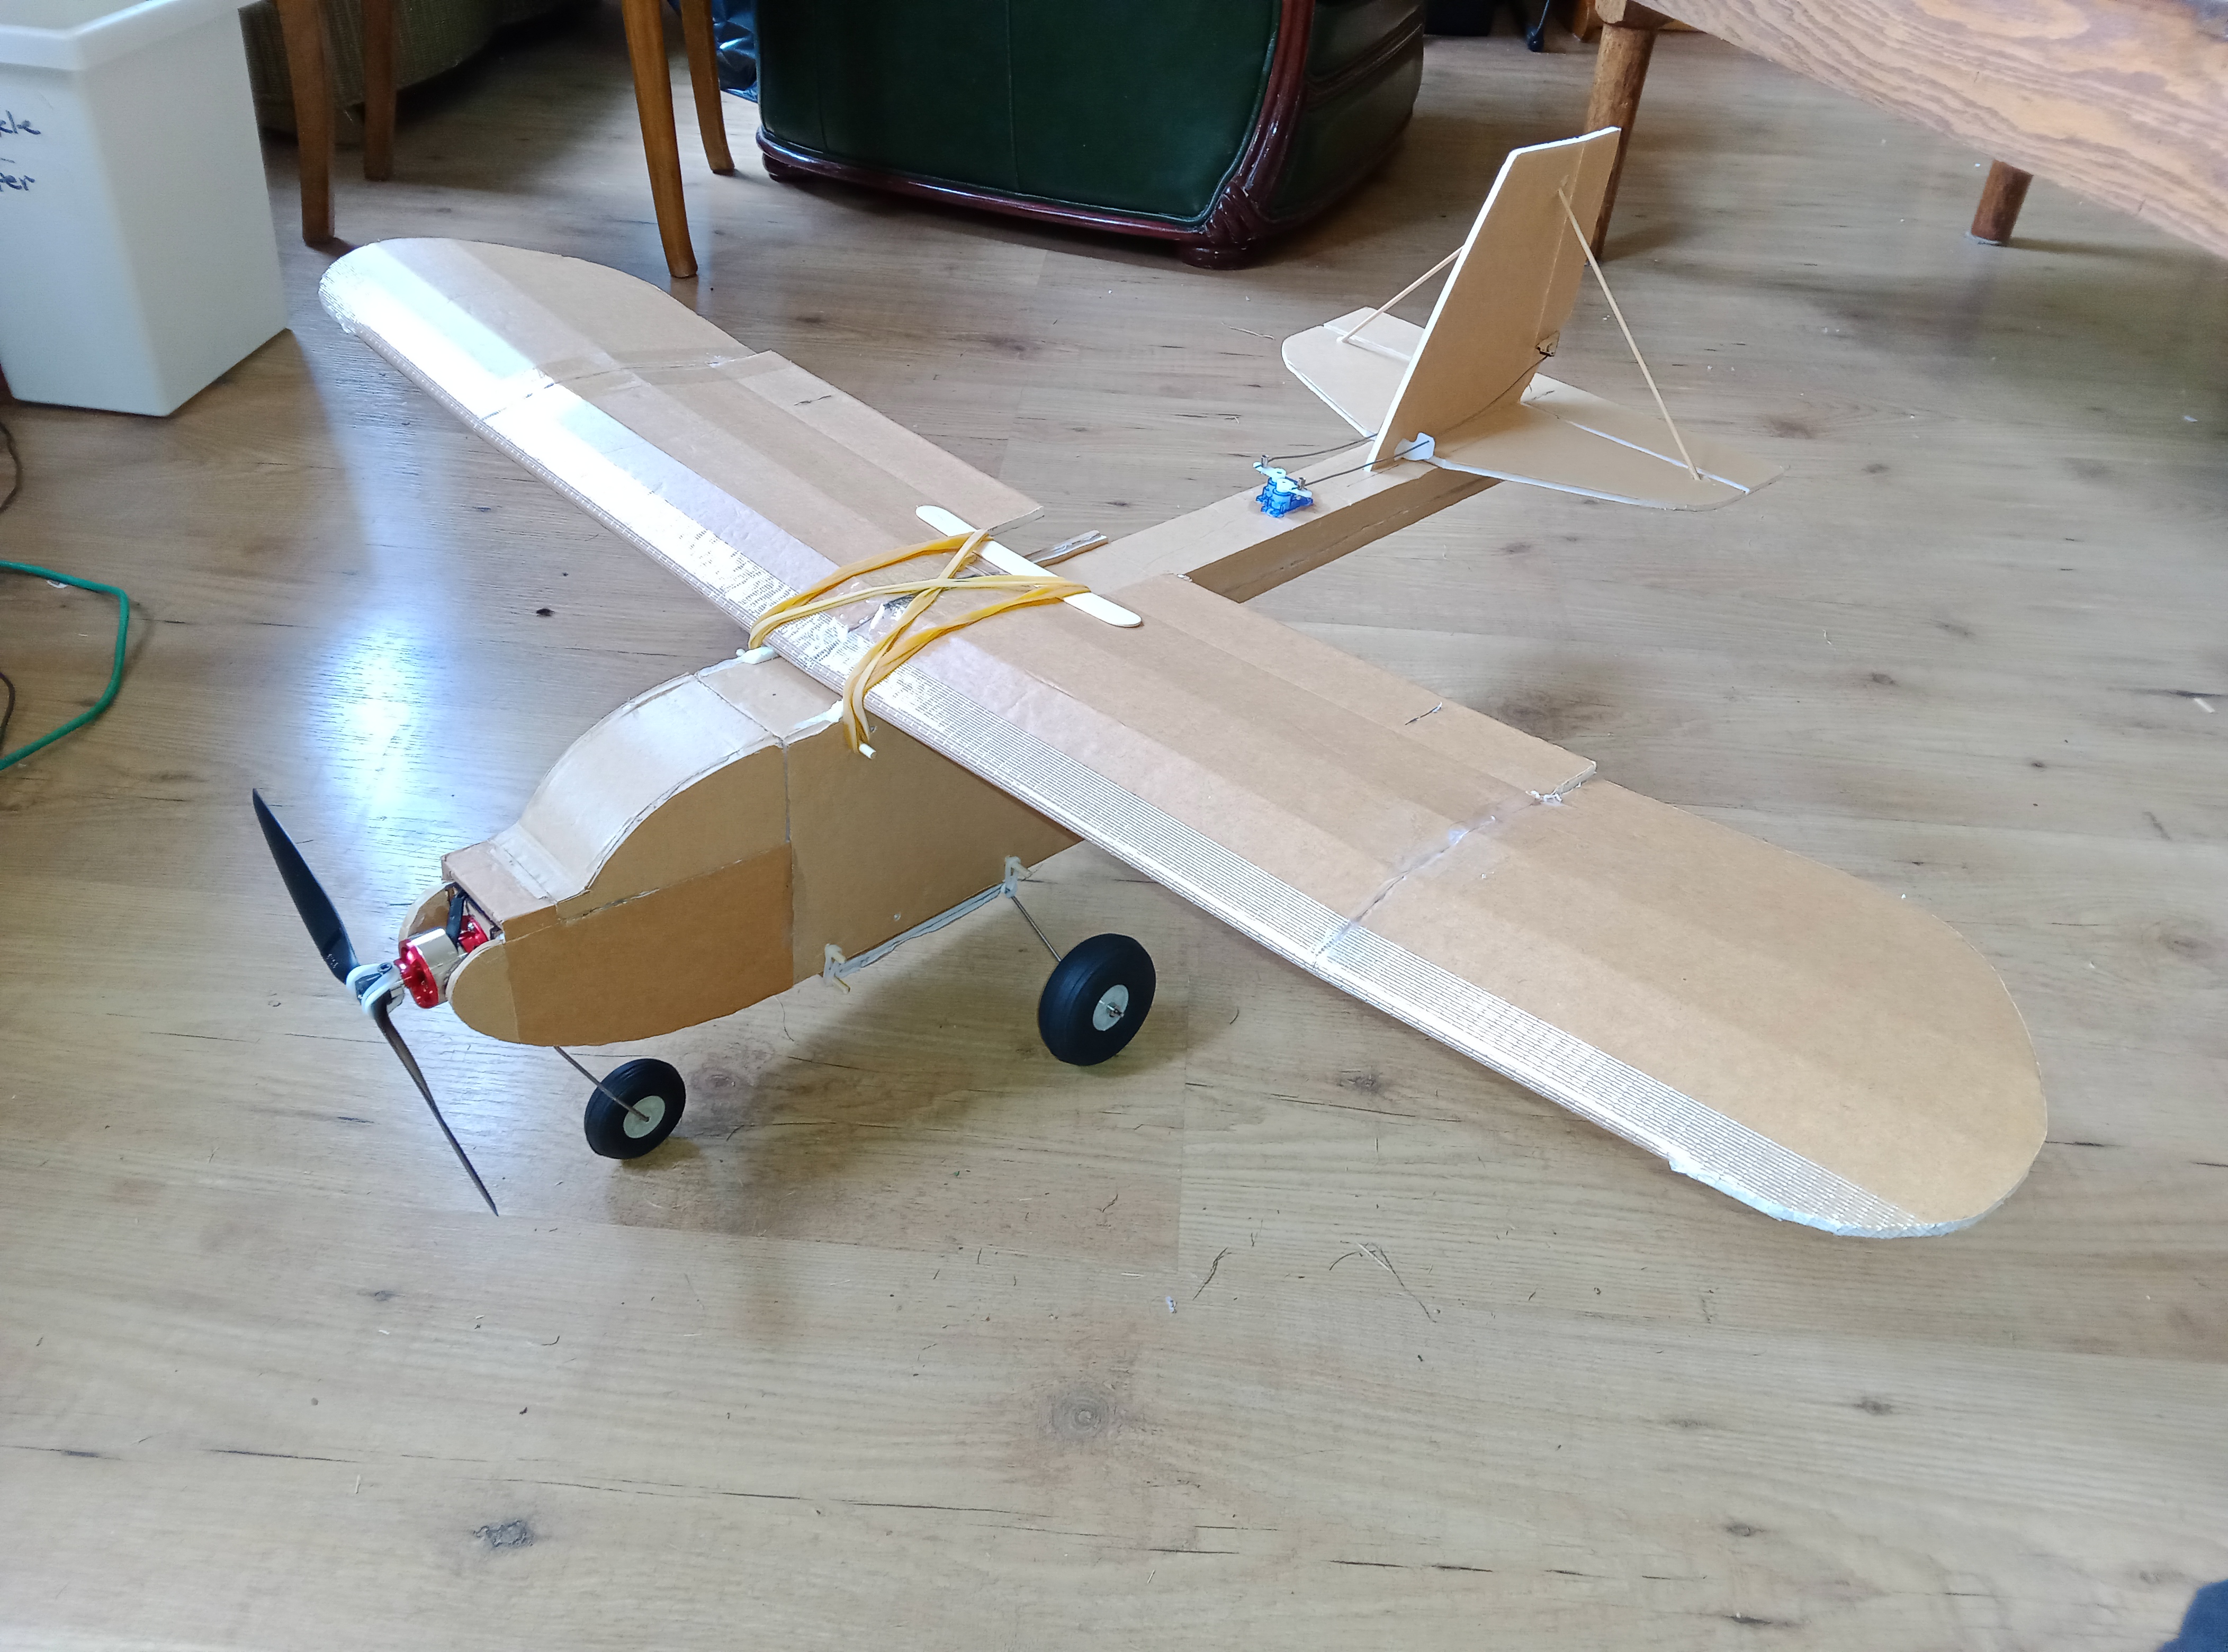
The other Explorer was used to tick another plane off my types list: a tricycle landing gear plane. Moving the engine to the front and with the tail boom lifted into a conveniently sized slot (part of the original Explorer design ethos) produced a rather pleasing and characterful model. A fairly floaty flier, I may repurpose the inboard ailerons as flaps and create smaller ailerons on the outer part of the wing. A STOL tricycle?
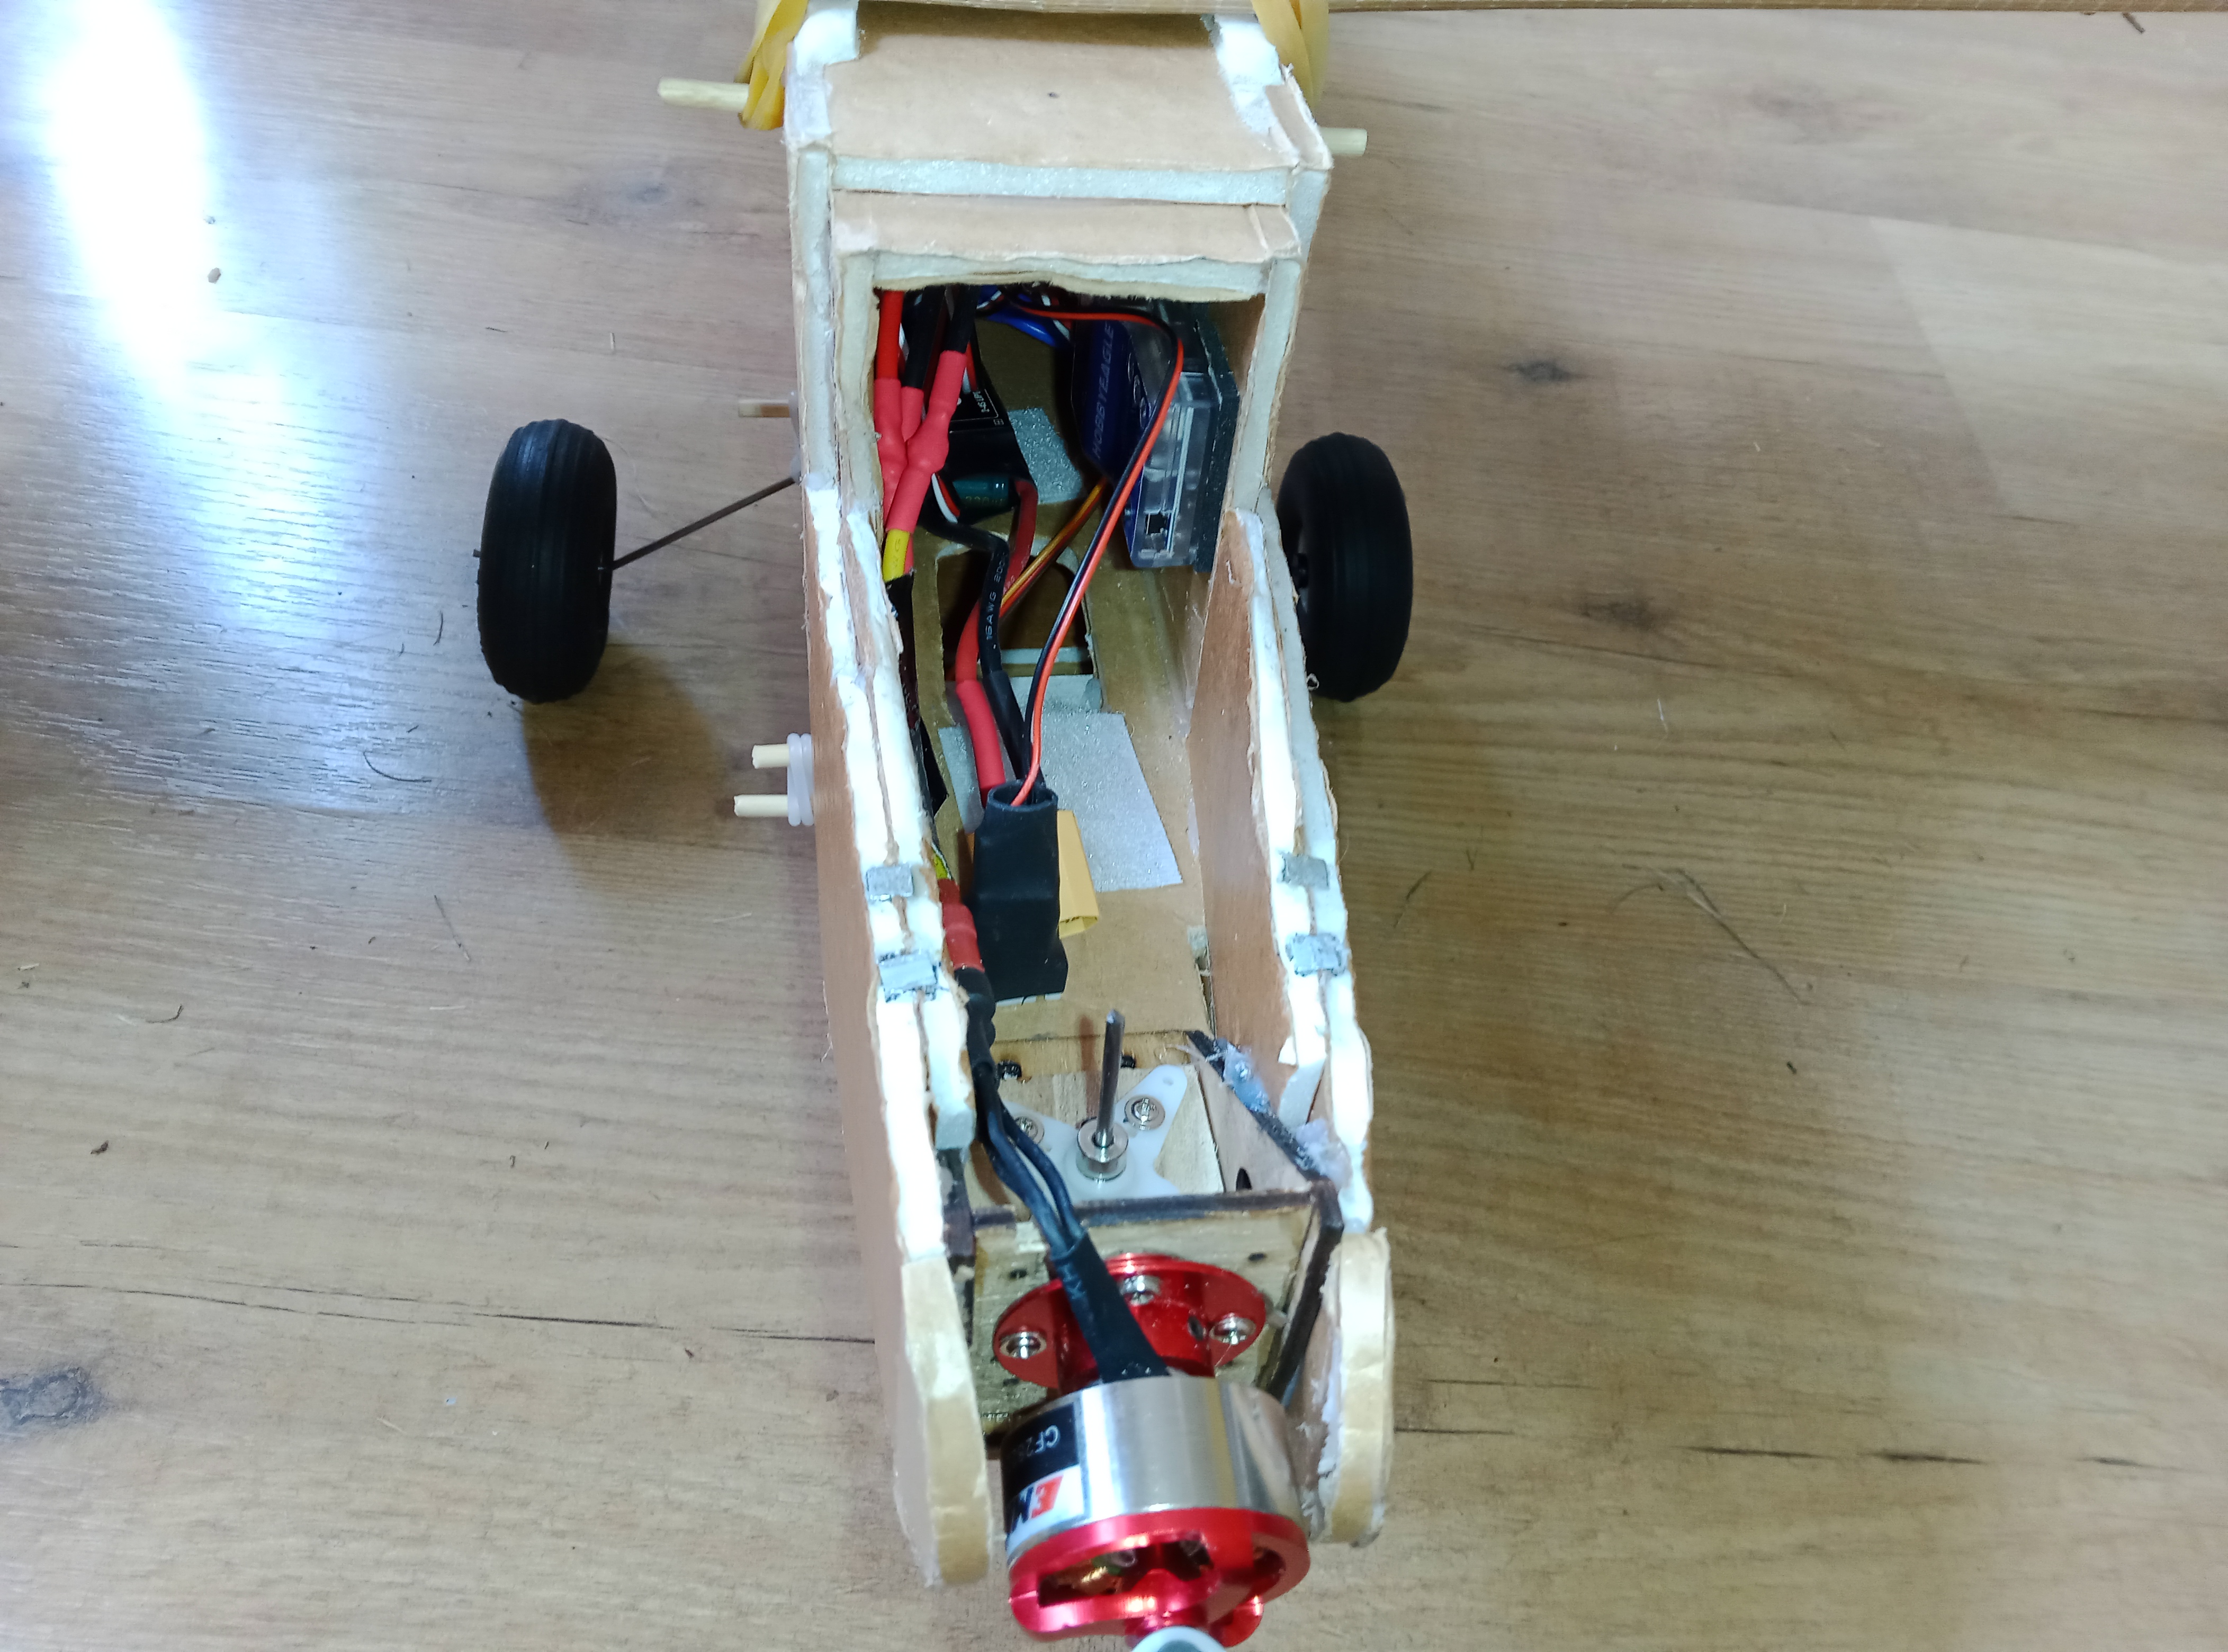
Plenty of space inside for batteries!
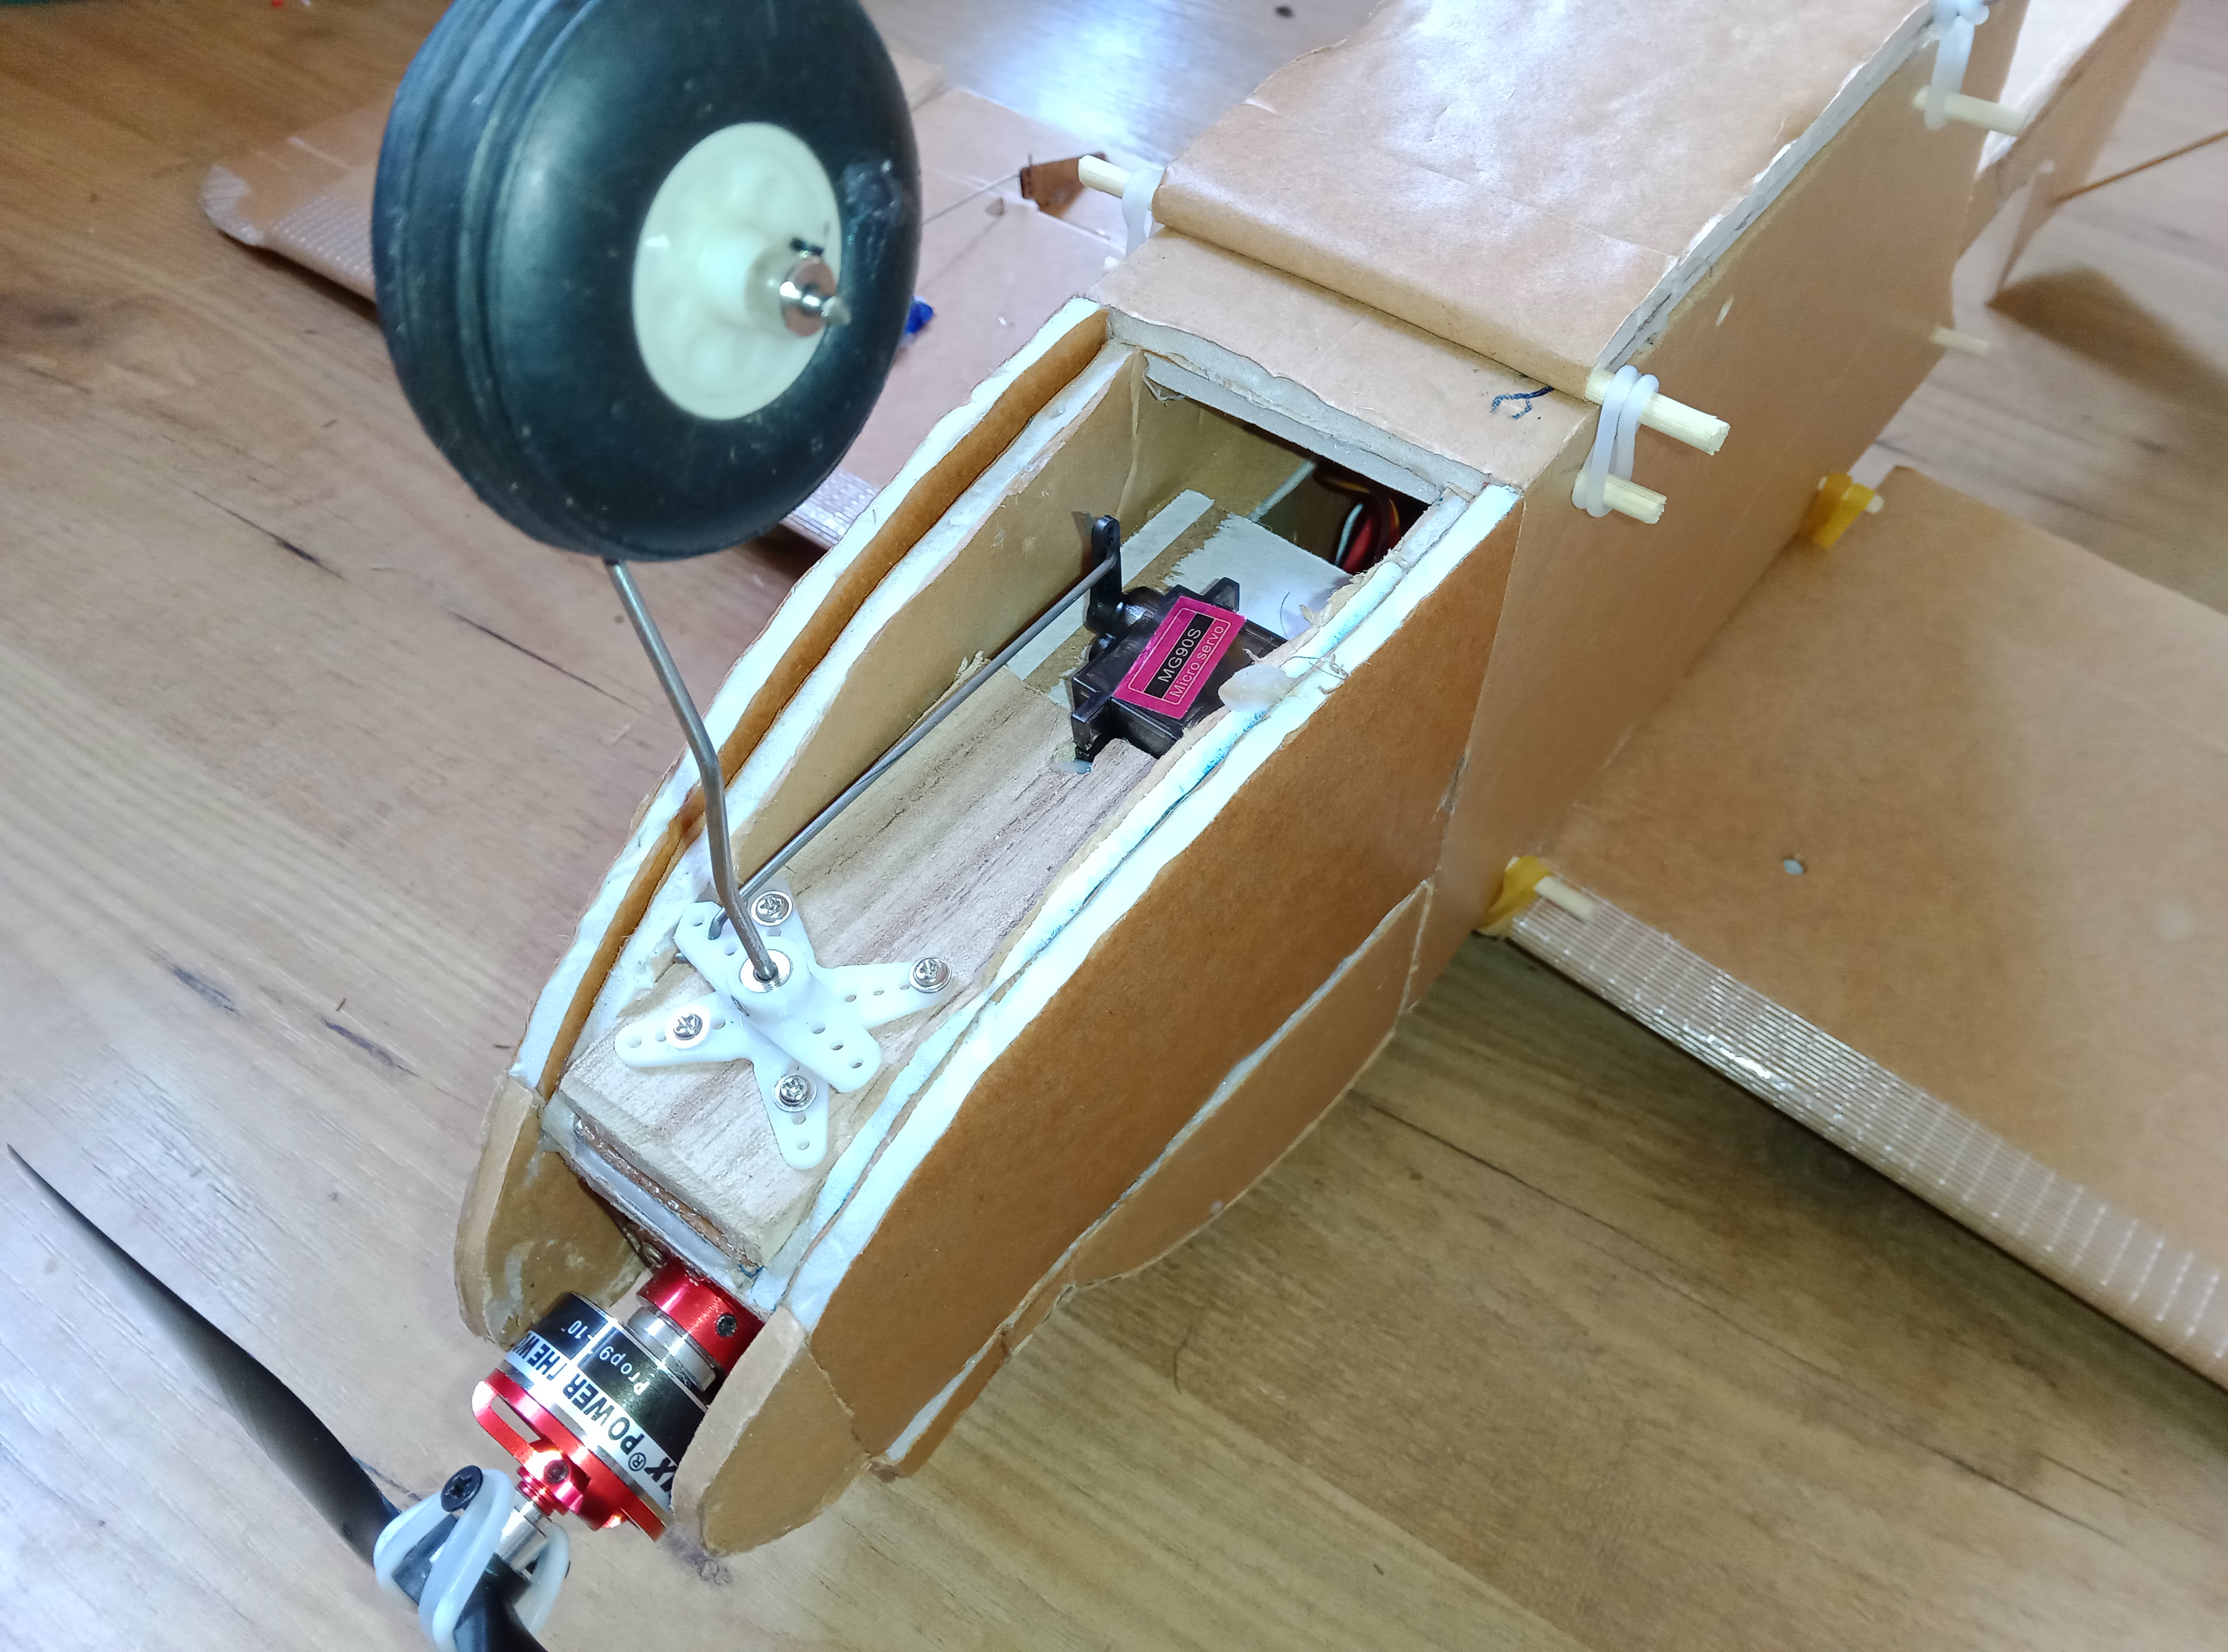
Nose steering: a pair of four arm servo arms 'bushed' with correctly sized wheel collets, to give a good fit on the wire, and screwed to light timber plates top and bottom keep the steering assembly in place. A metal gear servo copes with any landing shocks. What a fright when I did my first rotation at speed. From hugging the ground and seeming unwilling to rise (what I was used to with tail draggers), the plane literally bounced into the air.
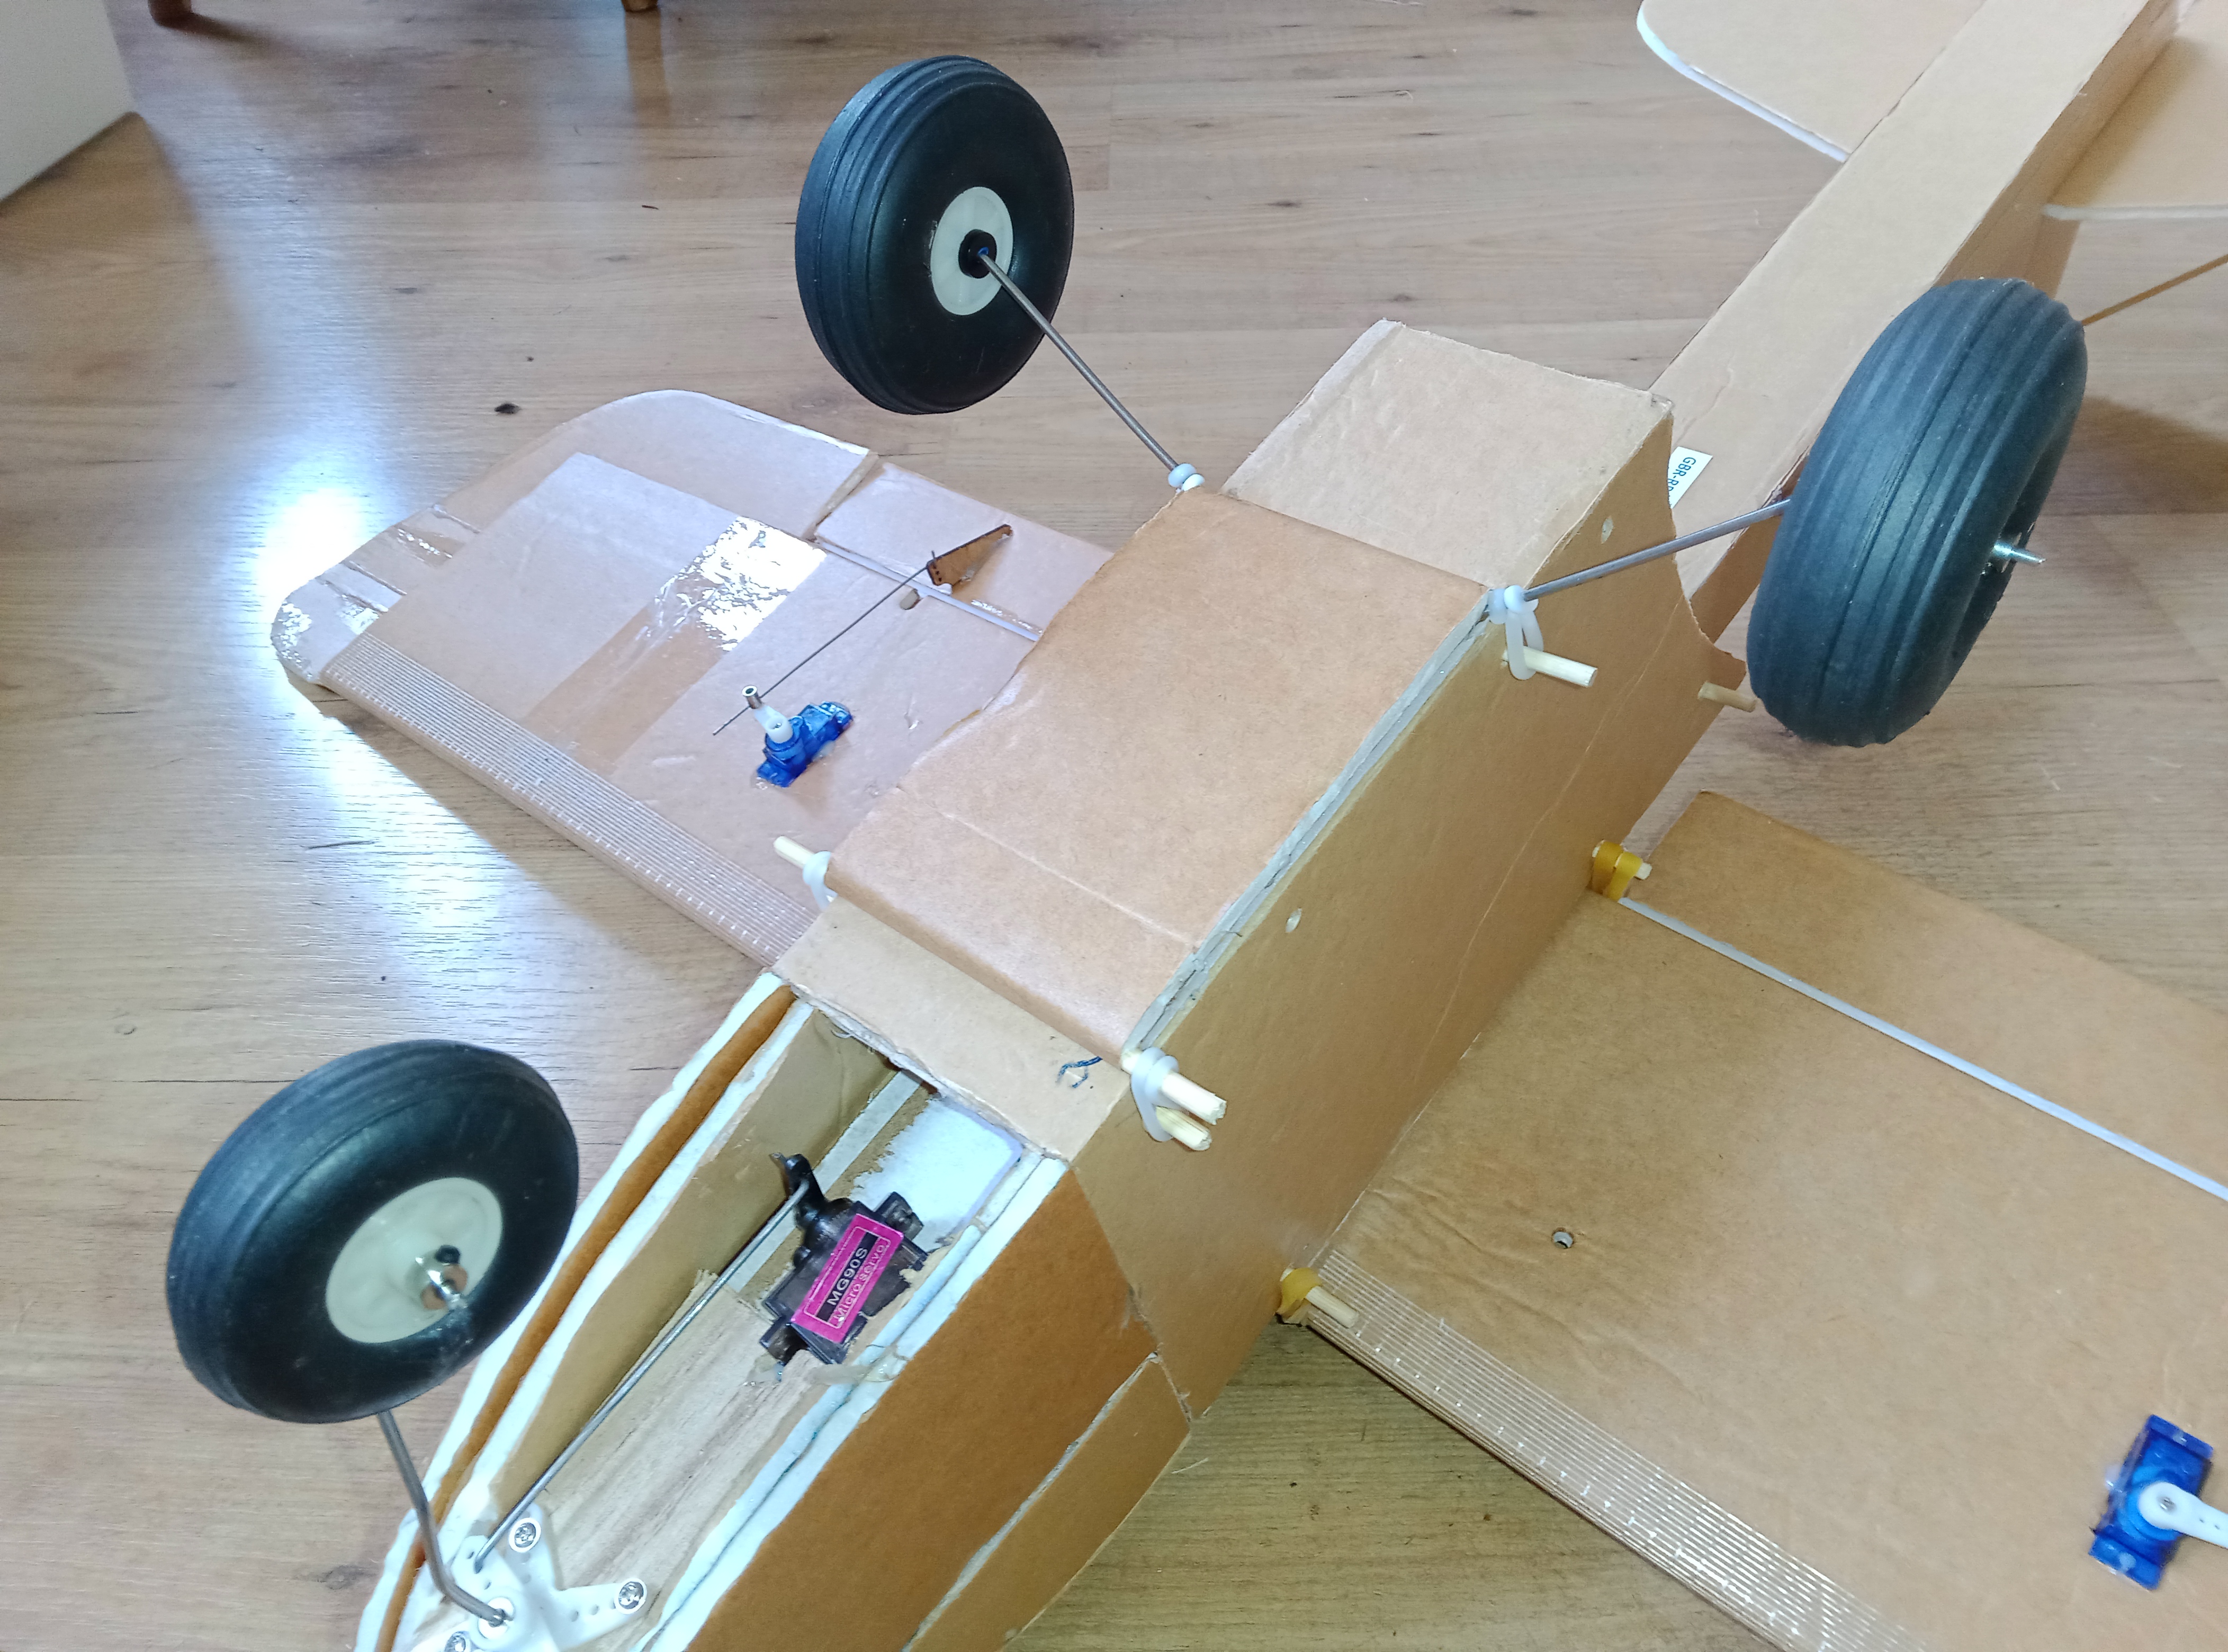
Another build innovation was a double layer foamboard 'sled' into which the rear undercarriage is glued. This is held in place by prop saver rings going around skewers and the landing gear. This flexible coupling prevents fuselage damage from rough landings.
NEXT! What to do with a pile of bits left over from the kit builds?
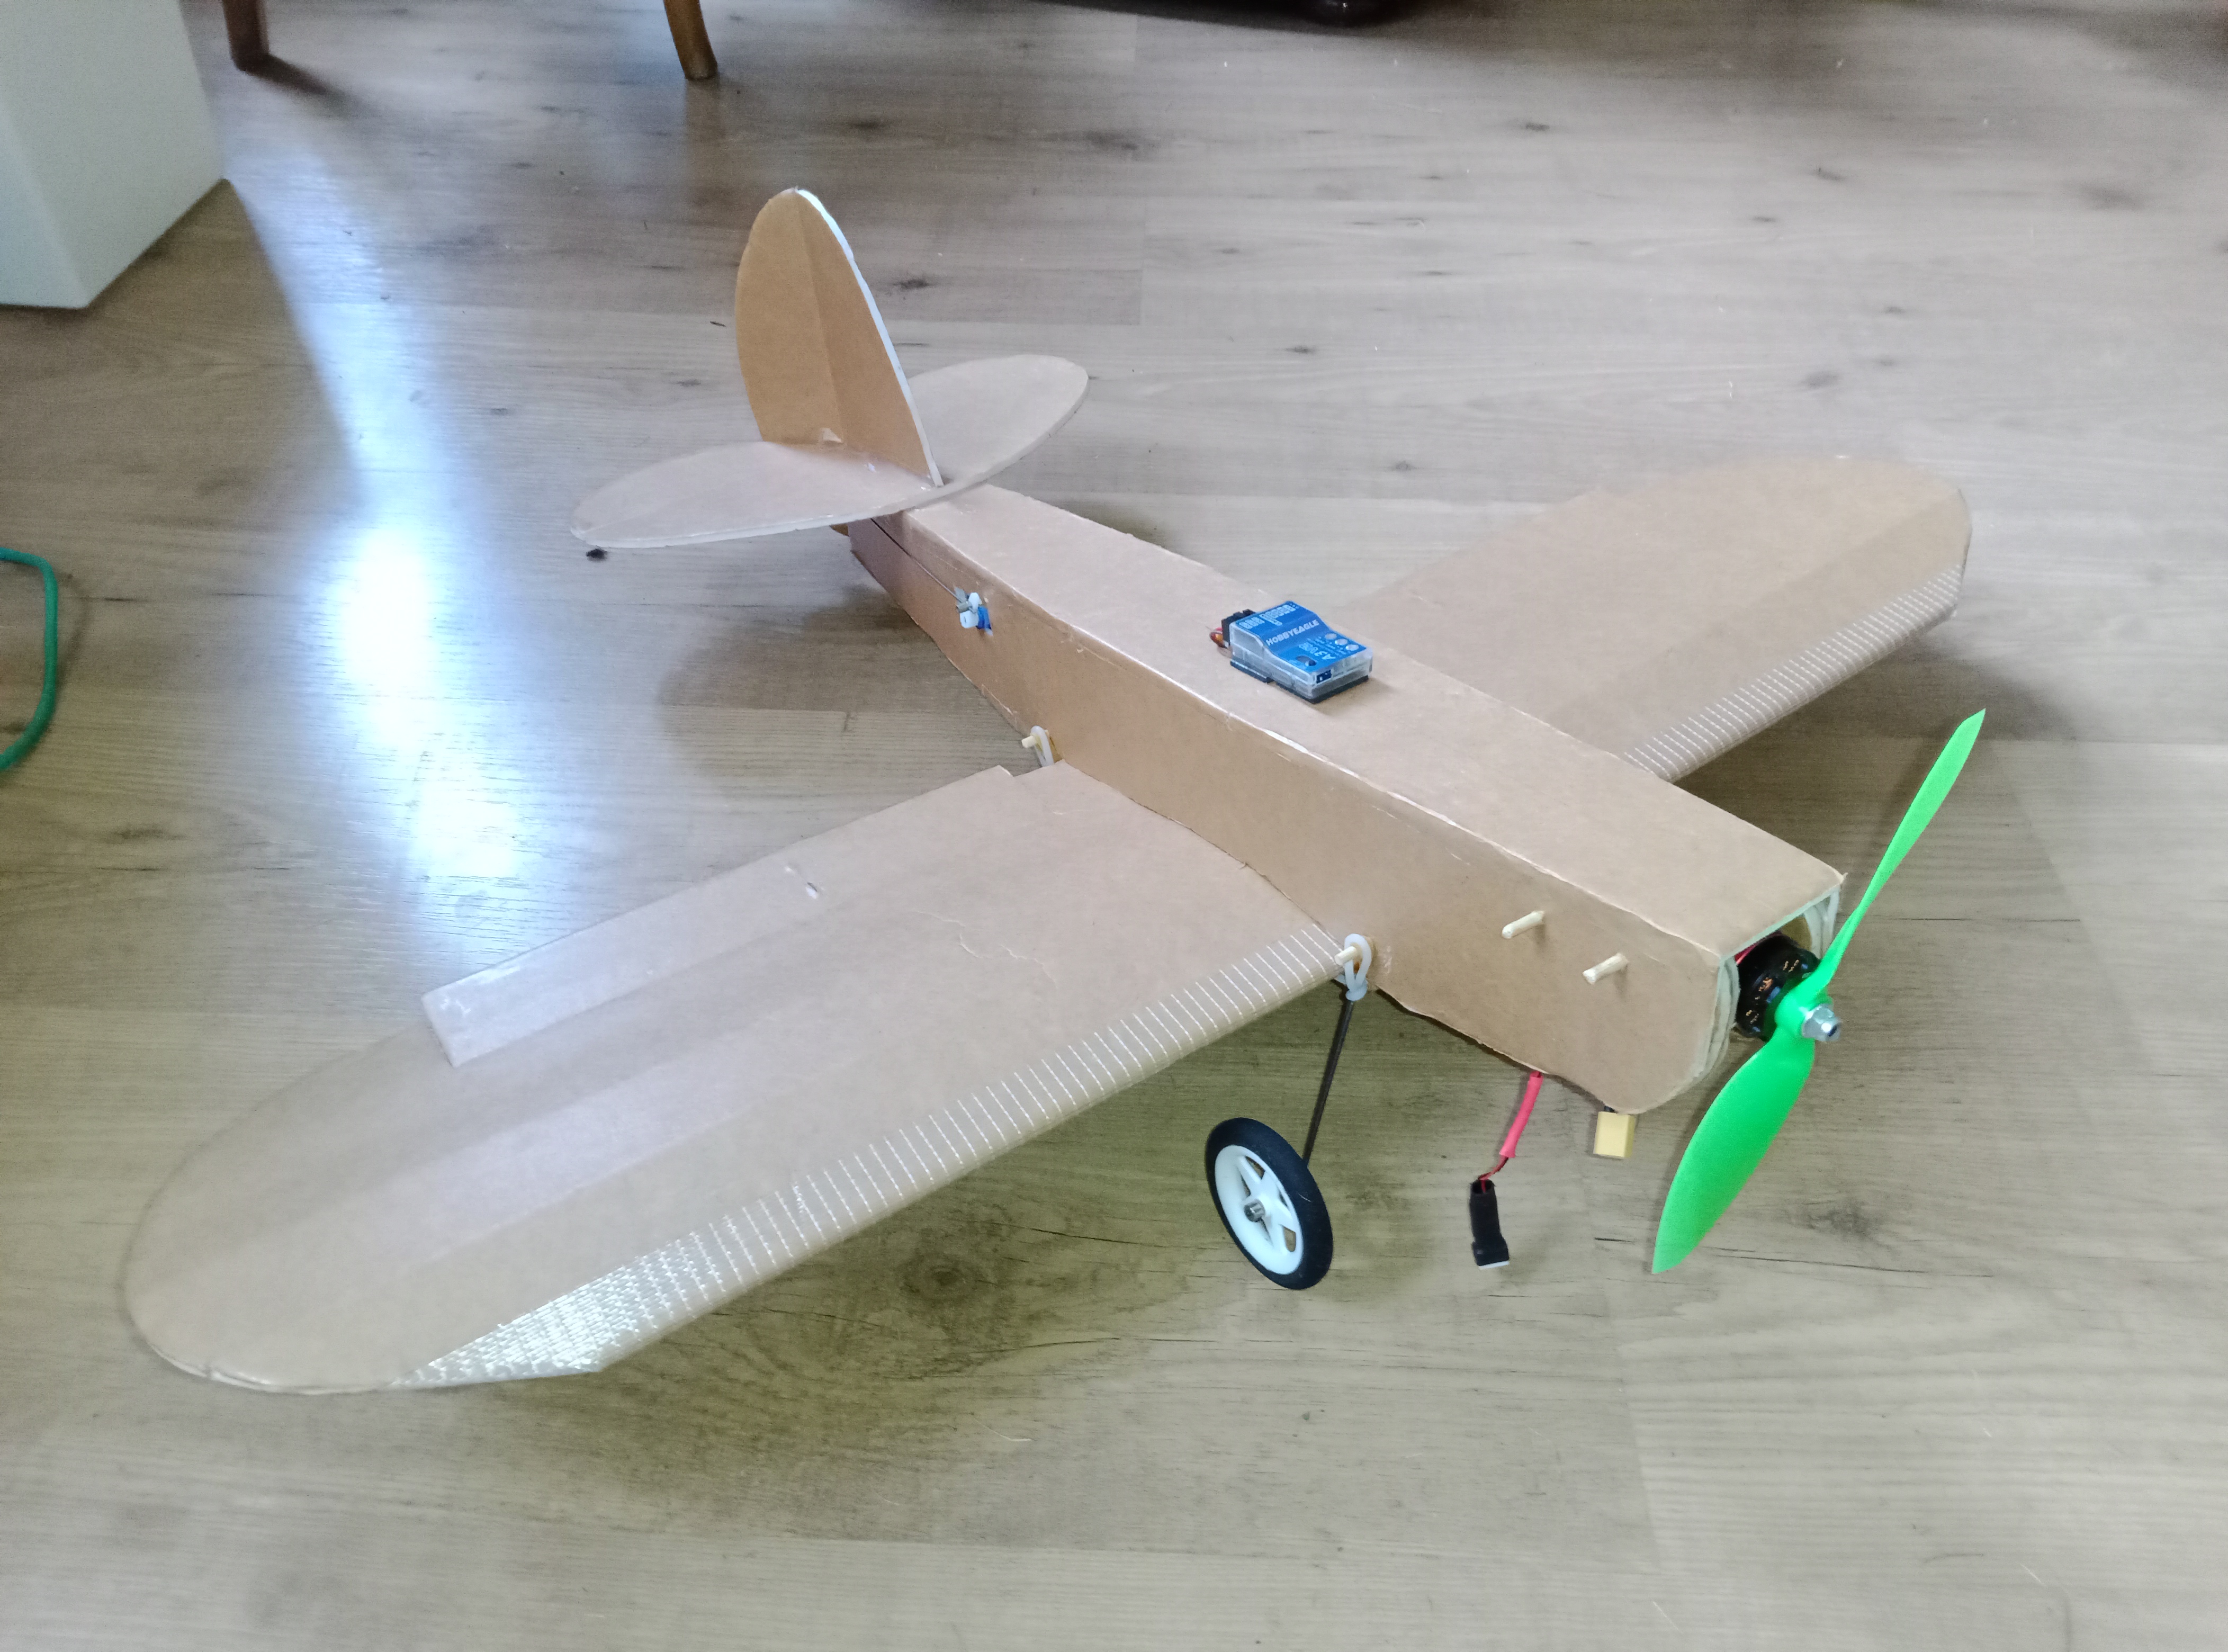
Remember those 'chopped' explorer wings? They left enough material to make up a 600 mm wingspan low wing aileron trainer.
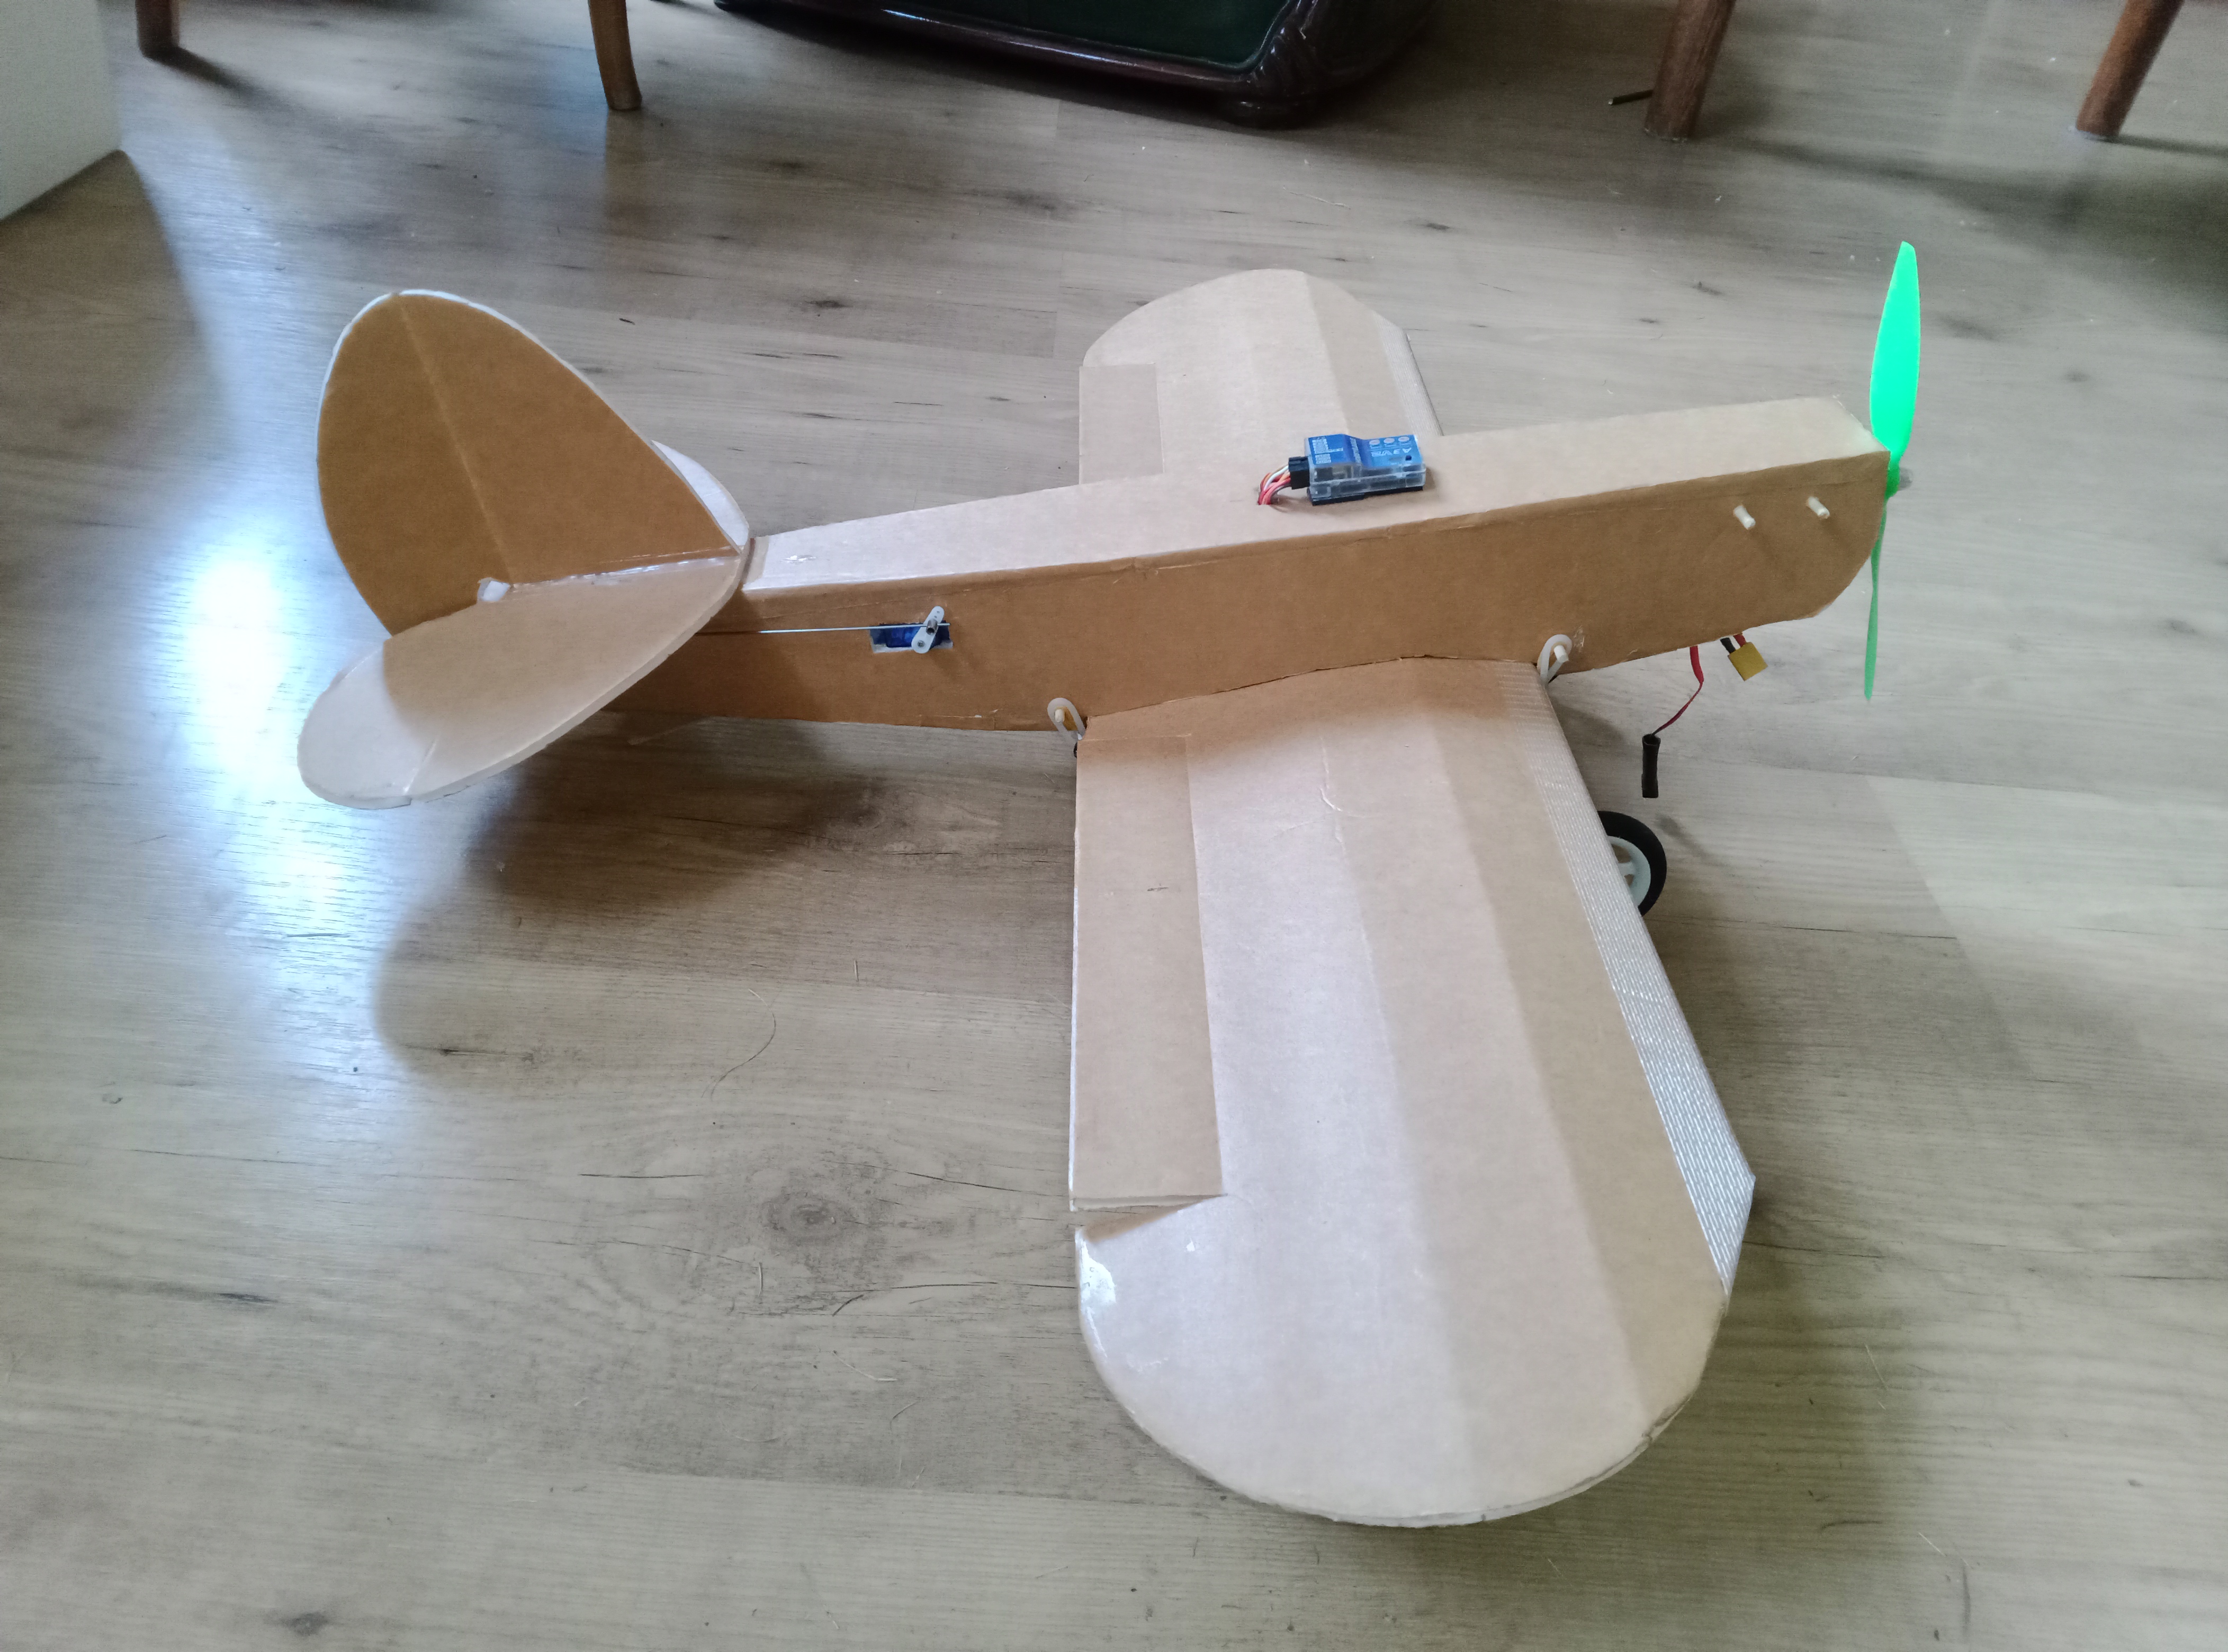
This super basic design floats along happily on a mini series type motor with a 2S 850mah battery and a 7 inch prop. Loops, inverted, rolls, and probably knife edge if a 3S battery was used.
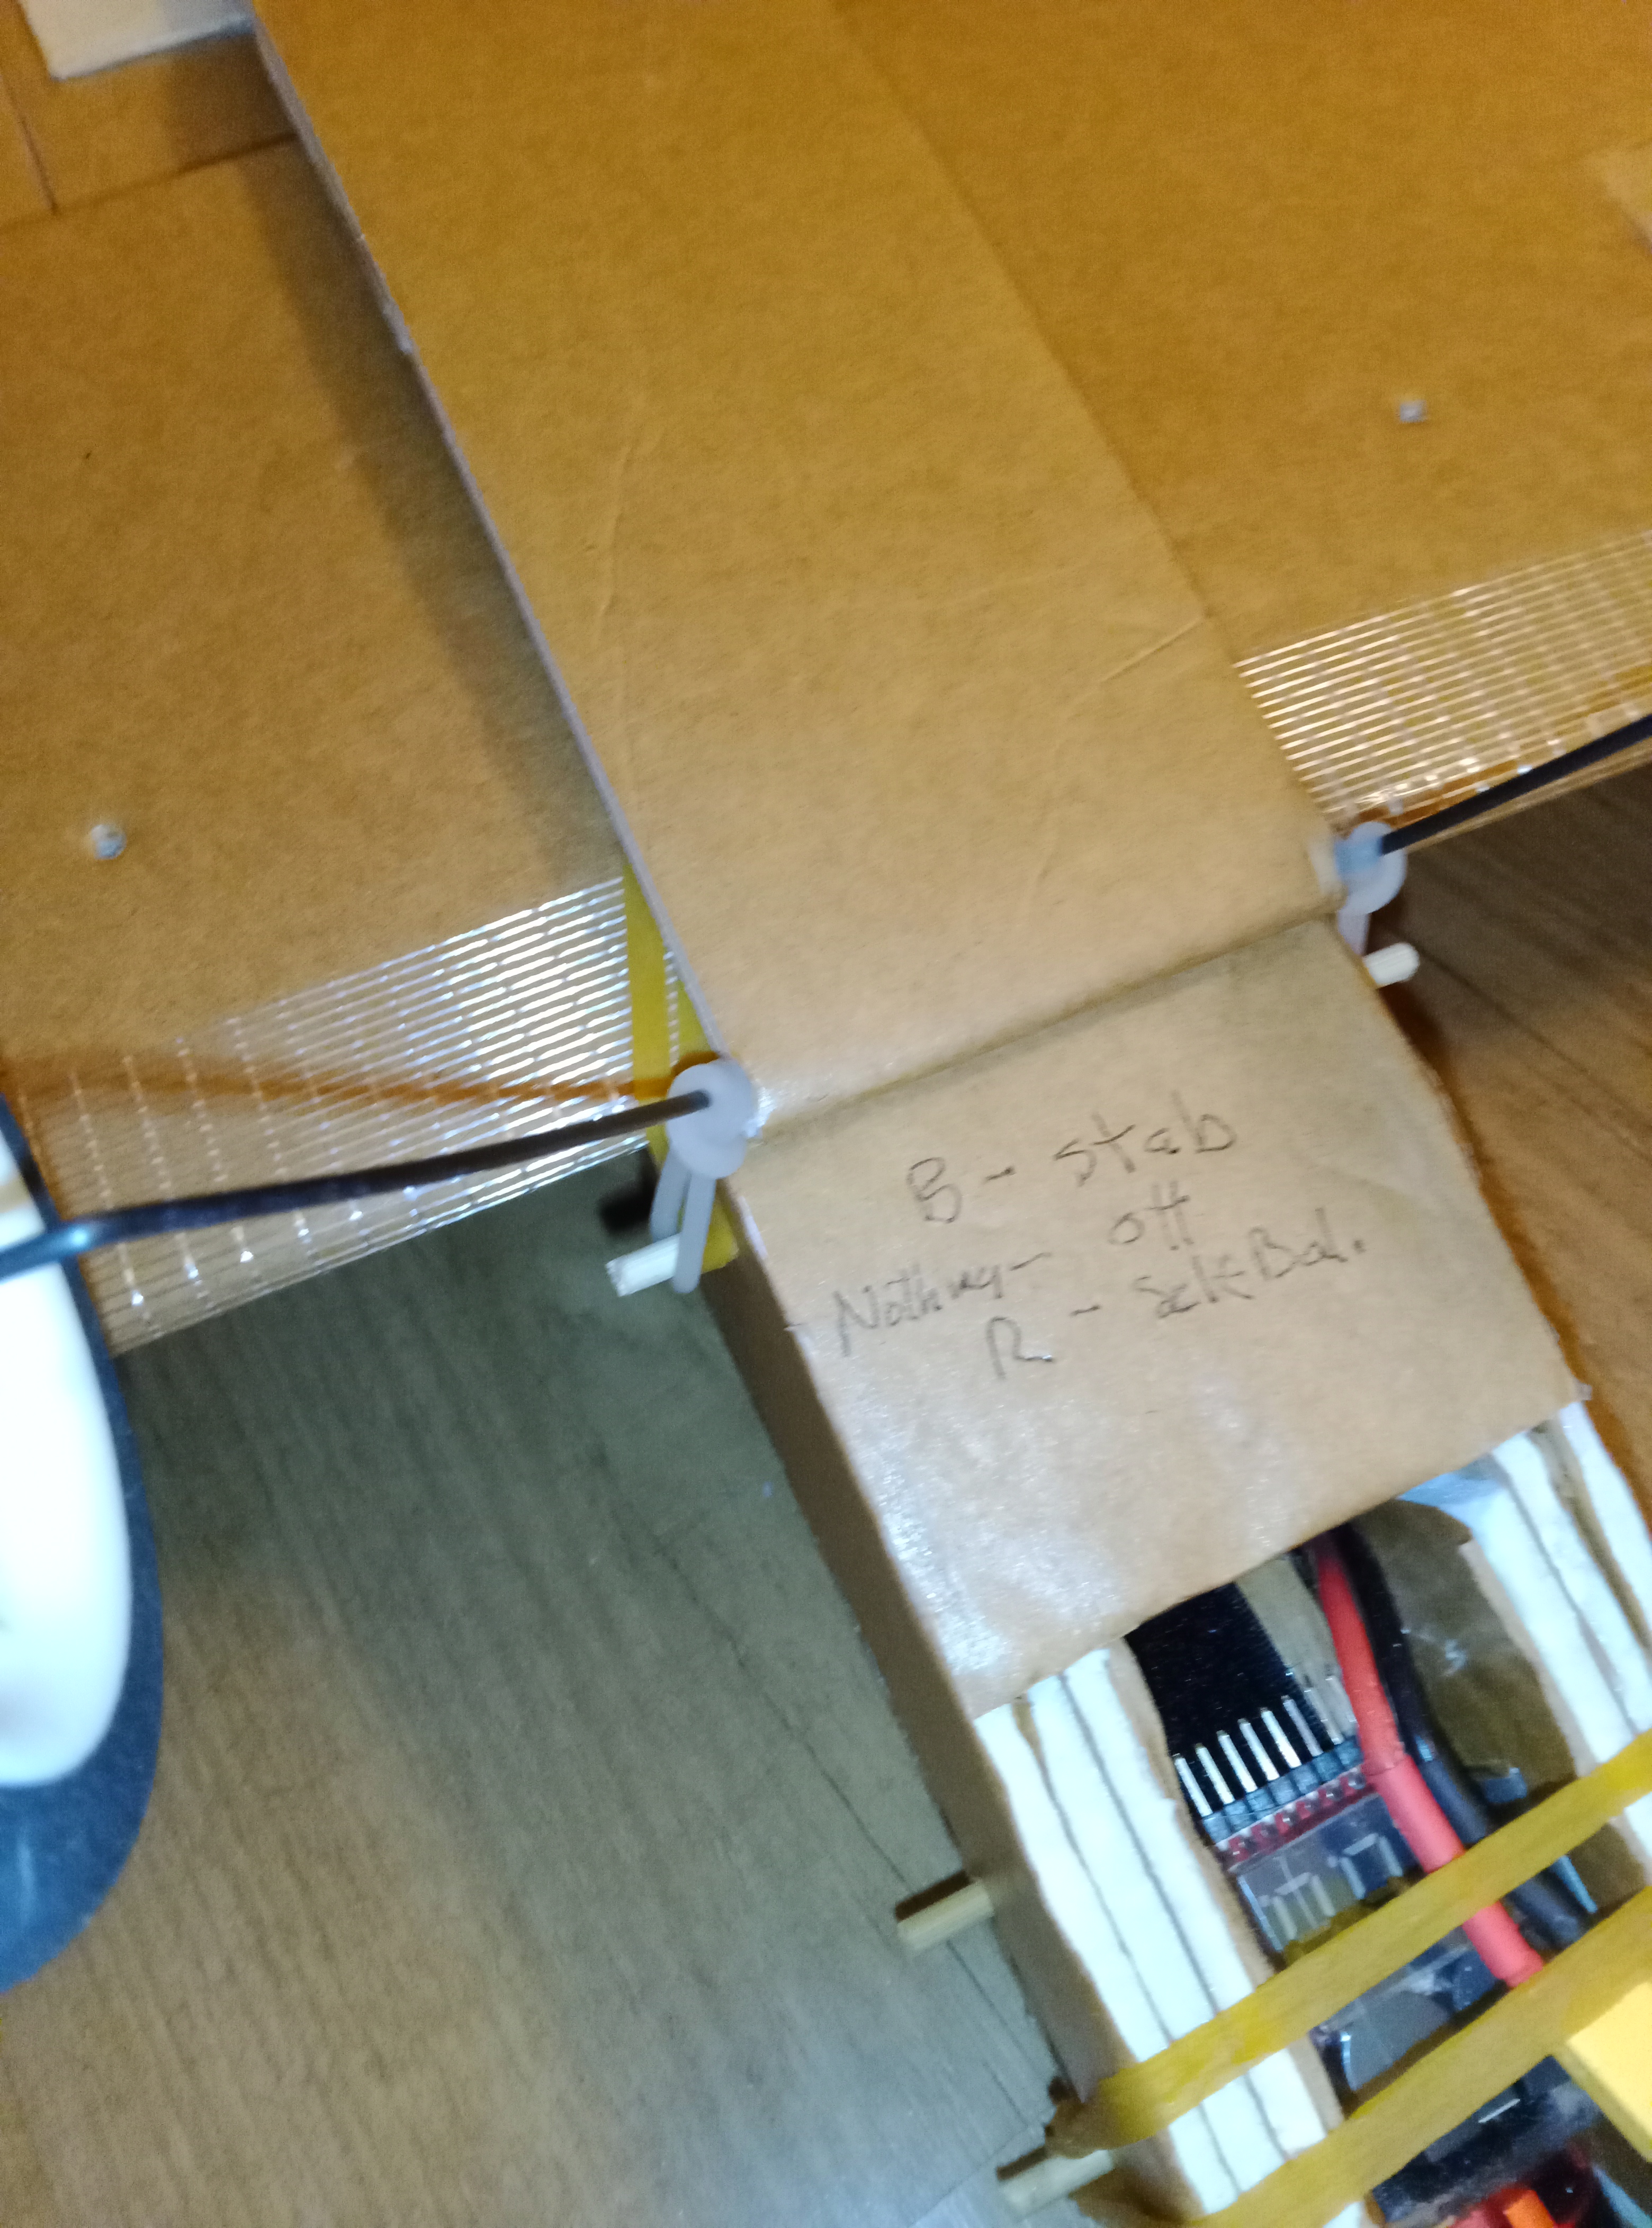
It also has a removable 'sled' undercarriage for thick grass belly-landing flying.
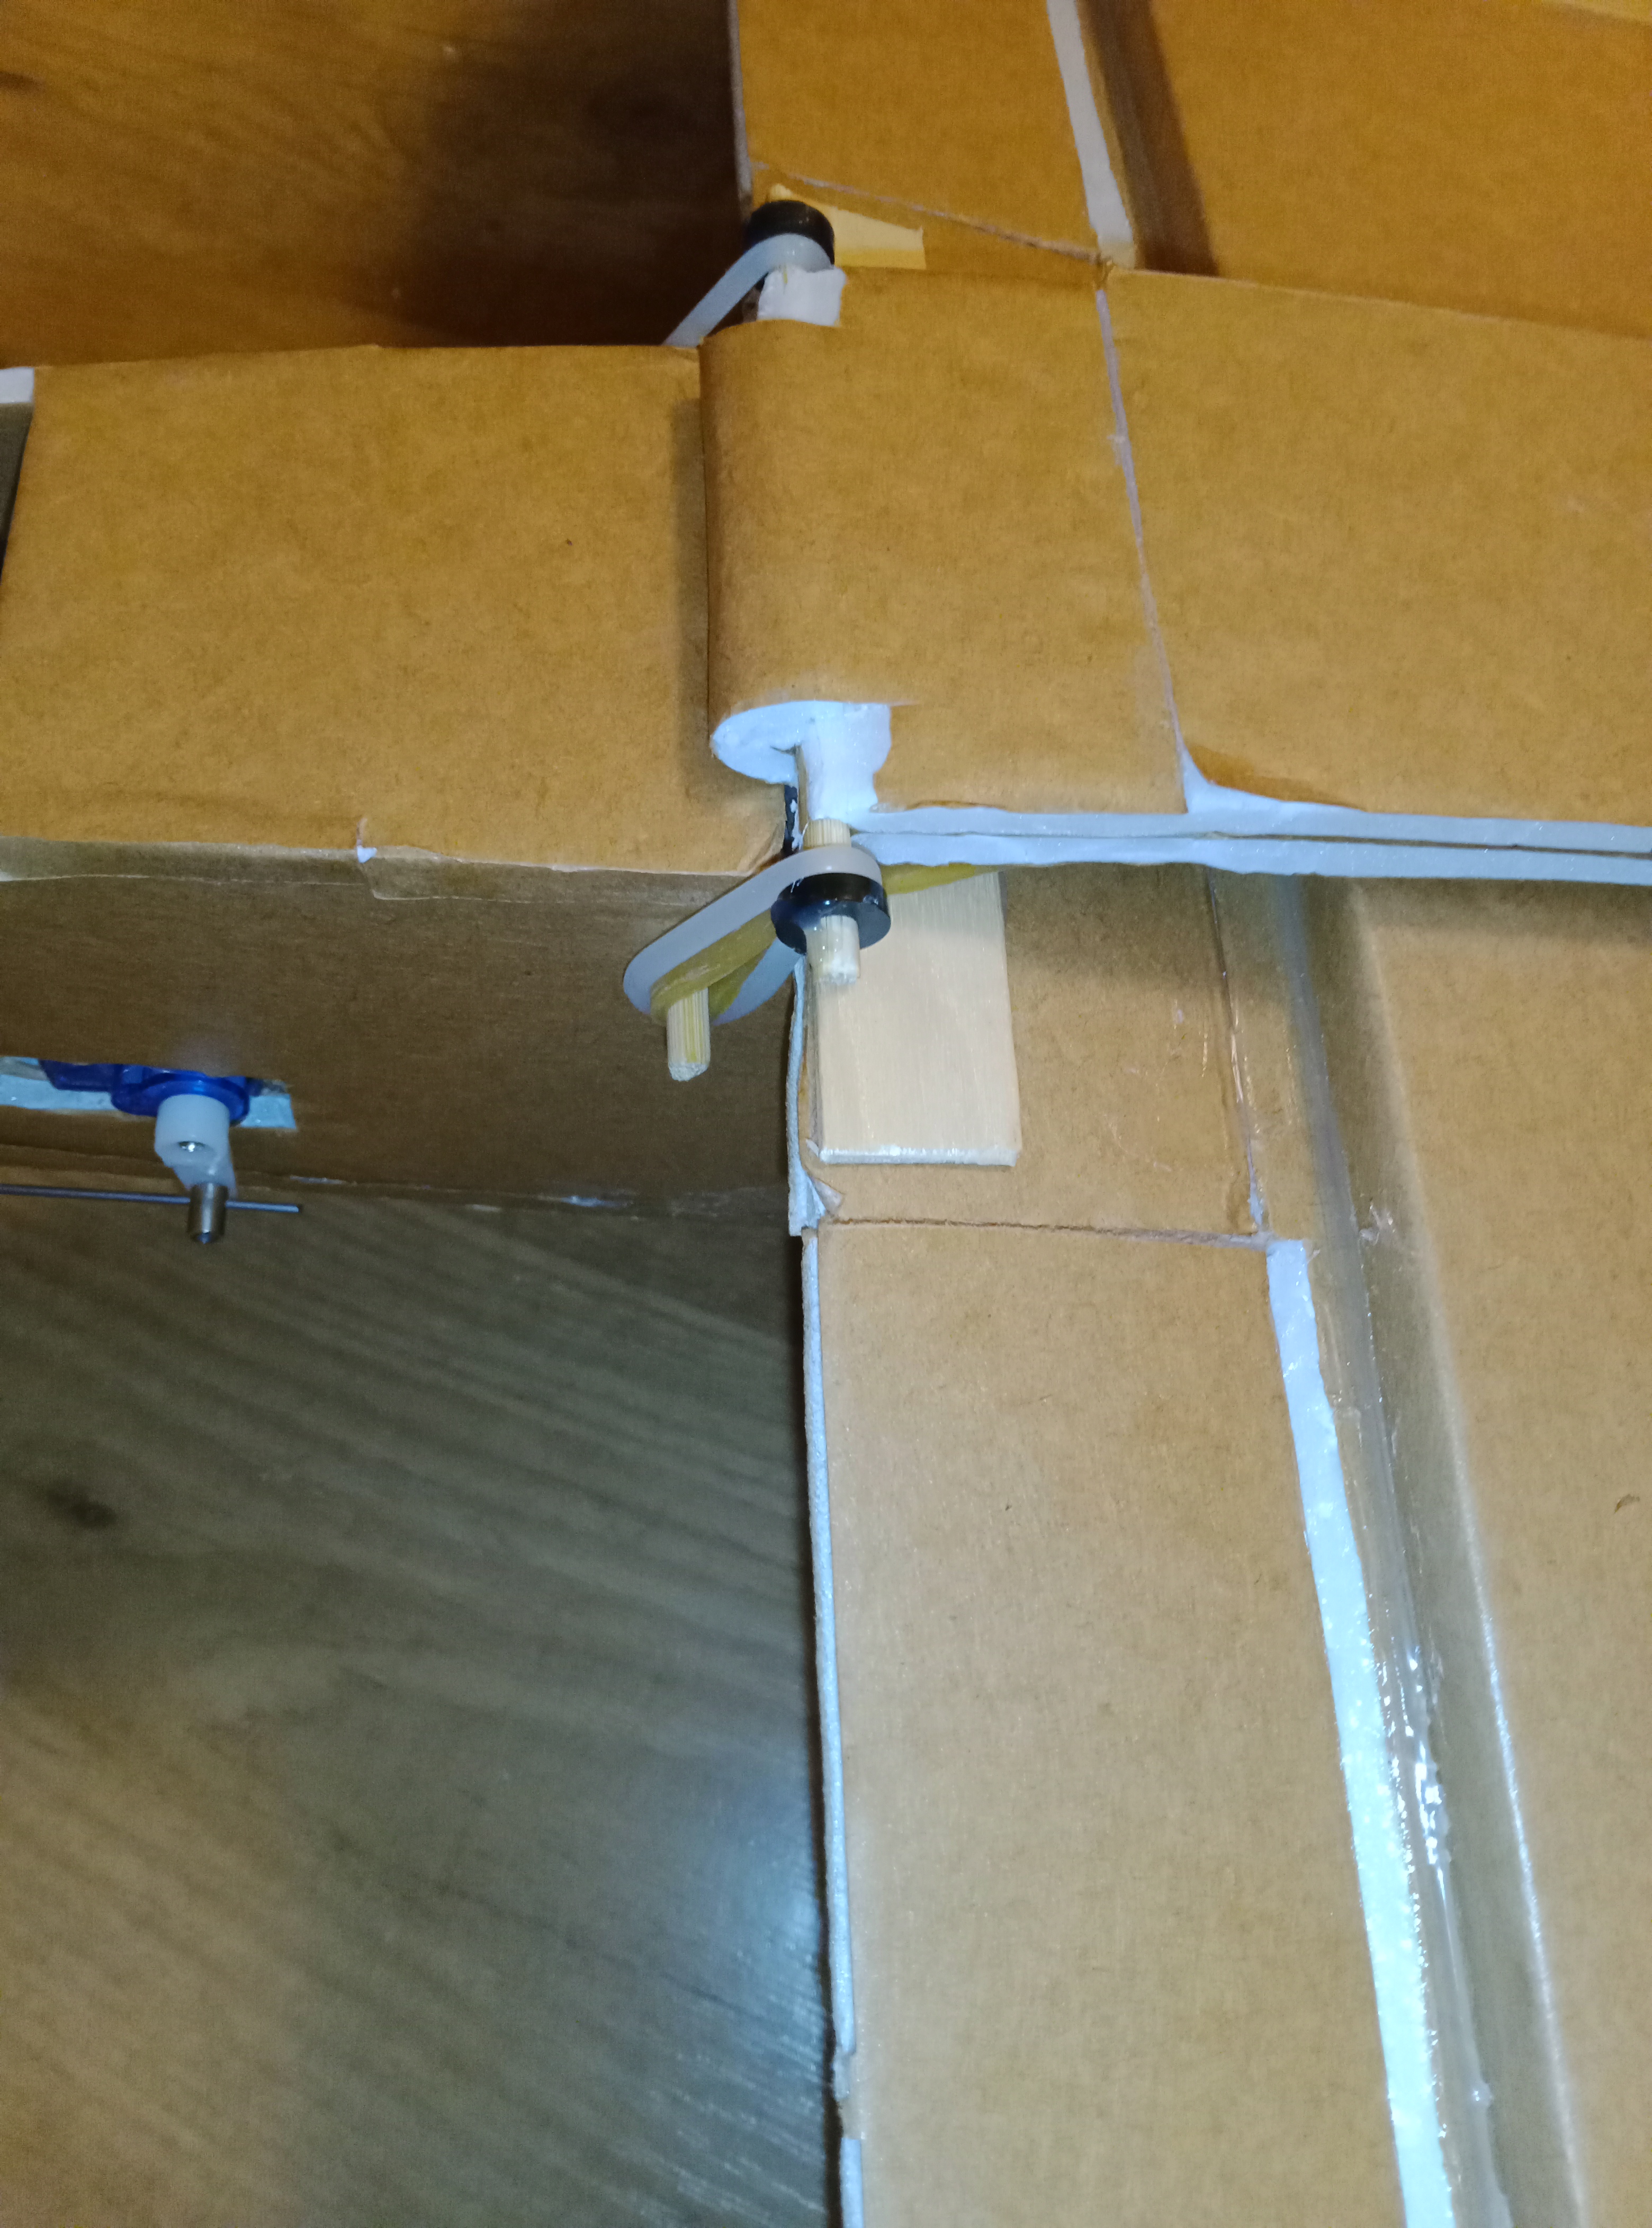
The rear of the 'sled' has prop centring spacers glued on the end of the skewers to keep the little rings from jumping off. The end fold uses the same technique as folding a wing, but with a deeper relief cut and a skewer added in.
NEXT! What to do with the Guinea Pig kit?
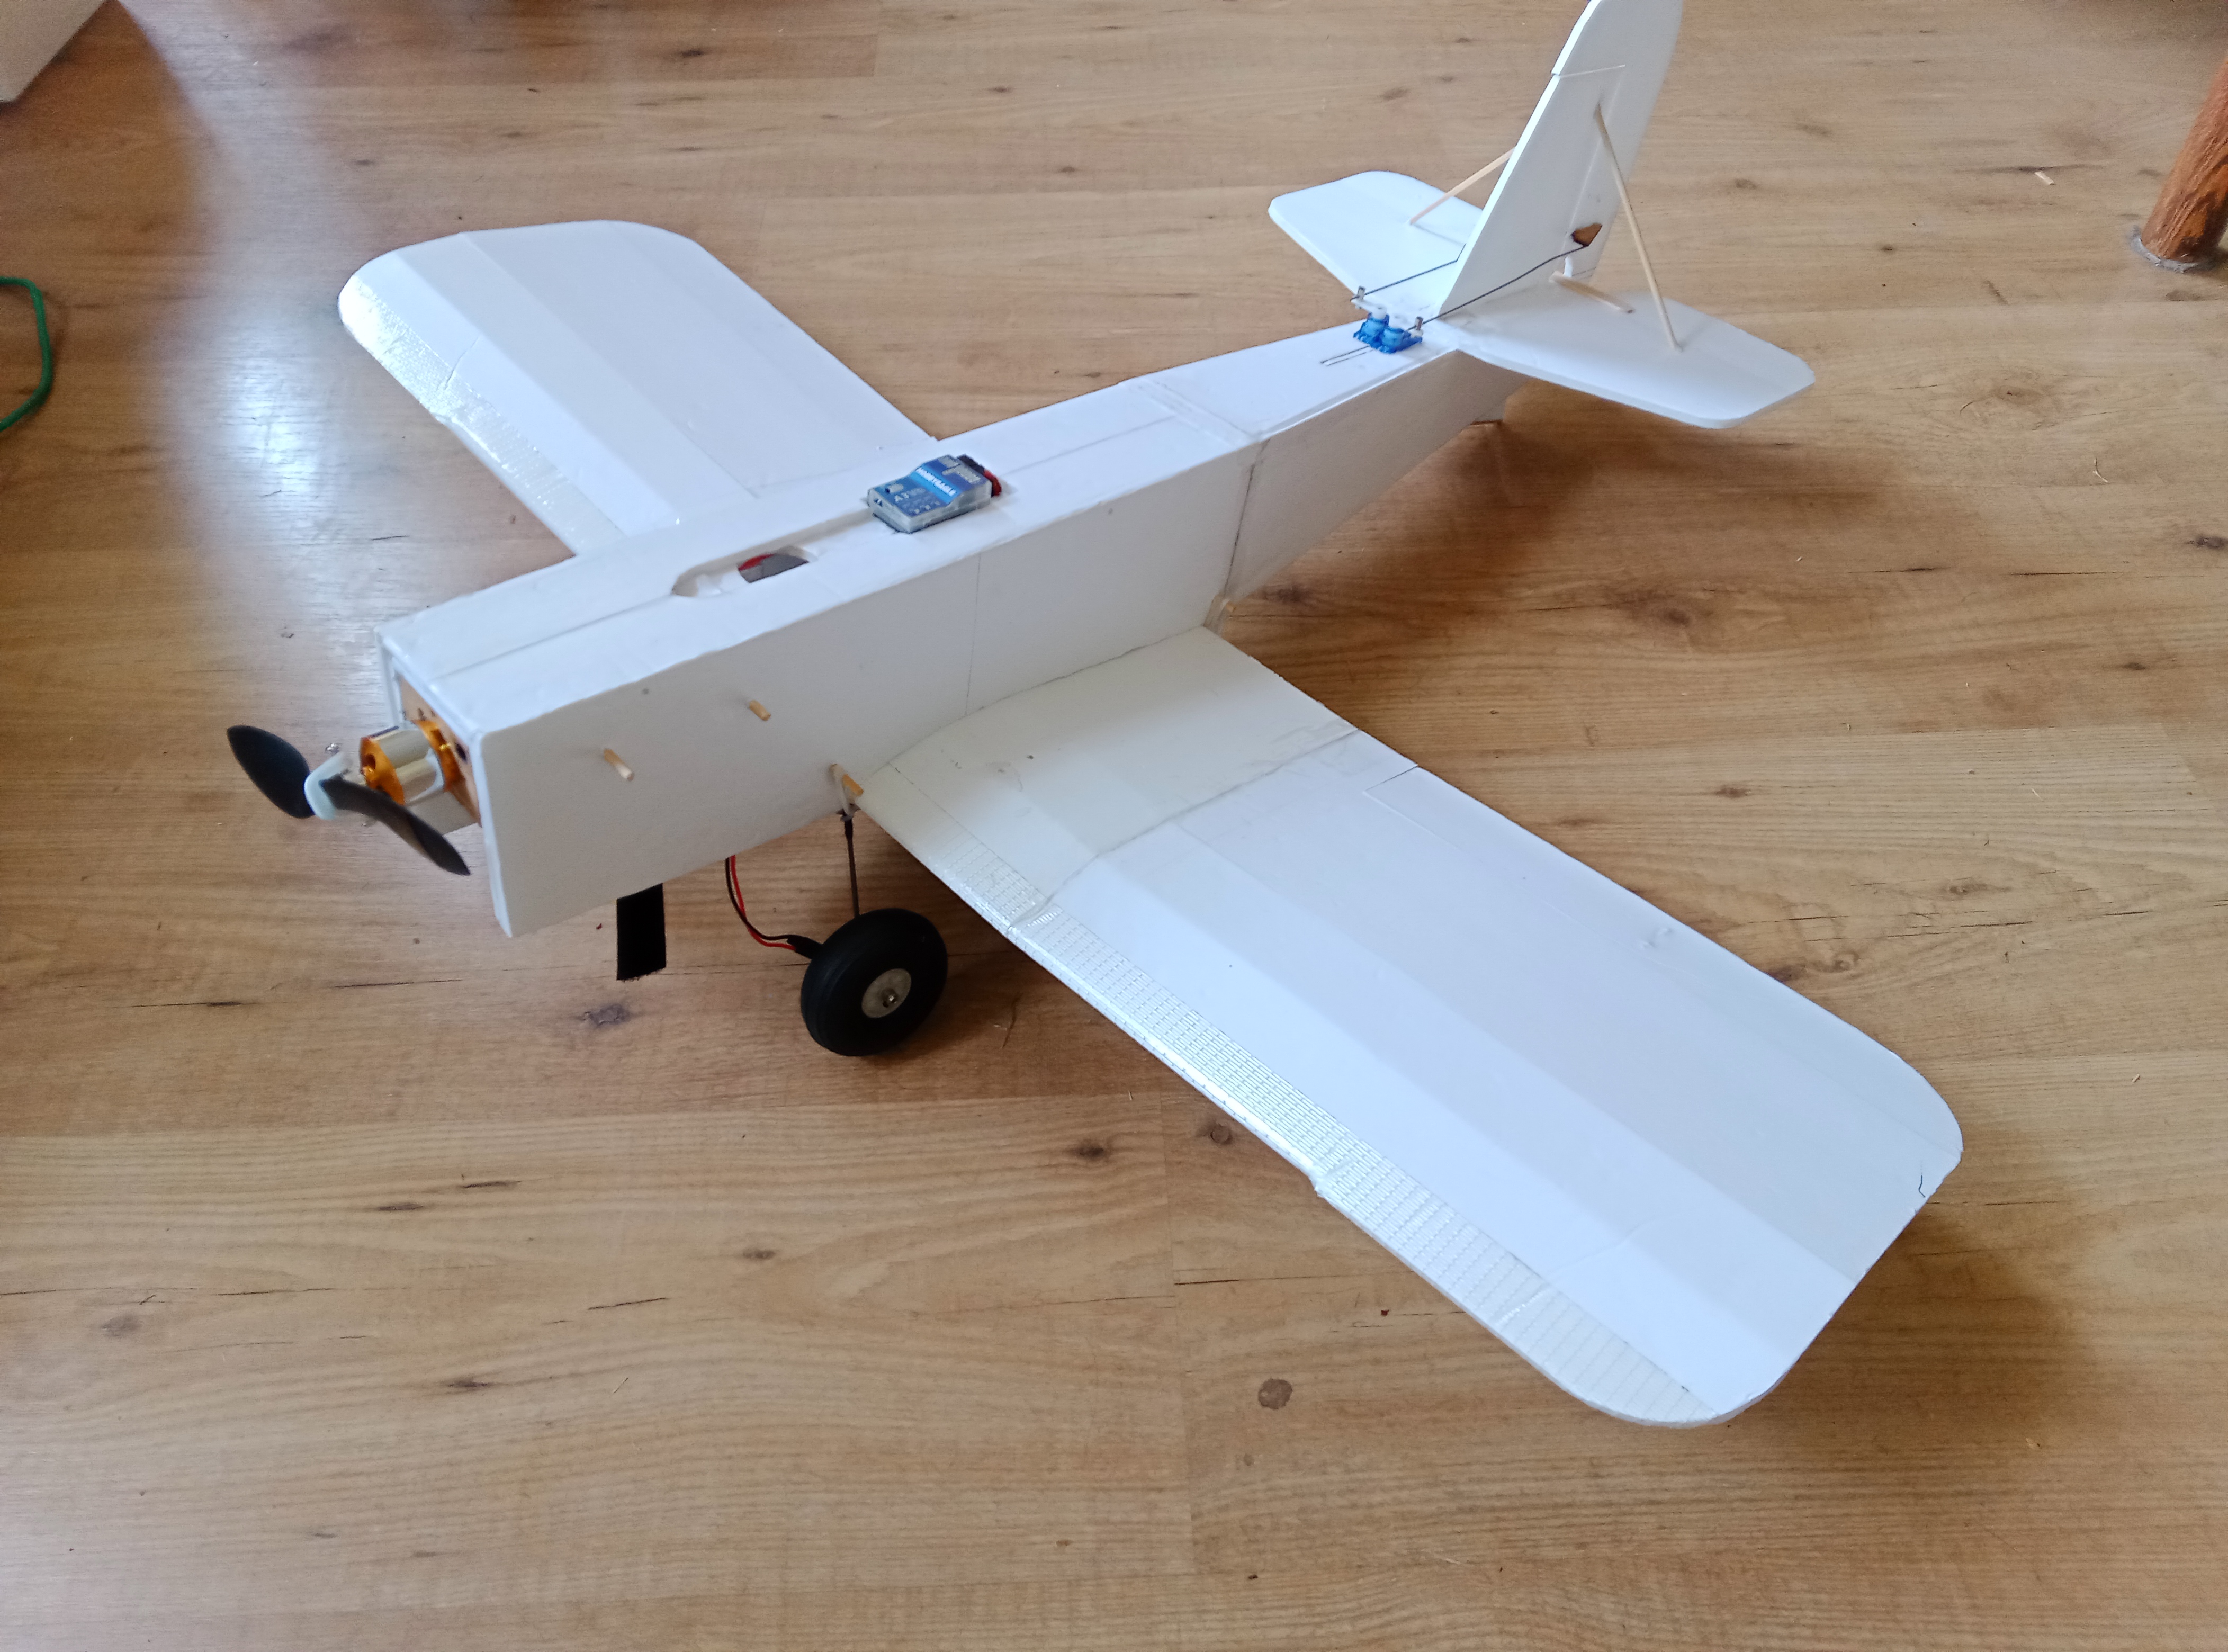
Build another low wing aileron trainer, but bigger! Another great flyer.
With all these make it up as you go designs, the wing position on the fuselage is decided by sellotaping a skewer on the top of the wing along the predicted CG, and see-sawing the almost complete fuselage over the skewer. Any loose final components were placed on top of the fuselage and a little extra wiggle room weight was added to the tail. The loaded fuselage was slid backwards and forwards to find where it teetered over the skewer. This gave the position of the CG on the fuselage and from that the wing profile could be cut into the fuselage. This was a gradual process. First I shifted the skewer to sit under the leading edge of the wing (producing a roughly 1.5 degree angle of attack) and then I shaved the fuselage down bit by bit until it fit the profile of the wing and the fuselage settled on my workbench. (Maybe another how to article?)
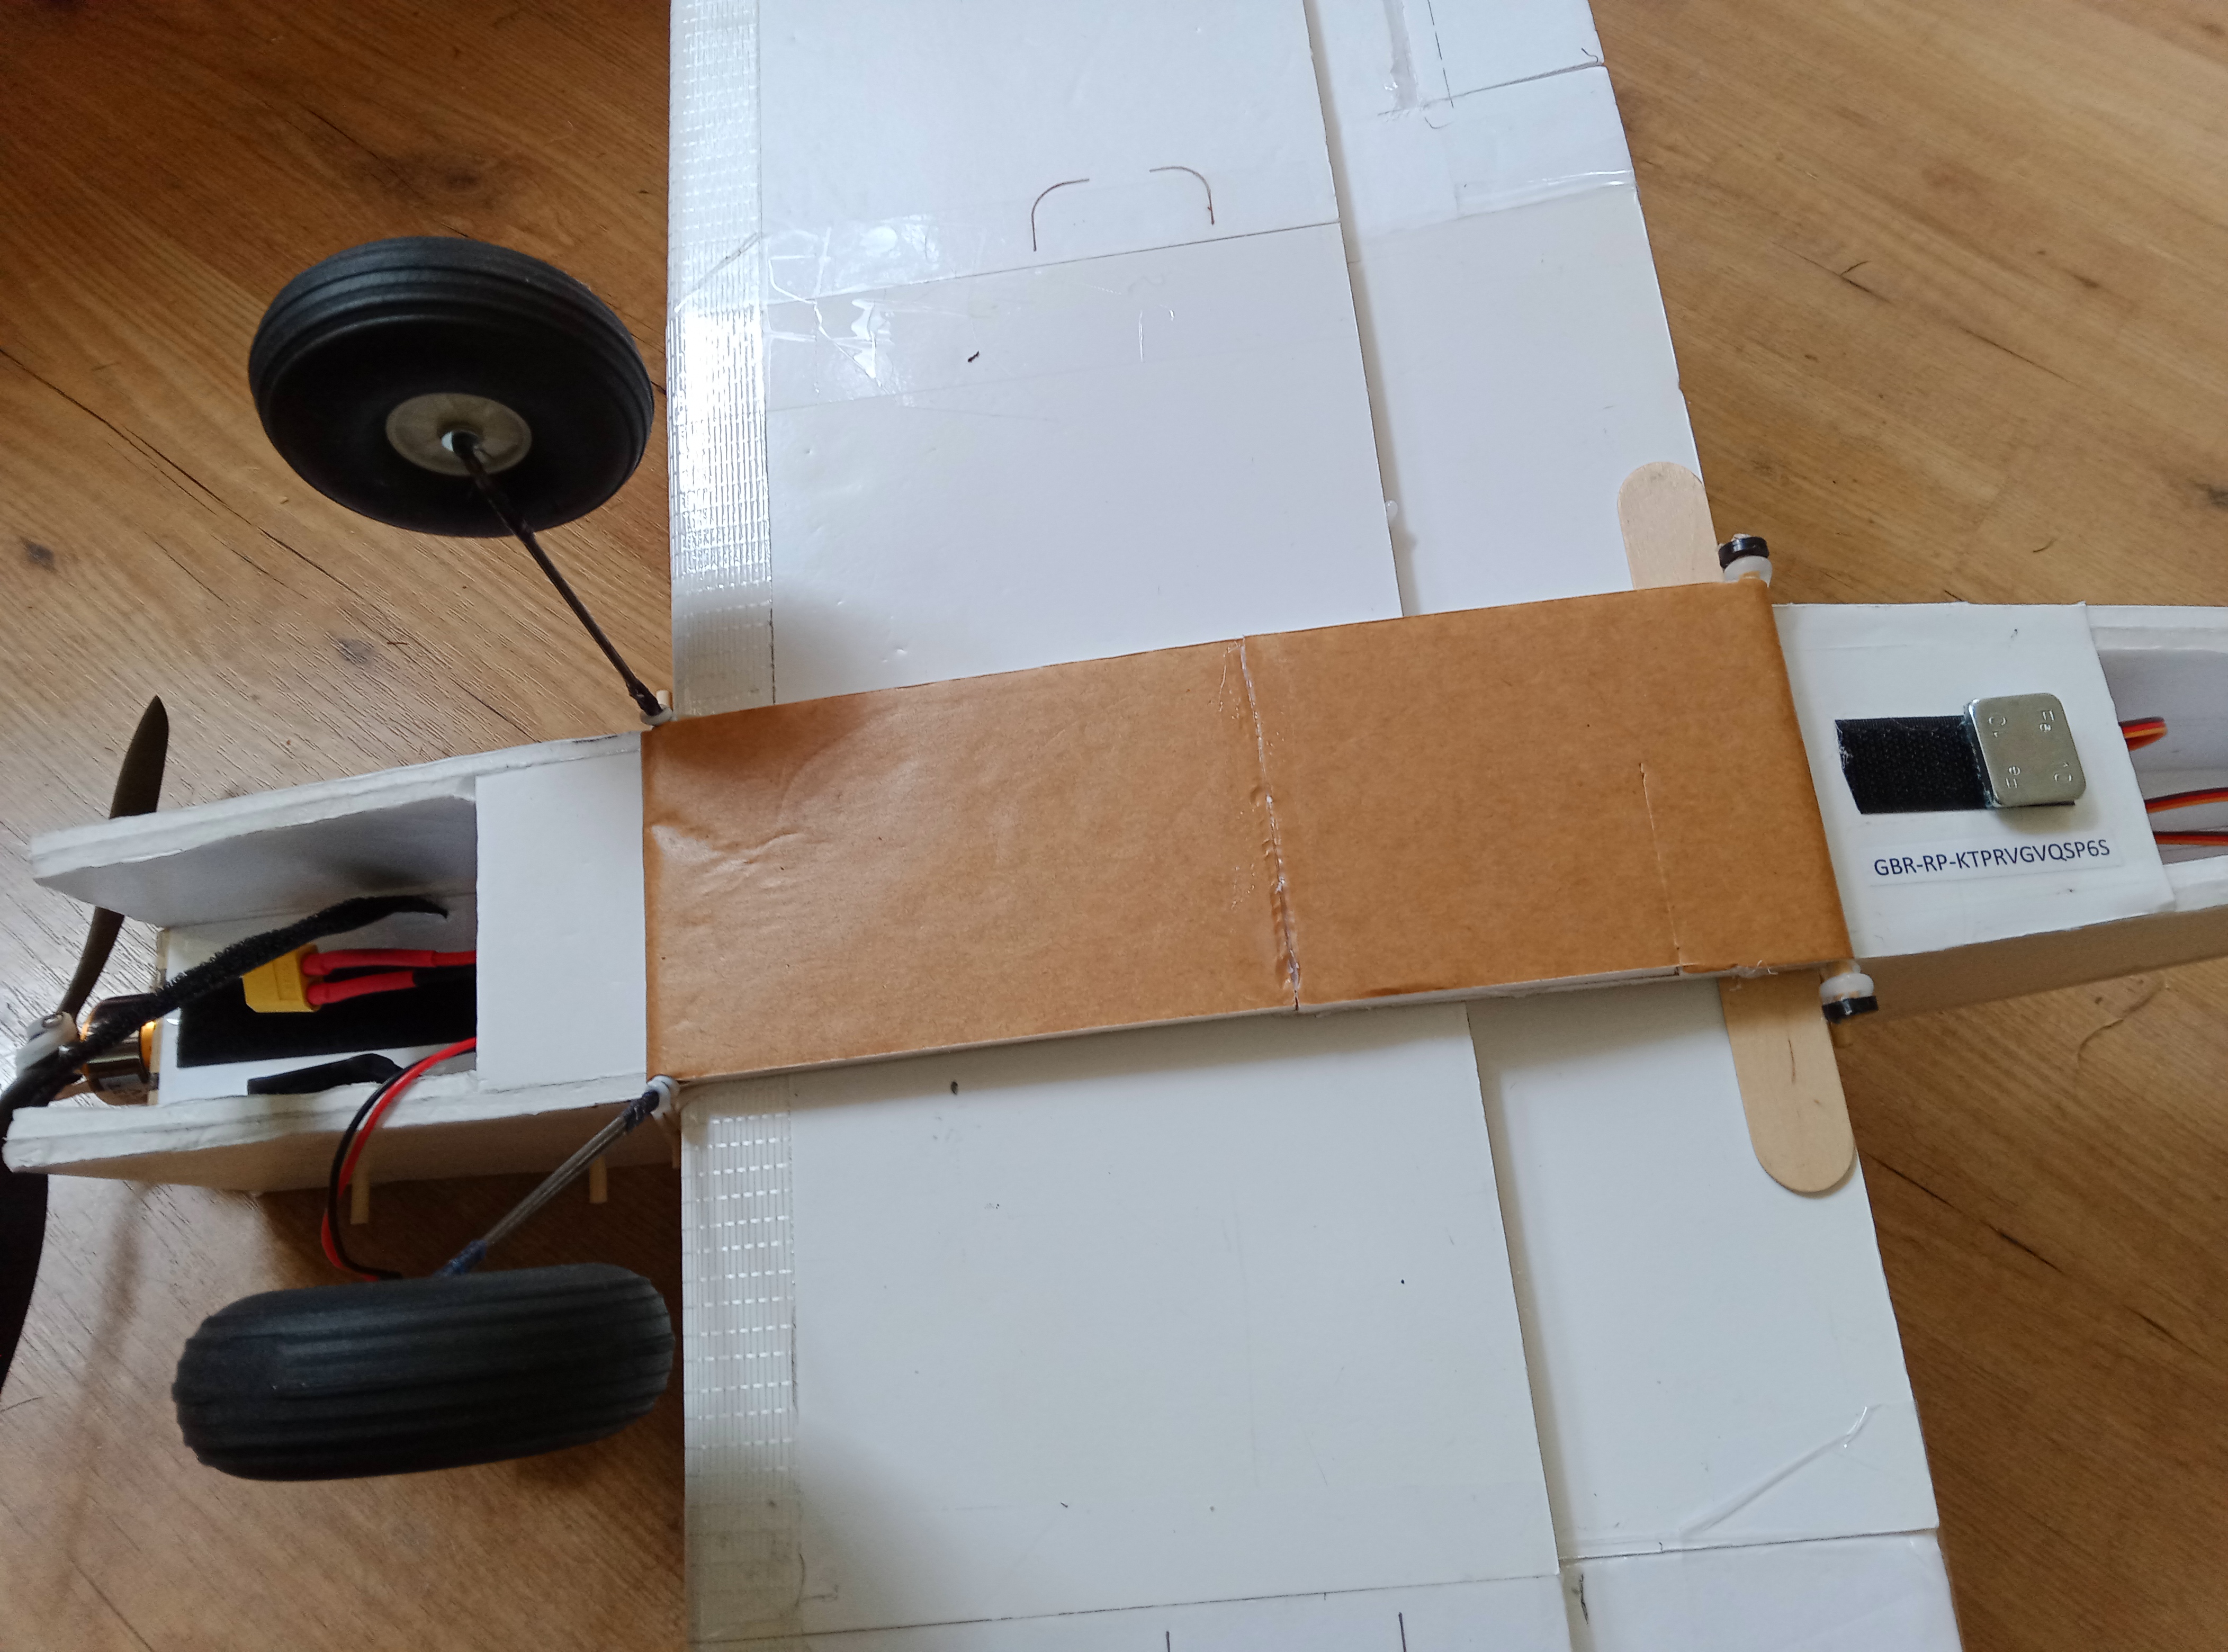
Another removable undercarriage sled.
NEXT! What do do with all that extra foamboard from the Guinea Pig kit (especially the extra wing material)
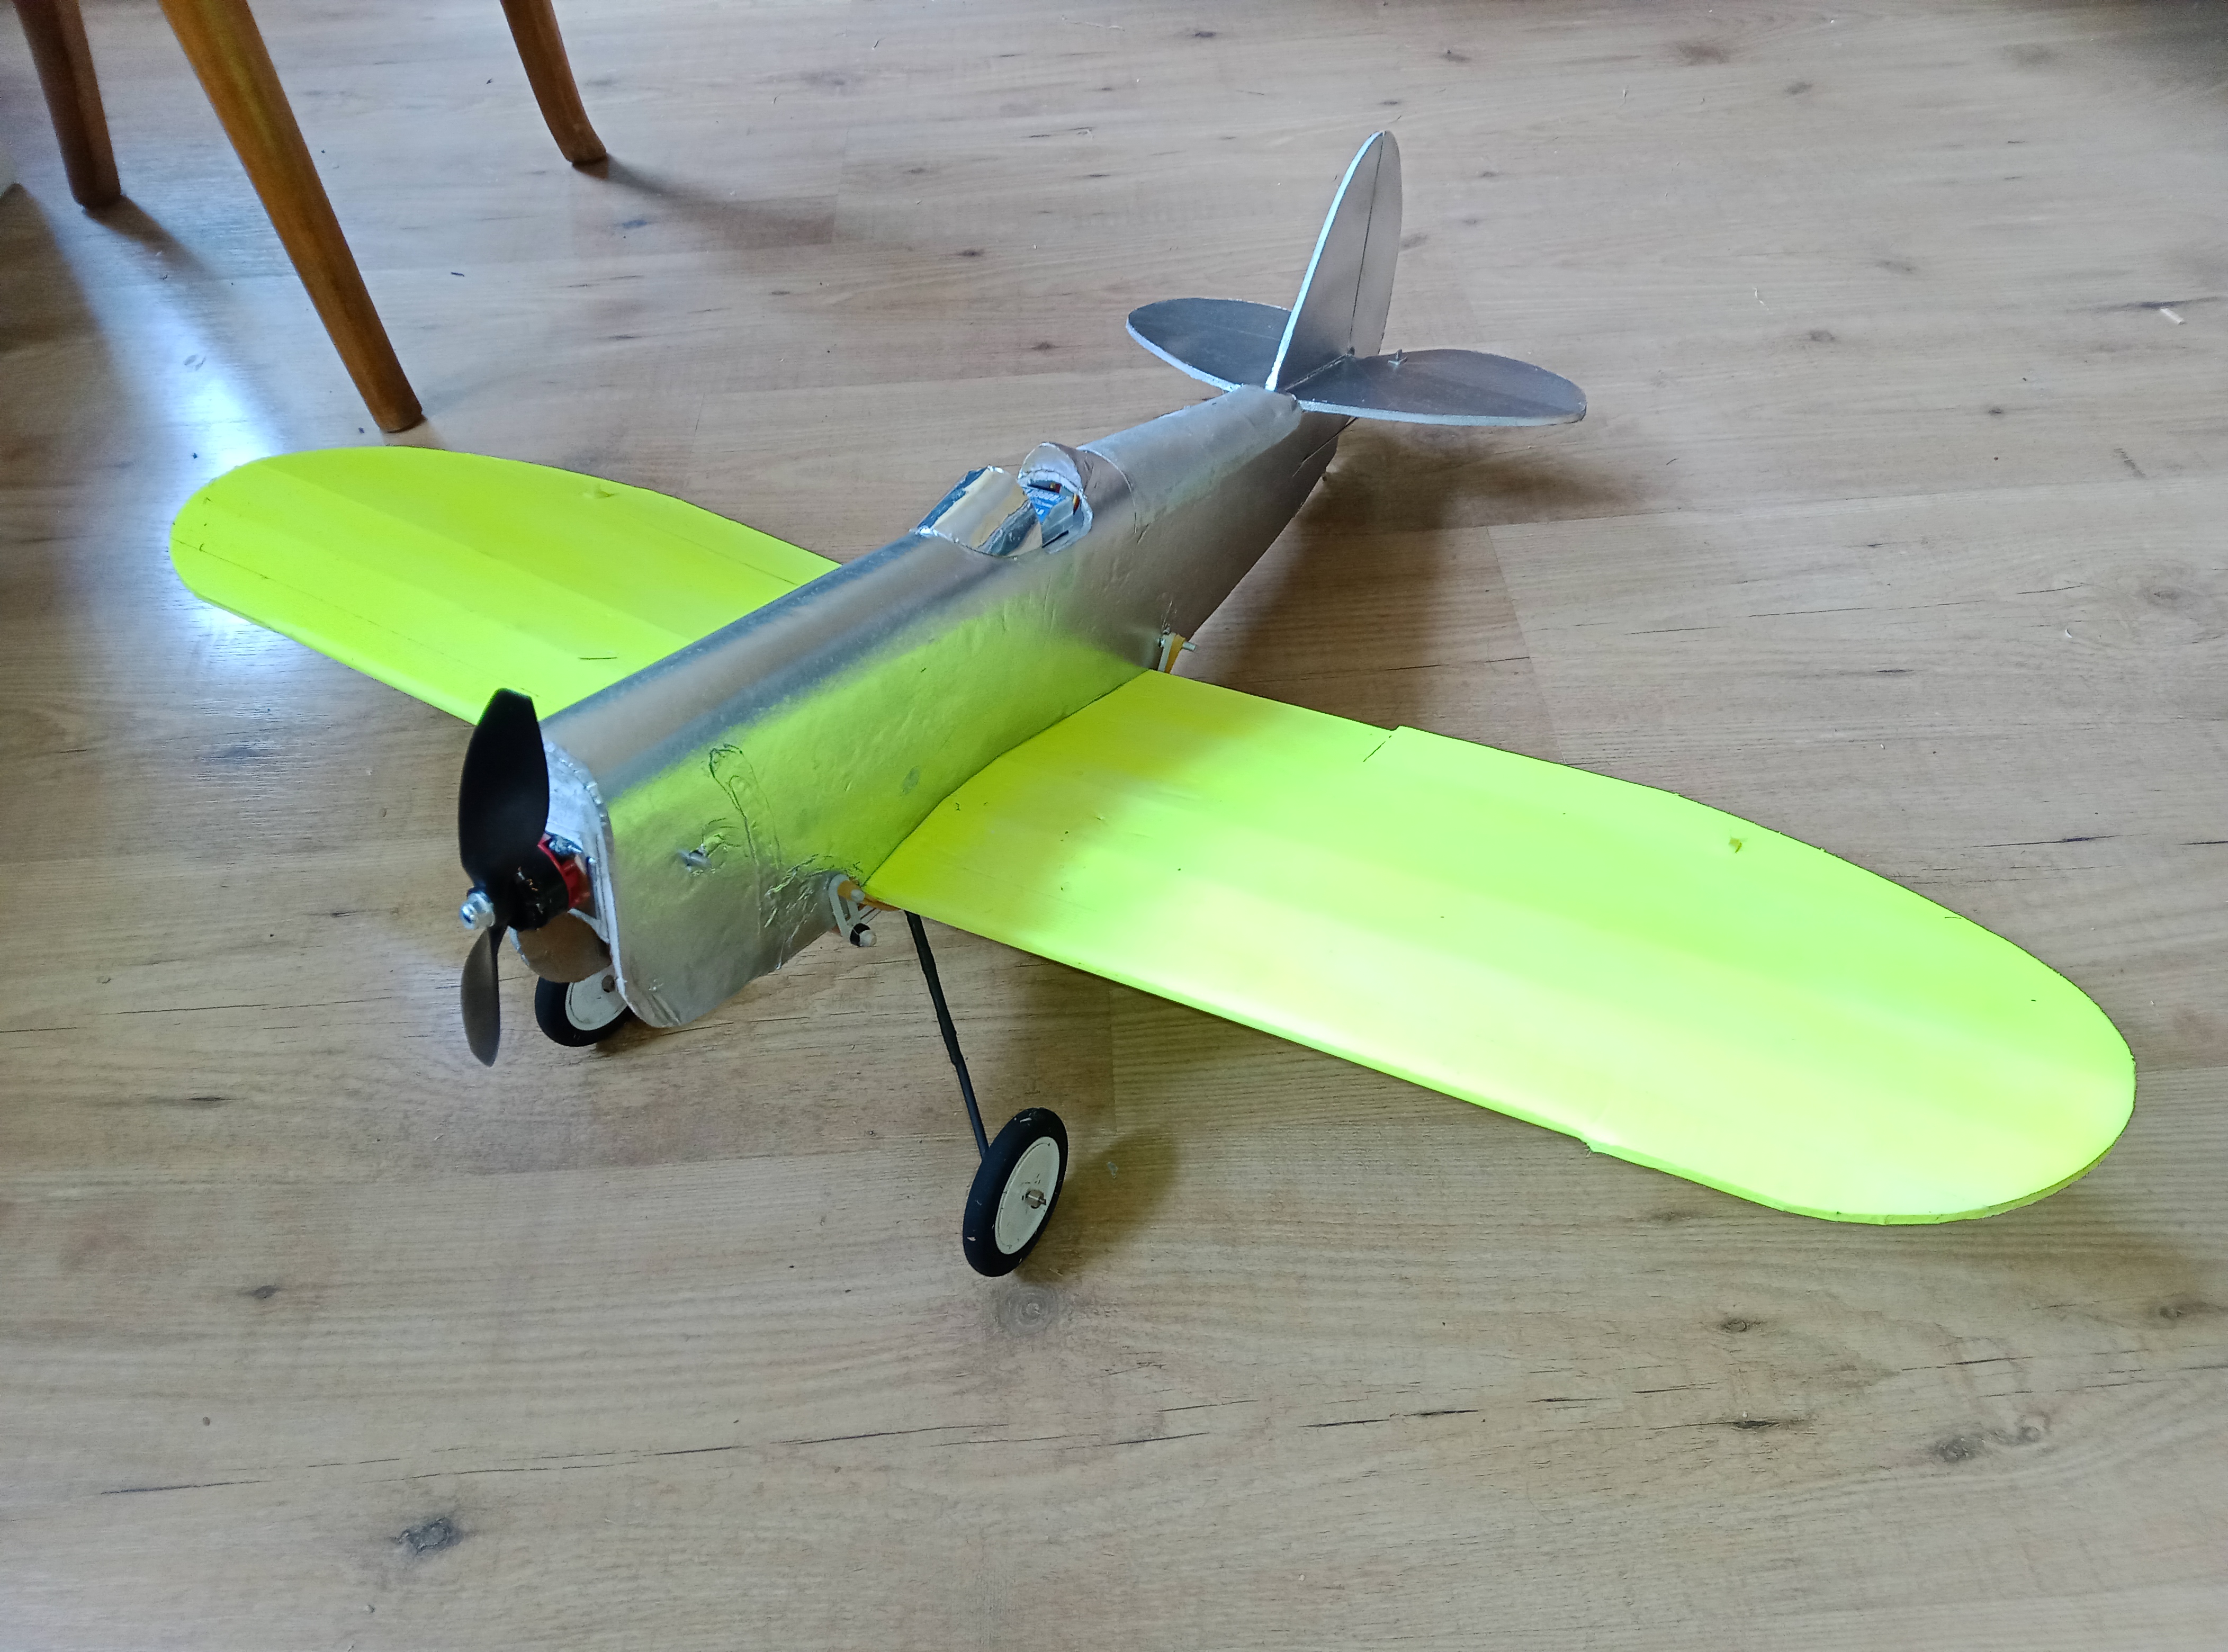
Answer, build another 30s style race plane!
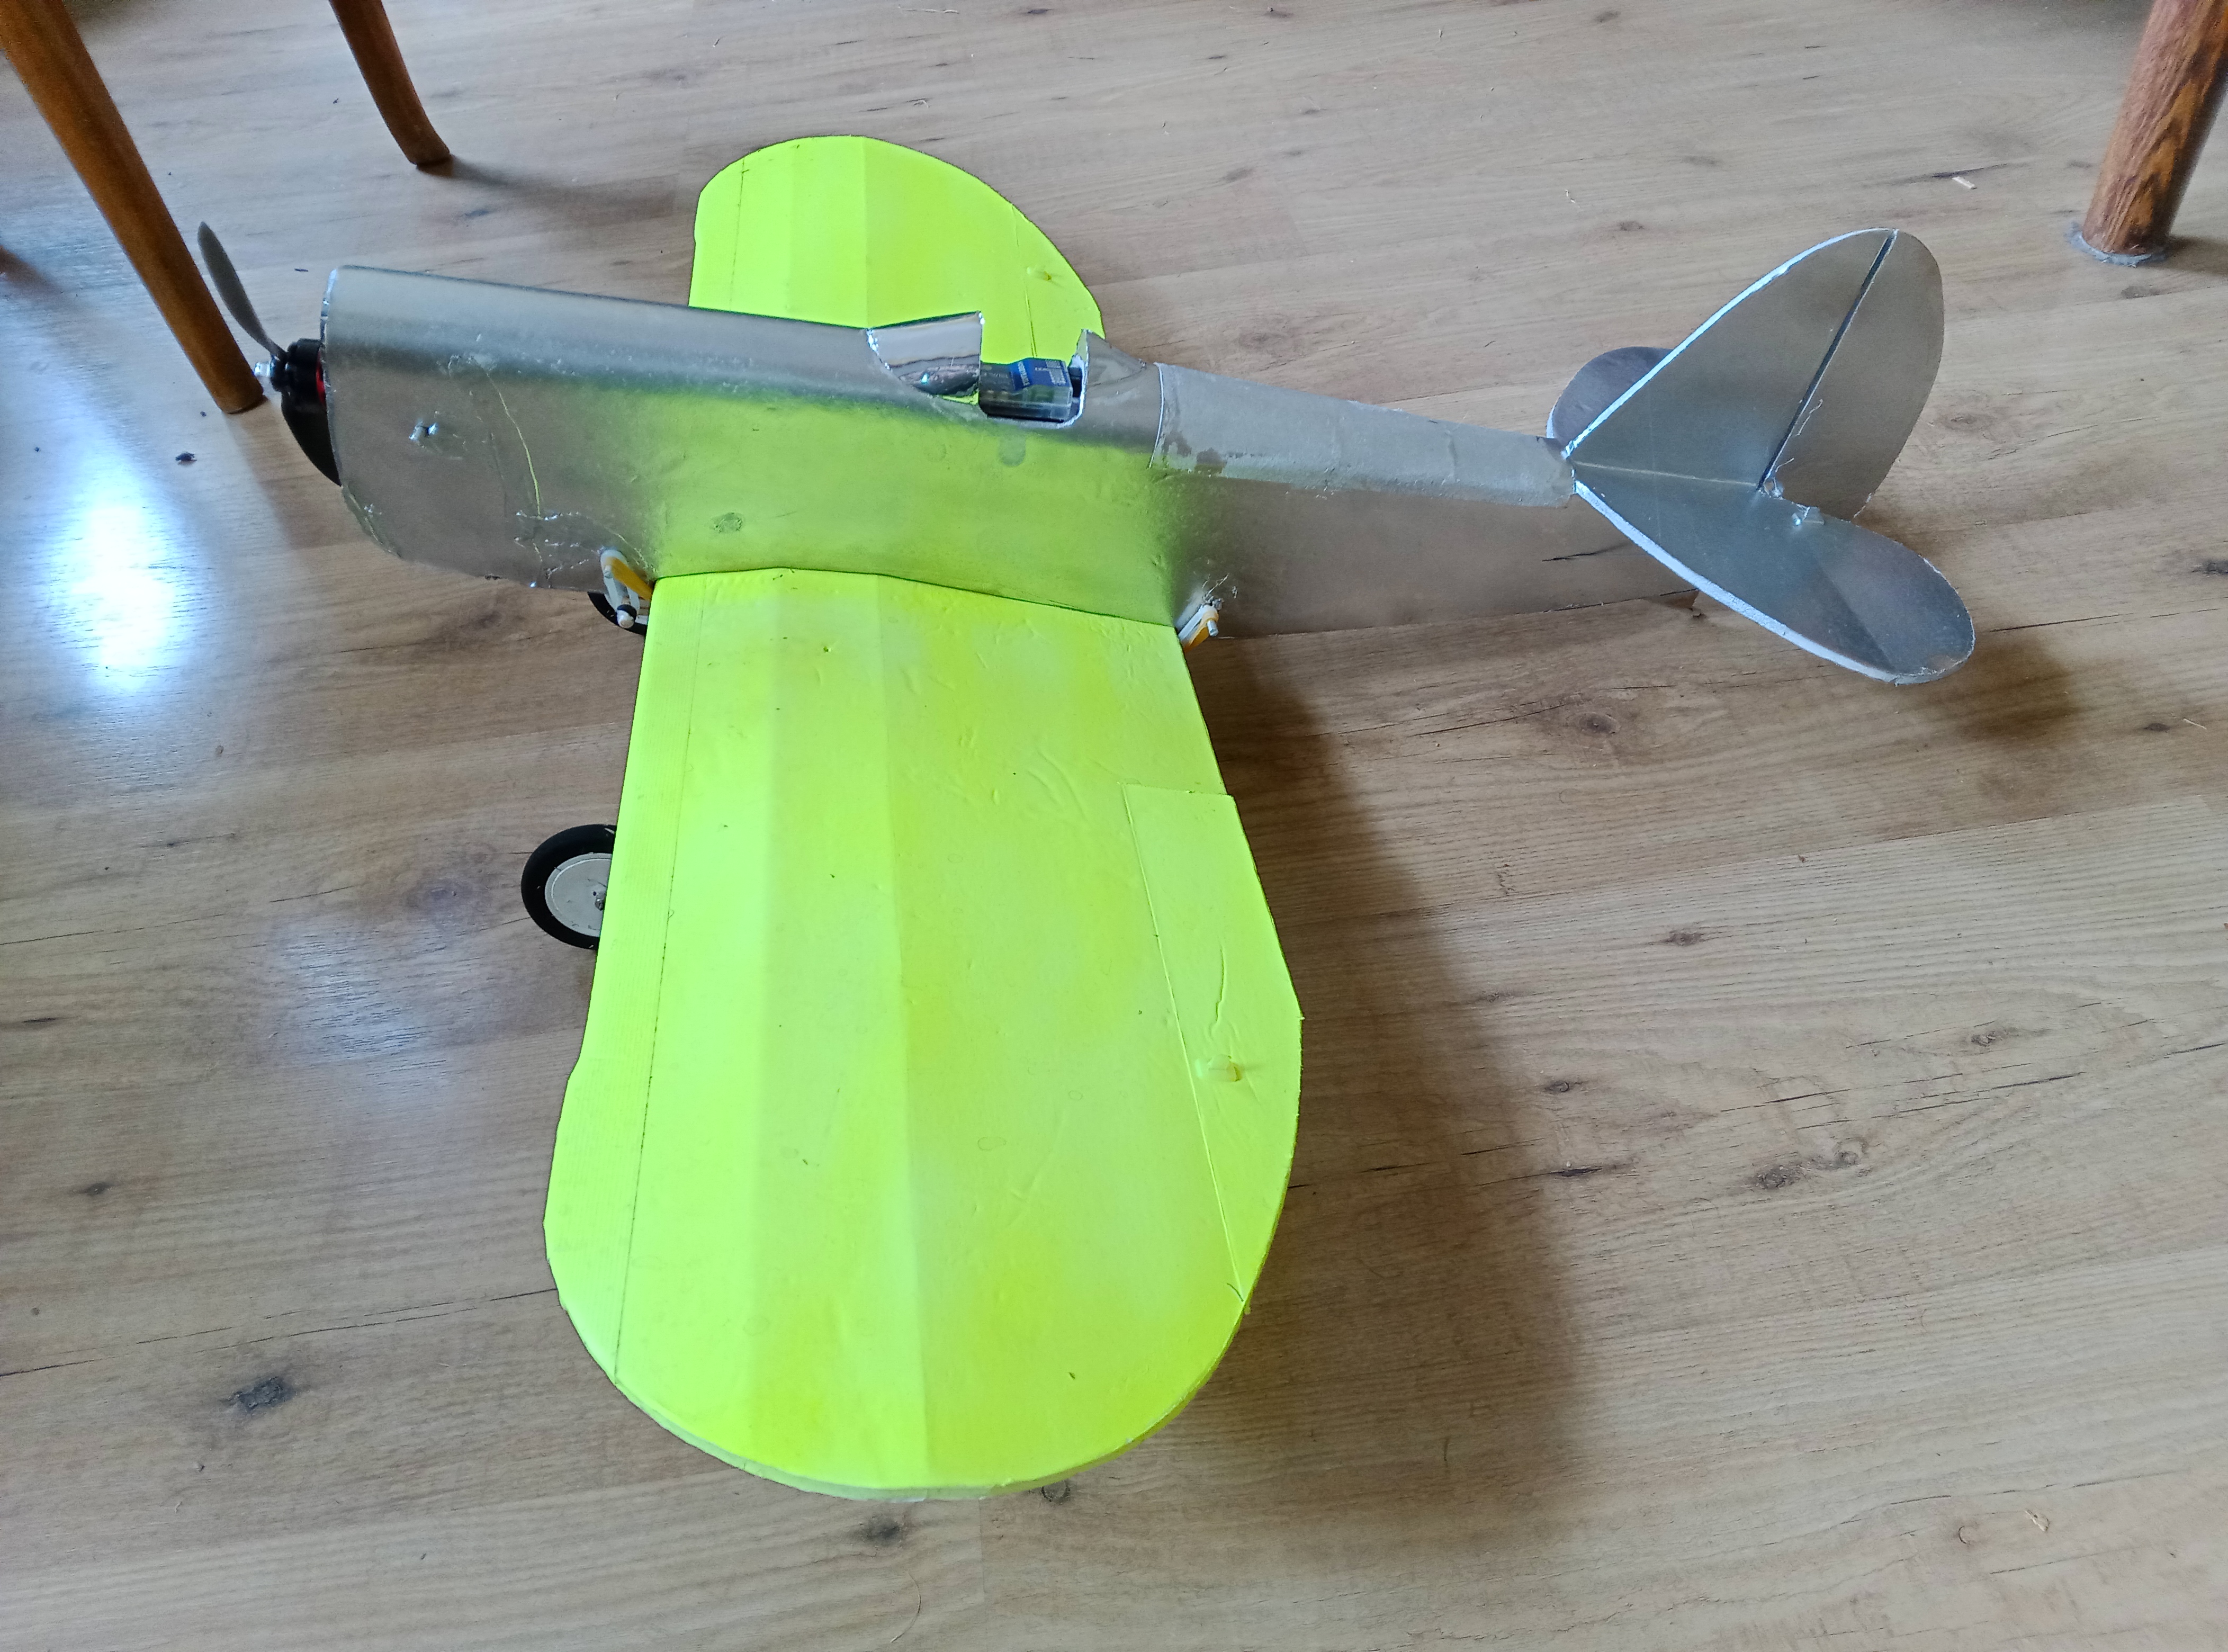
This is a beautiful flyer, requiring very low input to make it perform. The core of the plane is a group of 3 box sections glued together. This creates a kind of flat topped labyrinth of overlapping voids that make it easy to feed wires etc. It's also a very strong core to the plane. The outer skin of the fuselage is a single sheet of foam with the paper removed from the inside of what will become the curved top deck. This was folded across the box members to create the narrow fuselage. I used a mighty mini power pod, which fits perfectly inside the front box, and, apart from a slot to feed the 3 motor wires through, the pod was completely filled with foamboard. This makes it much more resilient. Fitting the pod within a box means the battery weight goes on the box not the pod.
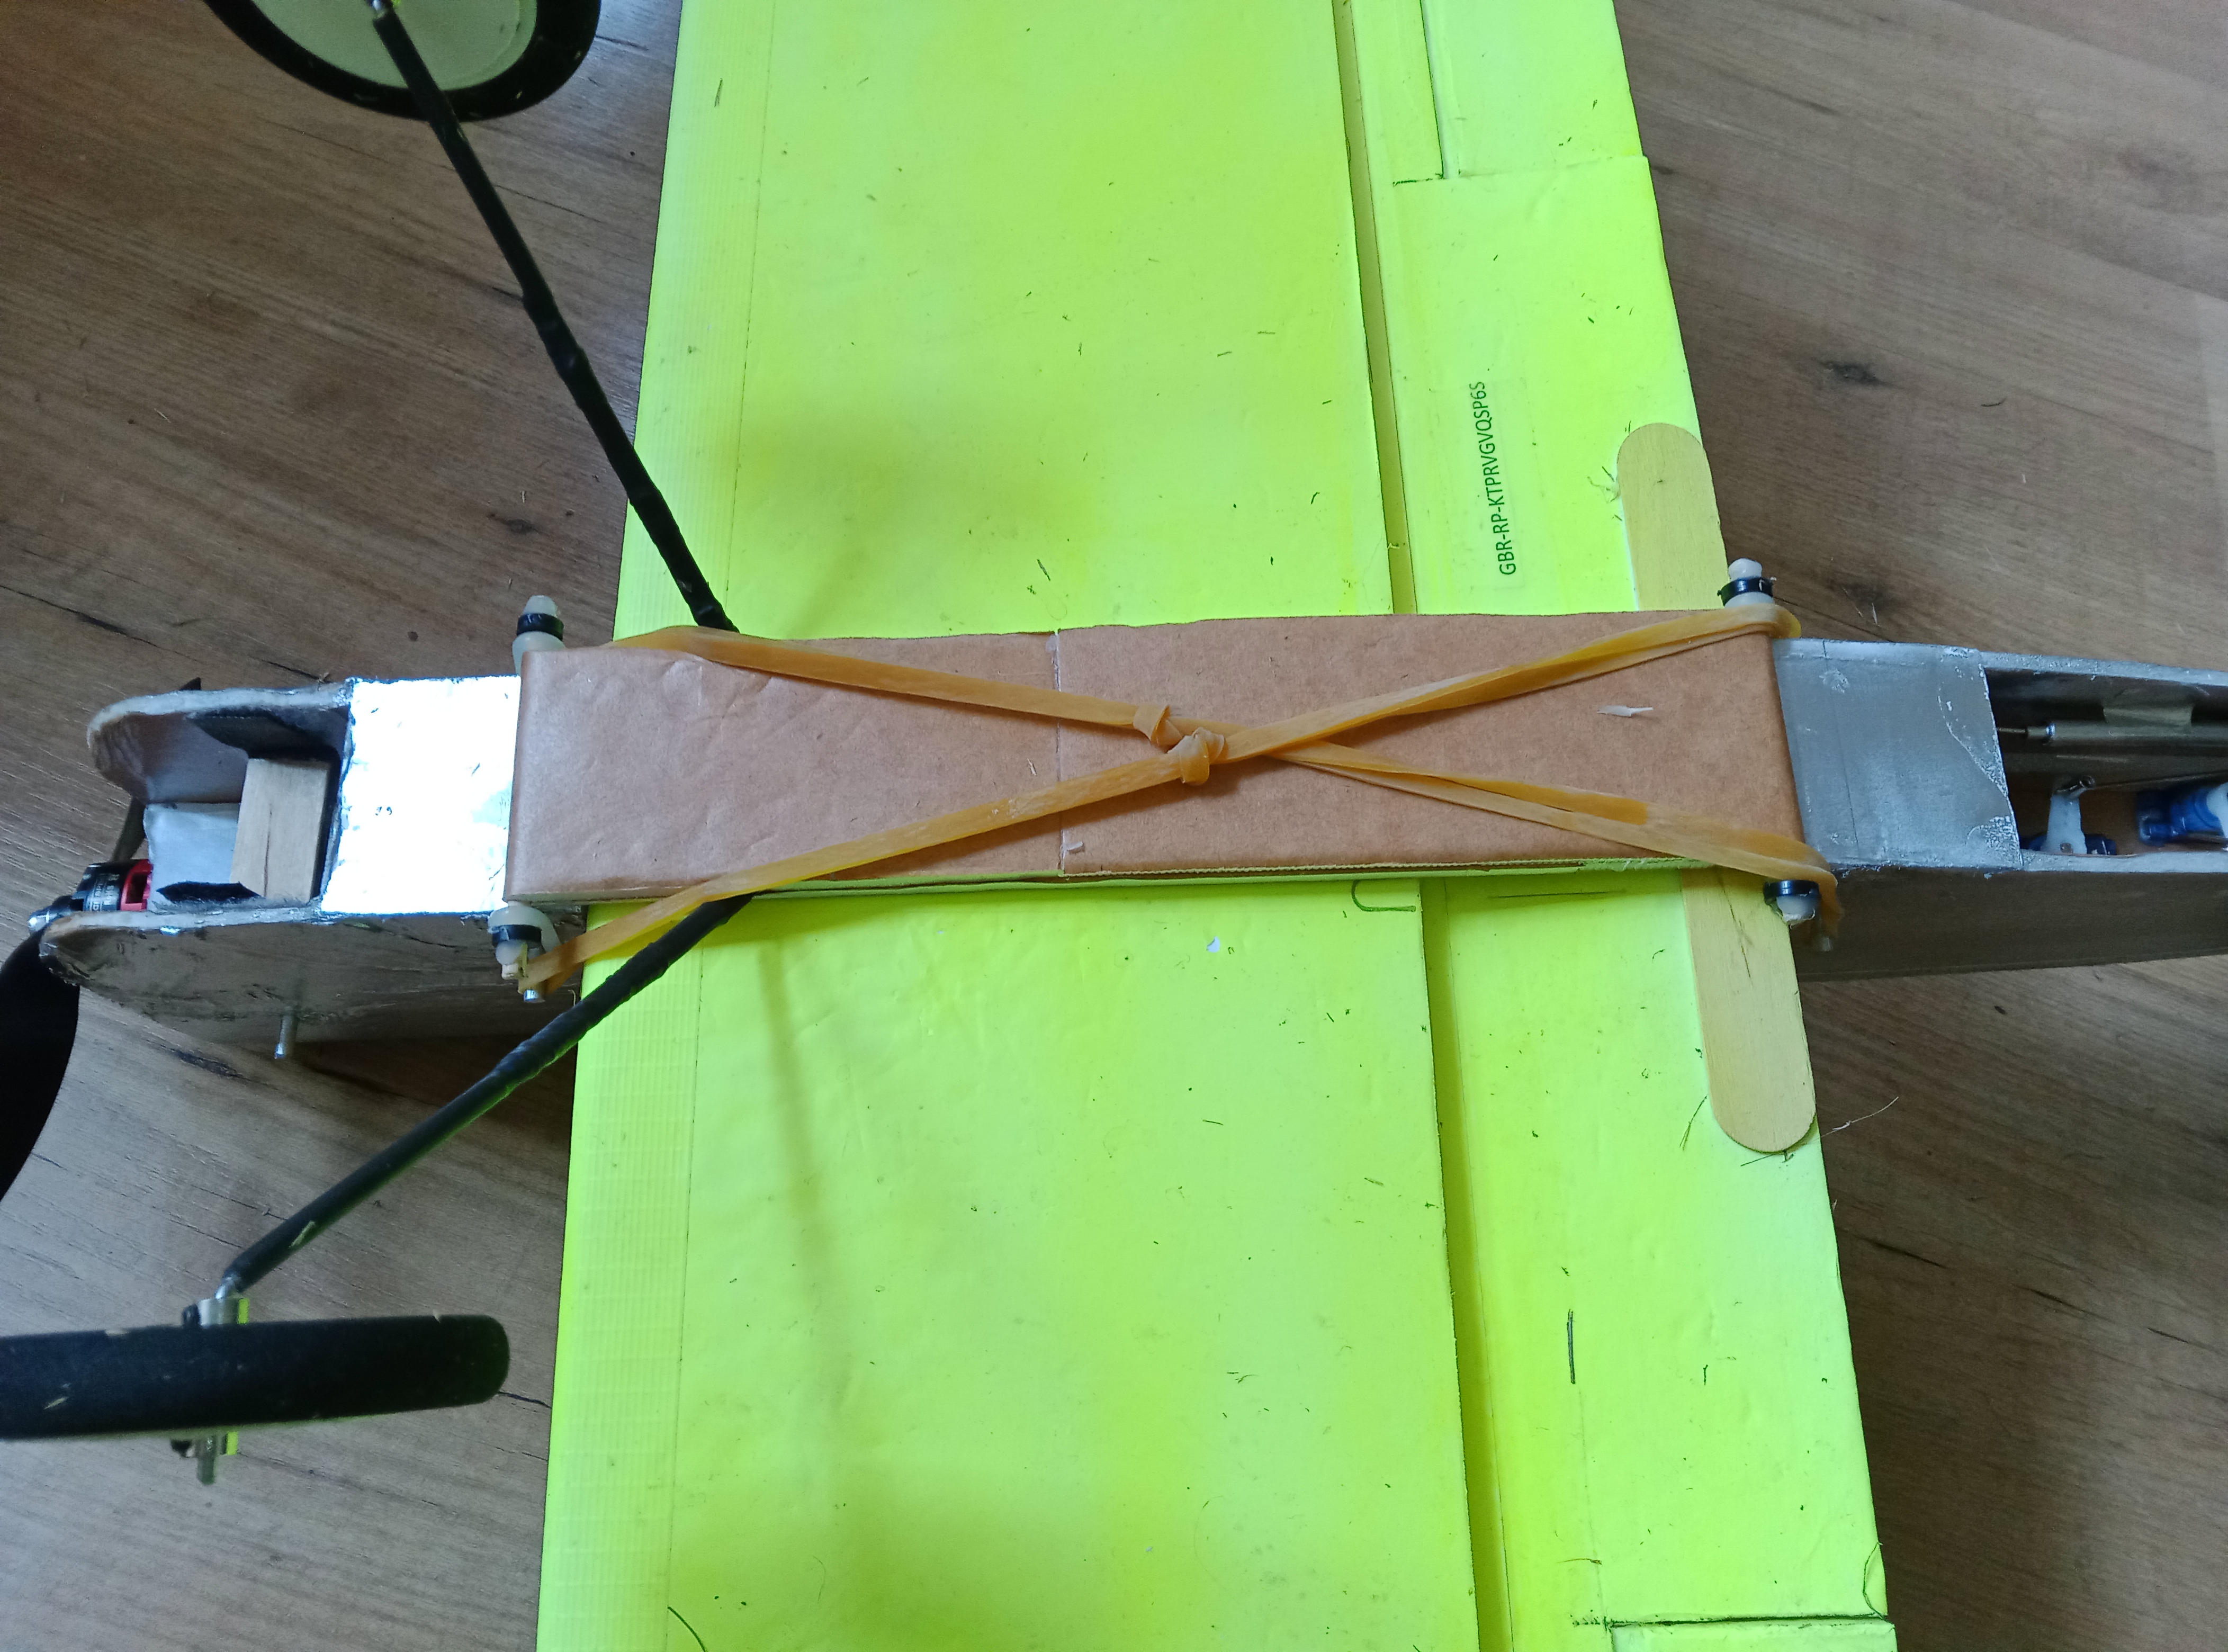
And, of course, a removable sled landing gear; this time with skewers at both ends and the undercarriage more to the centre. There is a wire cross member helping to stiffen the undercarriage. It's bound onto the main undercarriage component with thread and CA glue and covered in shrink wrap to hide the detail. (Same as how the wire cabanes on my biplane designs are joined together.)
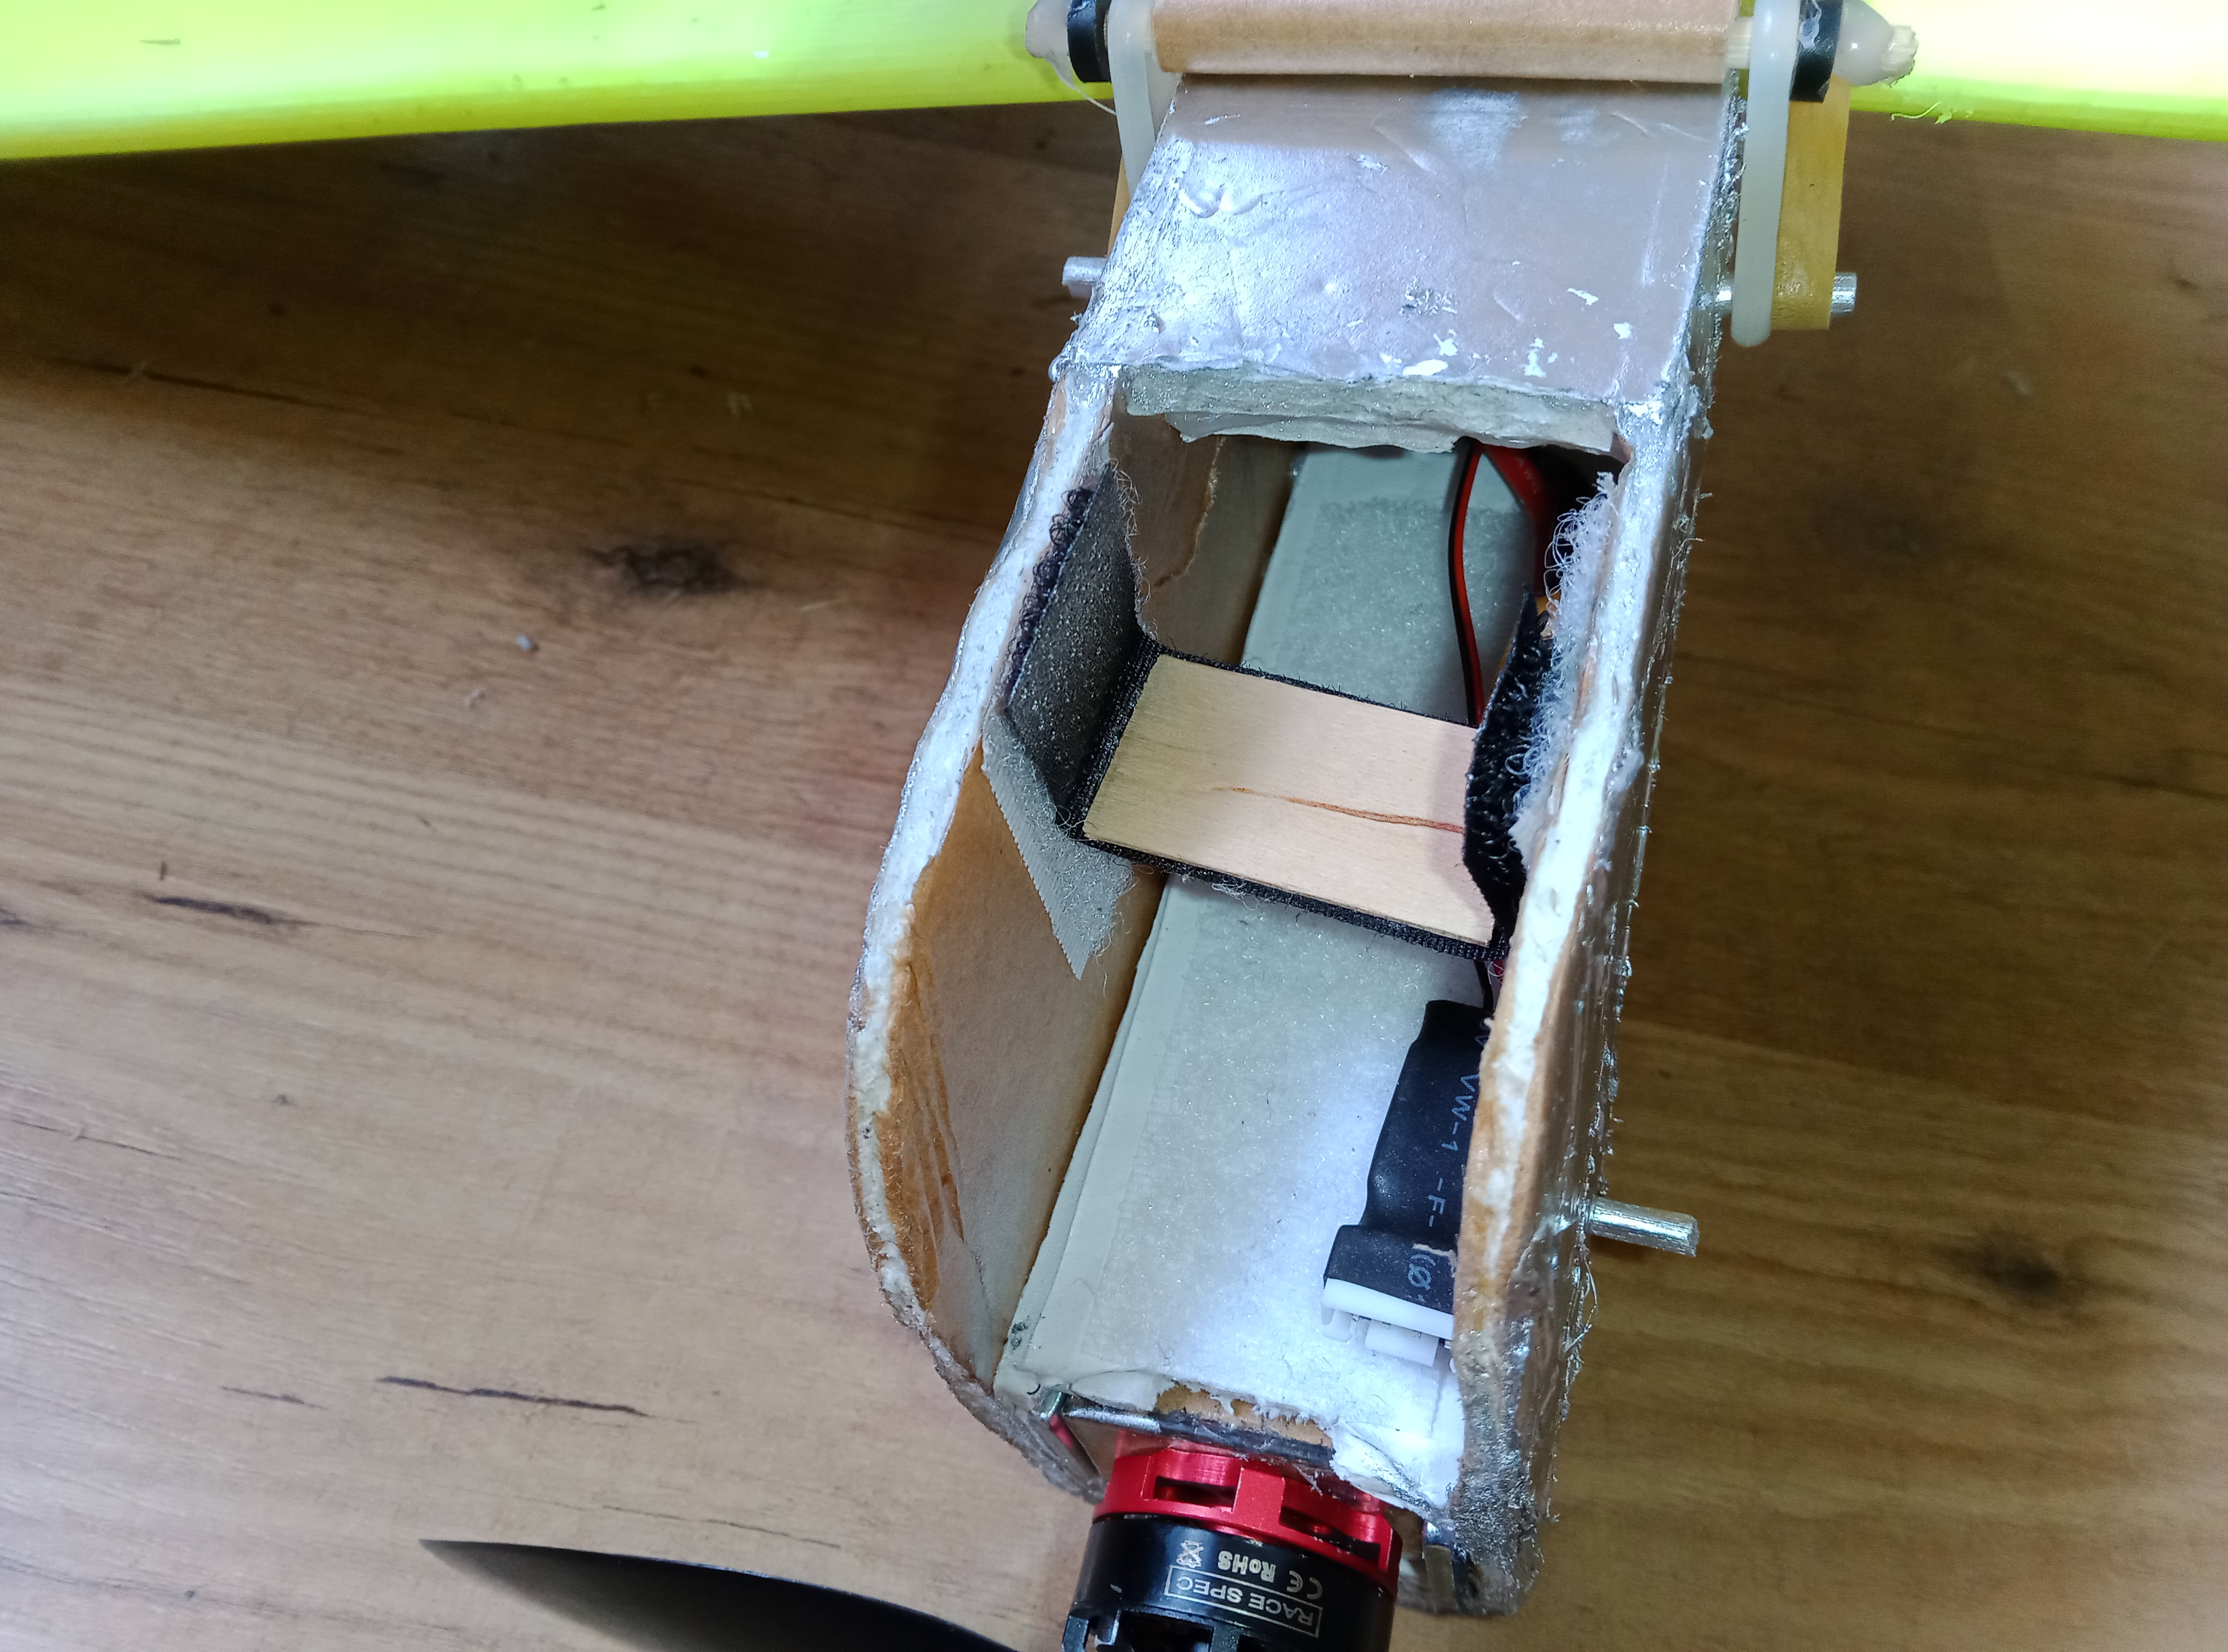
One other small innovation is the battery tie down strap. I put two strips of 'fluffy' Velcro either side of the battery space, and a U shaped strip of 'hook' Velcro, stiffened with a short length of tongue depressor, keeps the battery in place.
One other plane I scratch built from the correct foamboard is the Flite Test Simple Scout. What a wonderful flyer that is. Coasting around I can get near 15 minutes of flight with a 1500mah 3S battery.
I hope that will inspire some to get on with some new projects. If I find the time I'll do more detailed accounts of each build. Cheers.


No Comments Yet
Be the first to leave one!